Project Crown: Period Correctness and Dramas
15 February 2025
A bit has happened over the last wee while, so I'll split this write-up into three different parts:
Part 1: Period Correctness
Part 2: Upgrades and Maintence
Part 3: Drama
Part 1: Period Correctness
As you may know, I have always loved old-school 90s-00s parts and builds, and the goal for the Crown has always sort of been to make it look like it came 'straight out of a HyperRev magazine'. Well, I got my hands on all three JZX HyperRev magazines recently, and as a result, a few new modifications have been inspired and fitted.
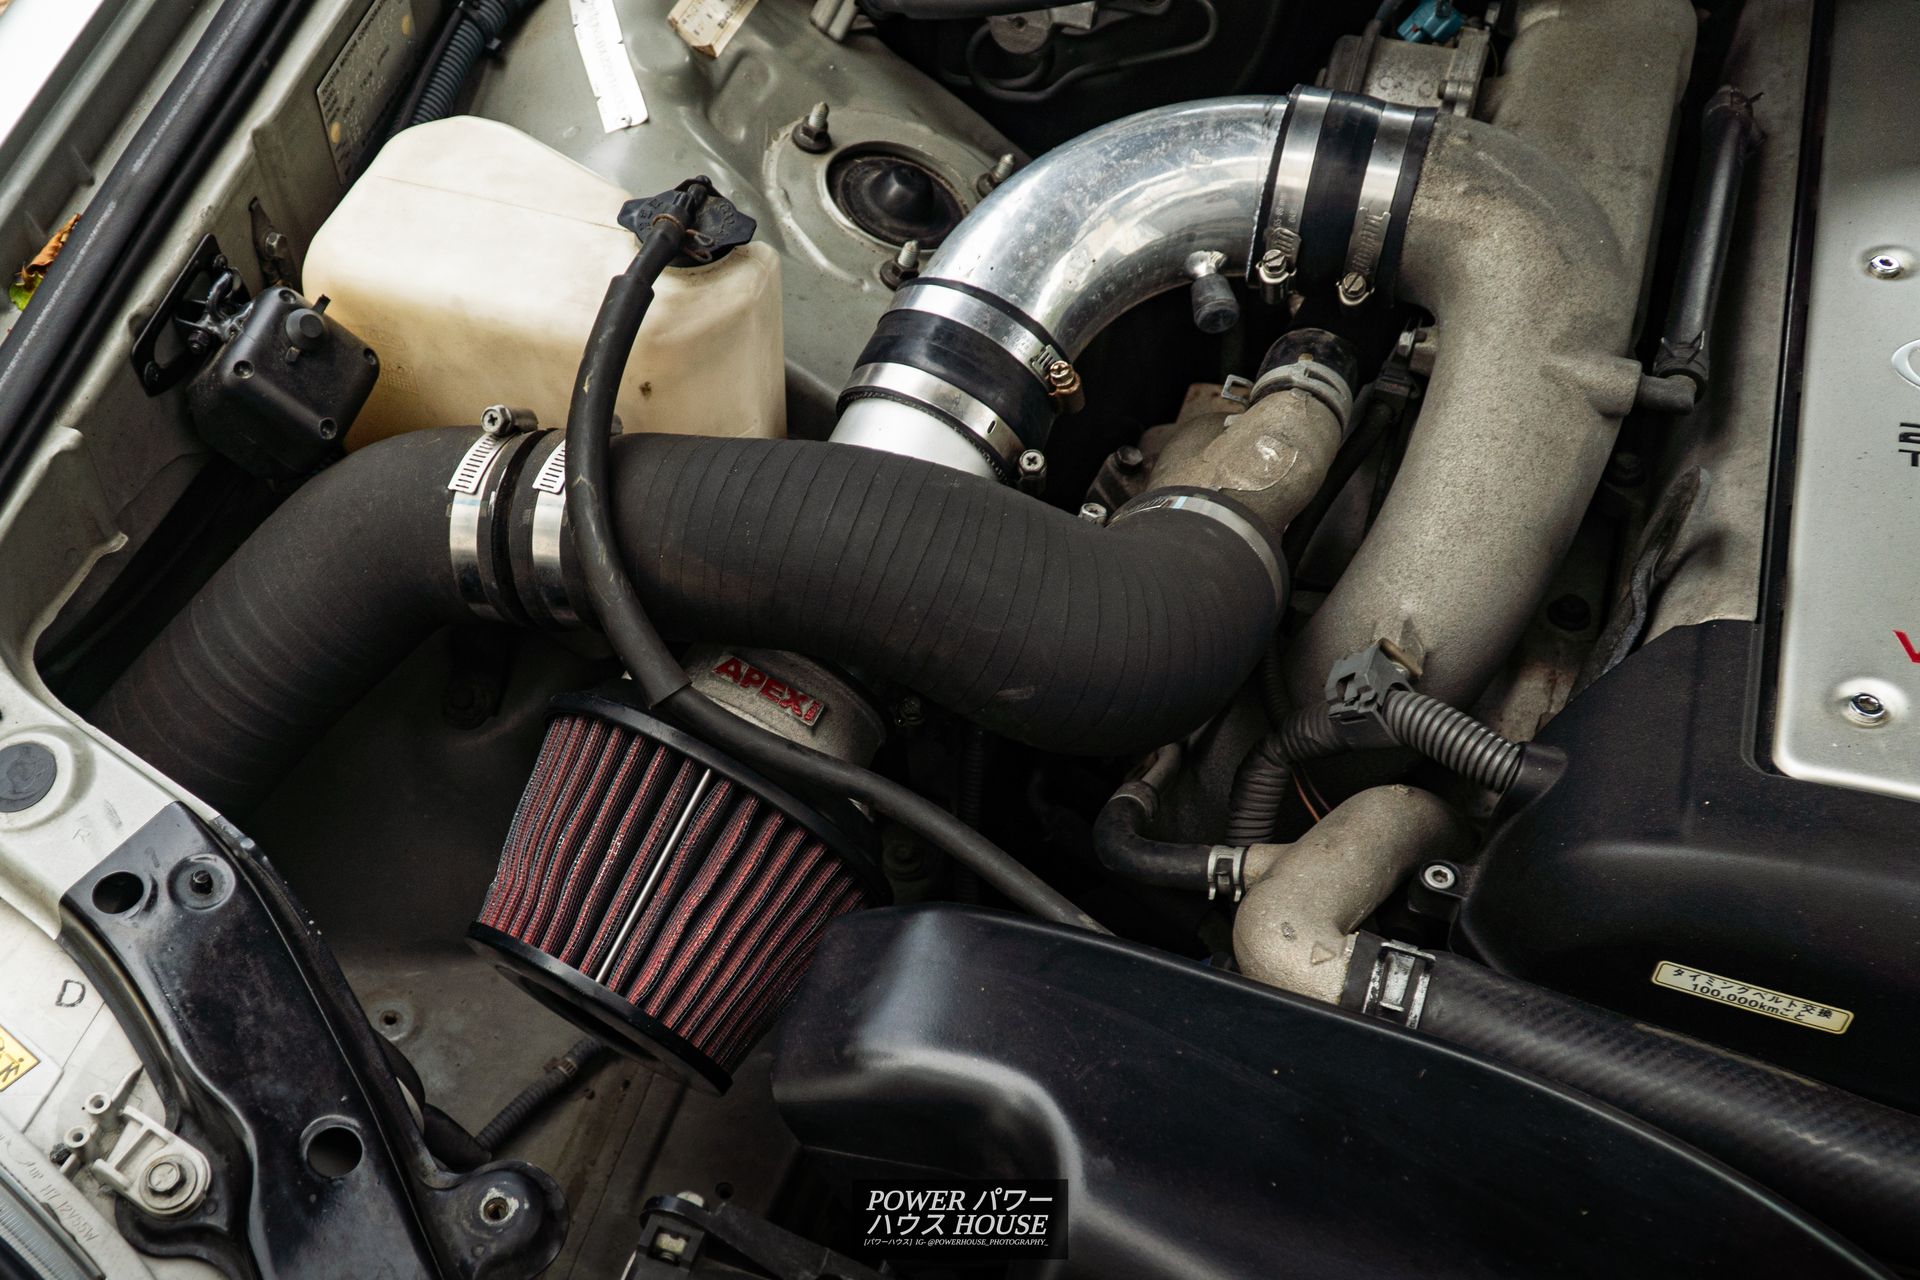
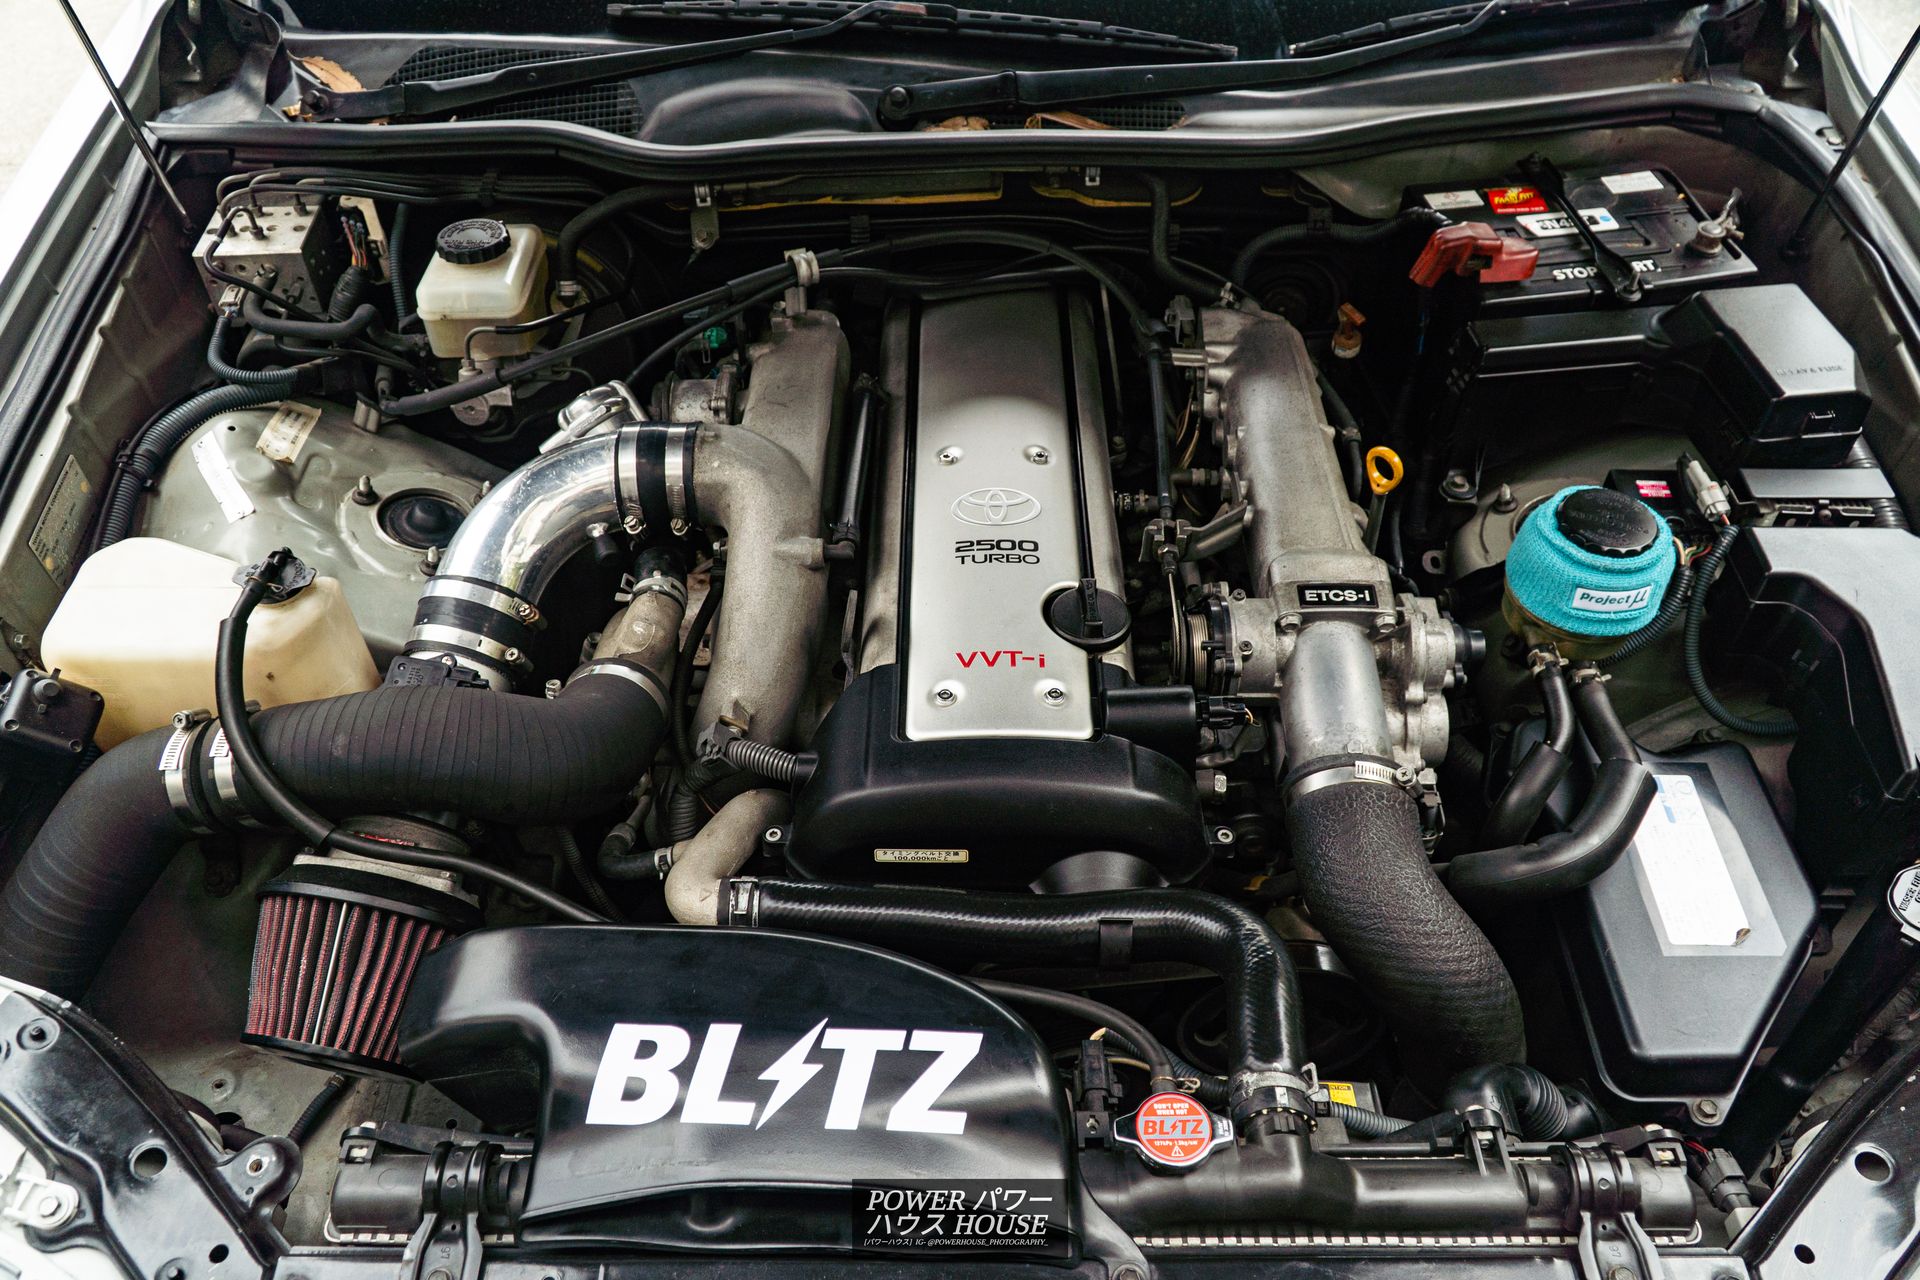
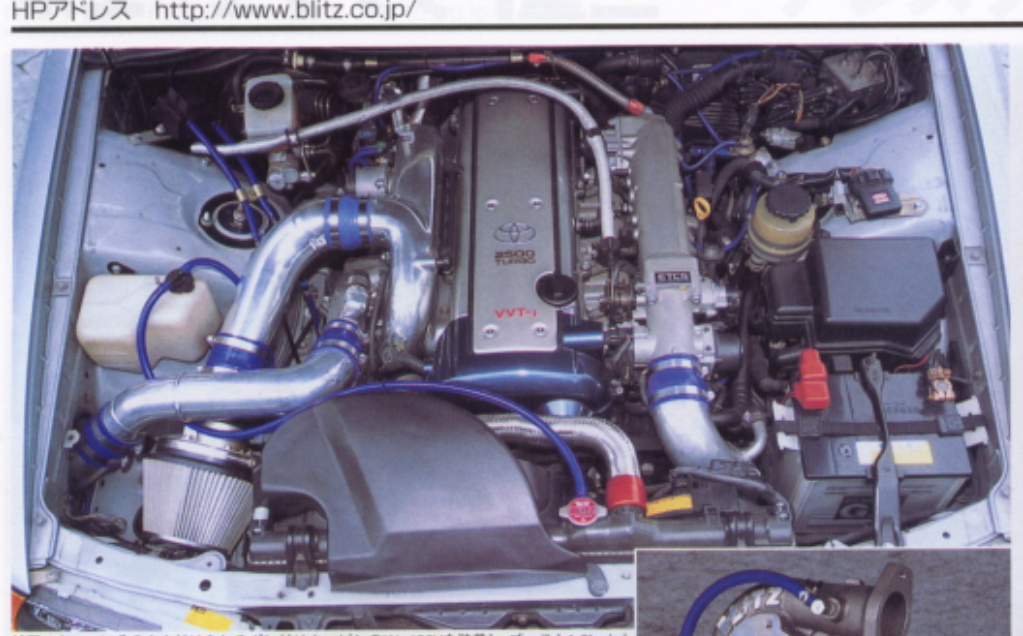
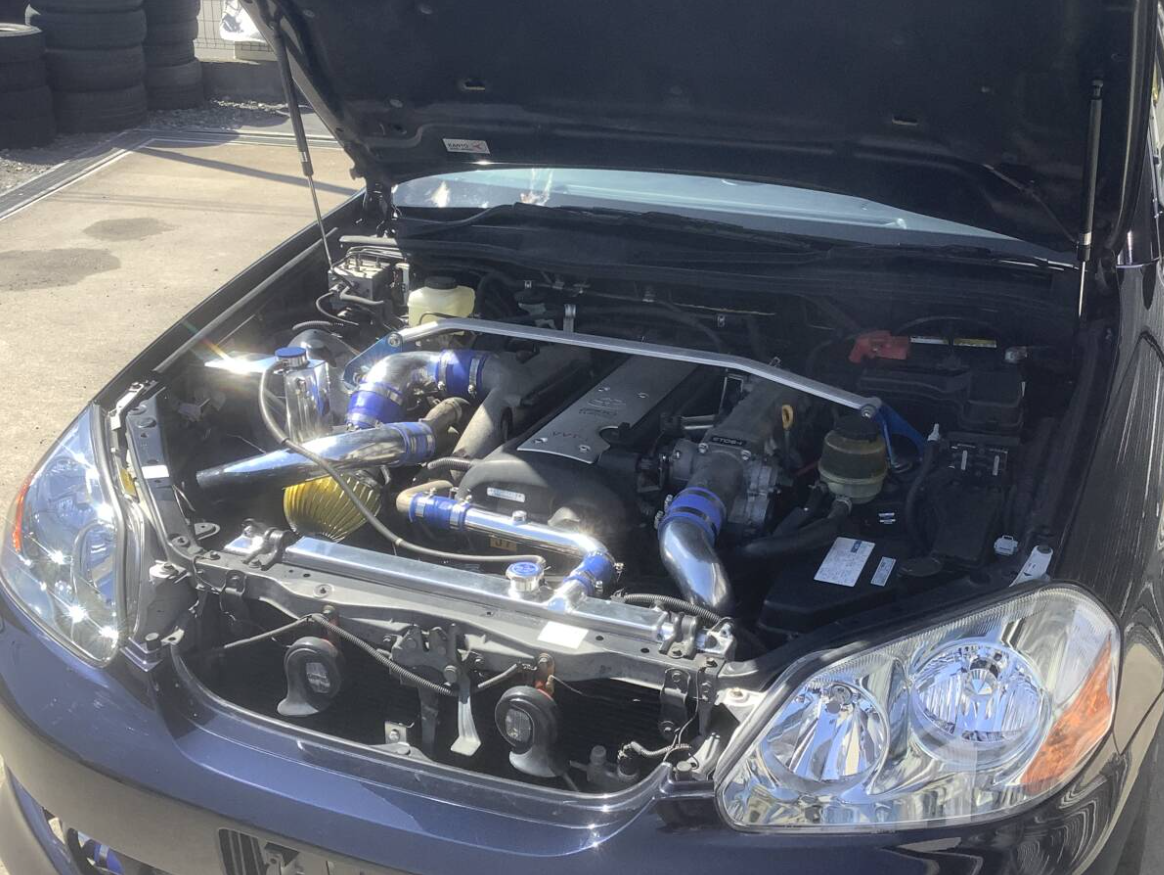
The first thing is something I have talked about wanting to do from day one - an intake. For this, I got myself a generic MAF adaptor, and for the filter, I had two options I had been saving for a time like this.
The first option was an HKS Super Power Flow, however, it had a 100mm inlet, and including the 76mm elbow it had, it was too chunky to fit in the tight bay. Therefore, I ended up going for option two, an equally iconic and old-school A'PEXi Power Intake pod filter, and of course, I had to fit it with an old-school HKS silicone coupler.
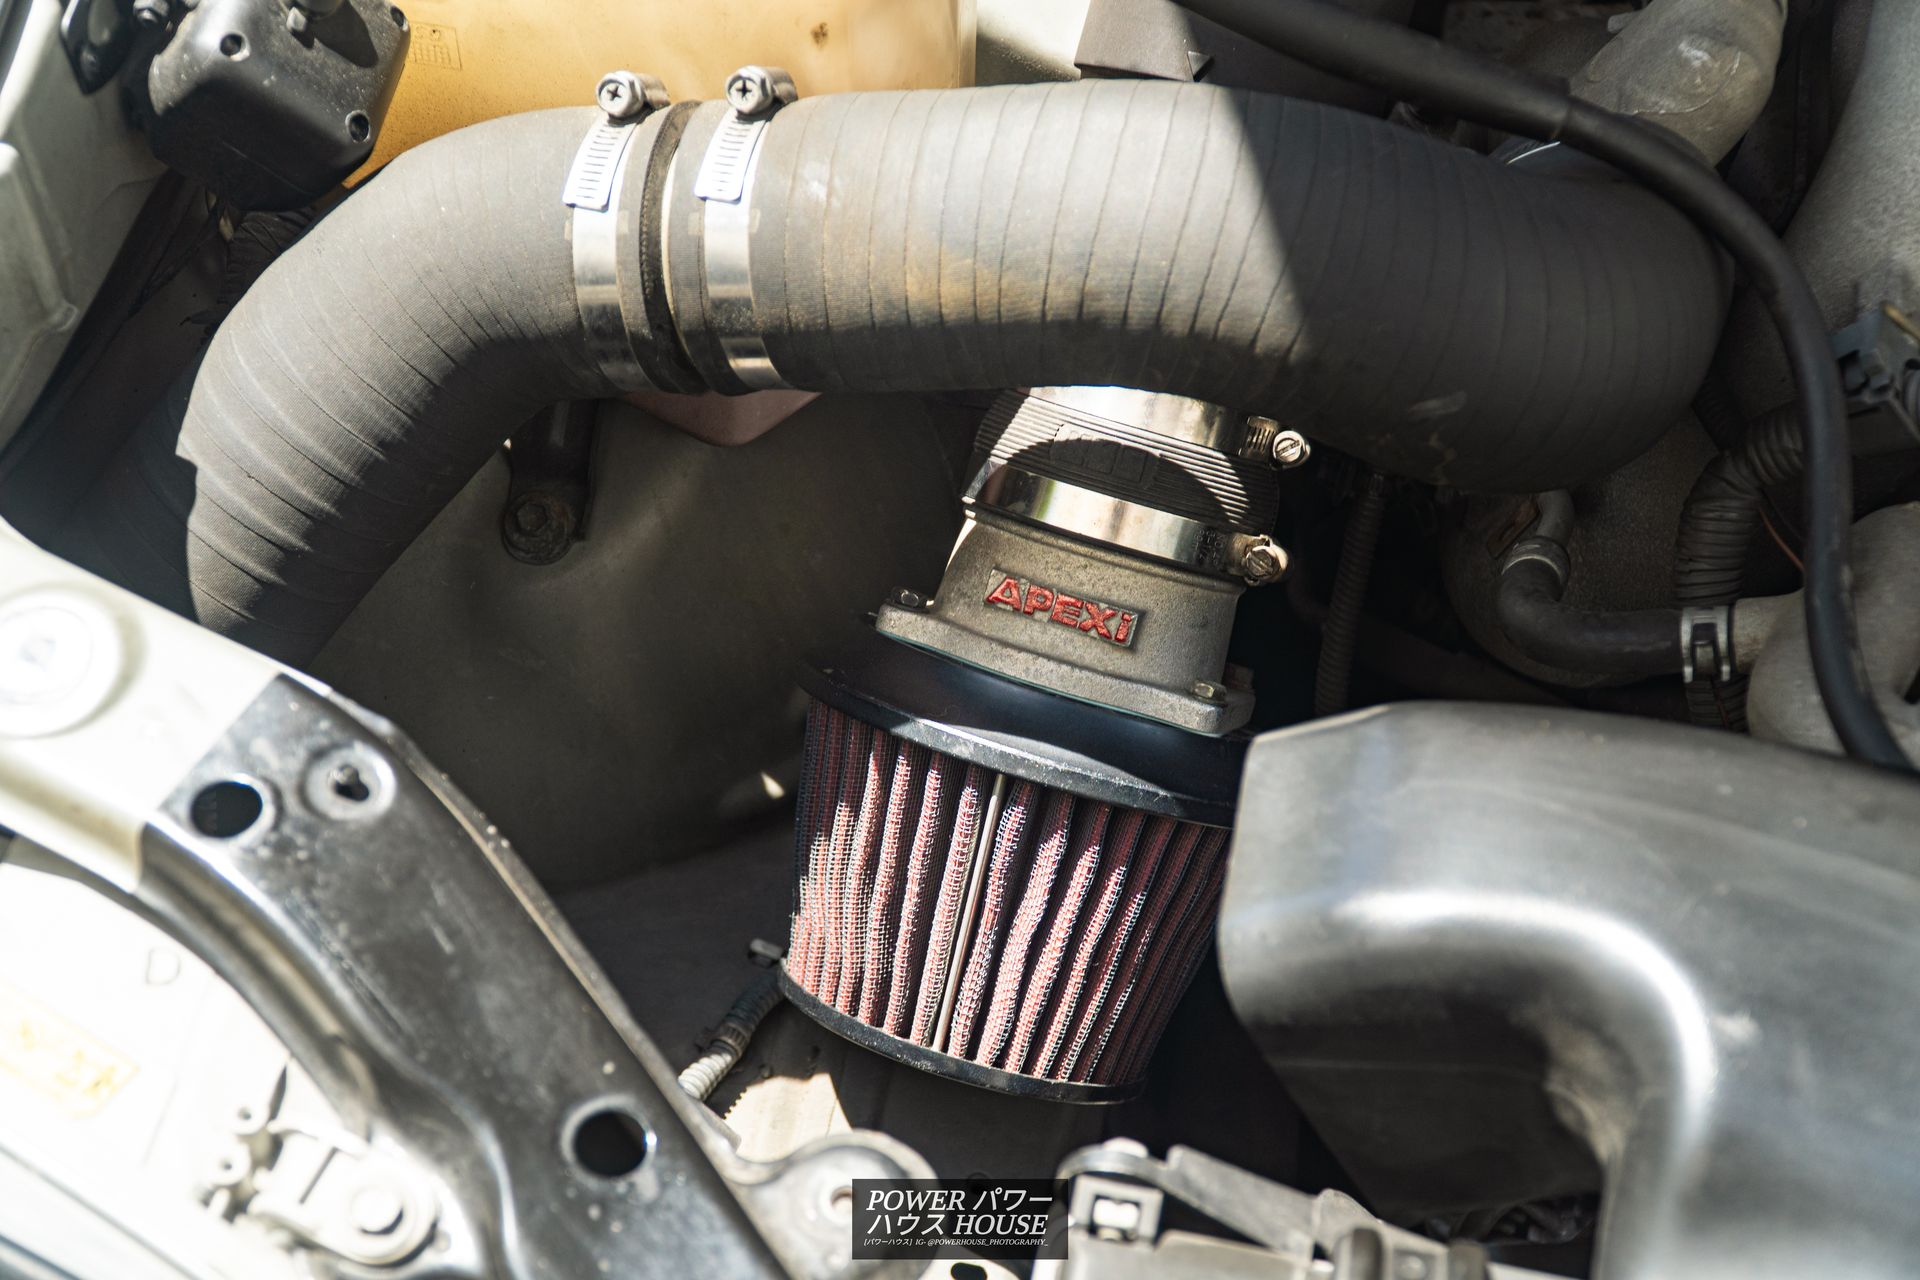
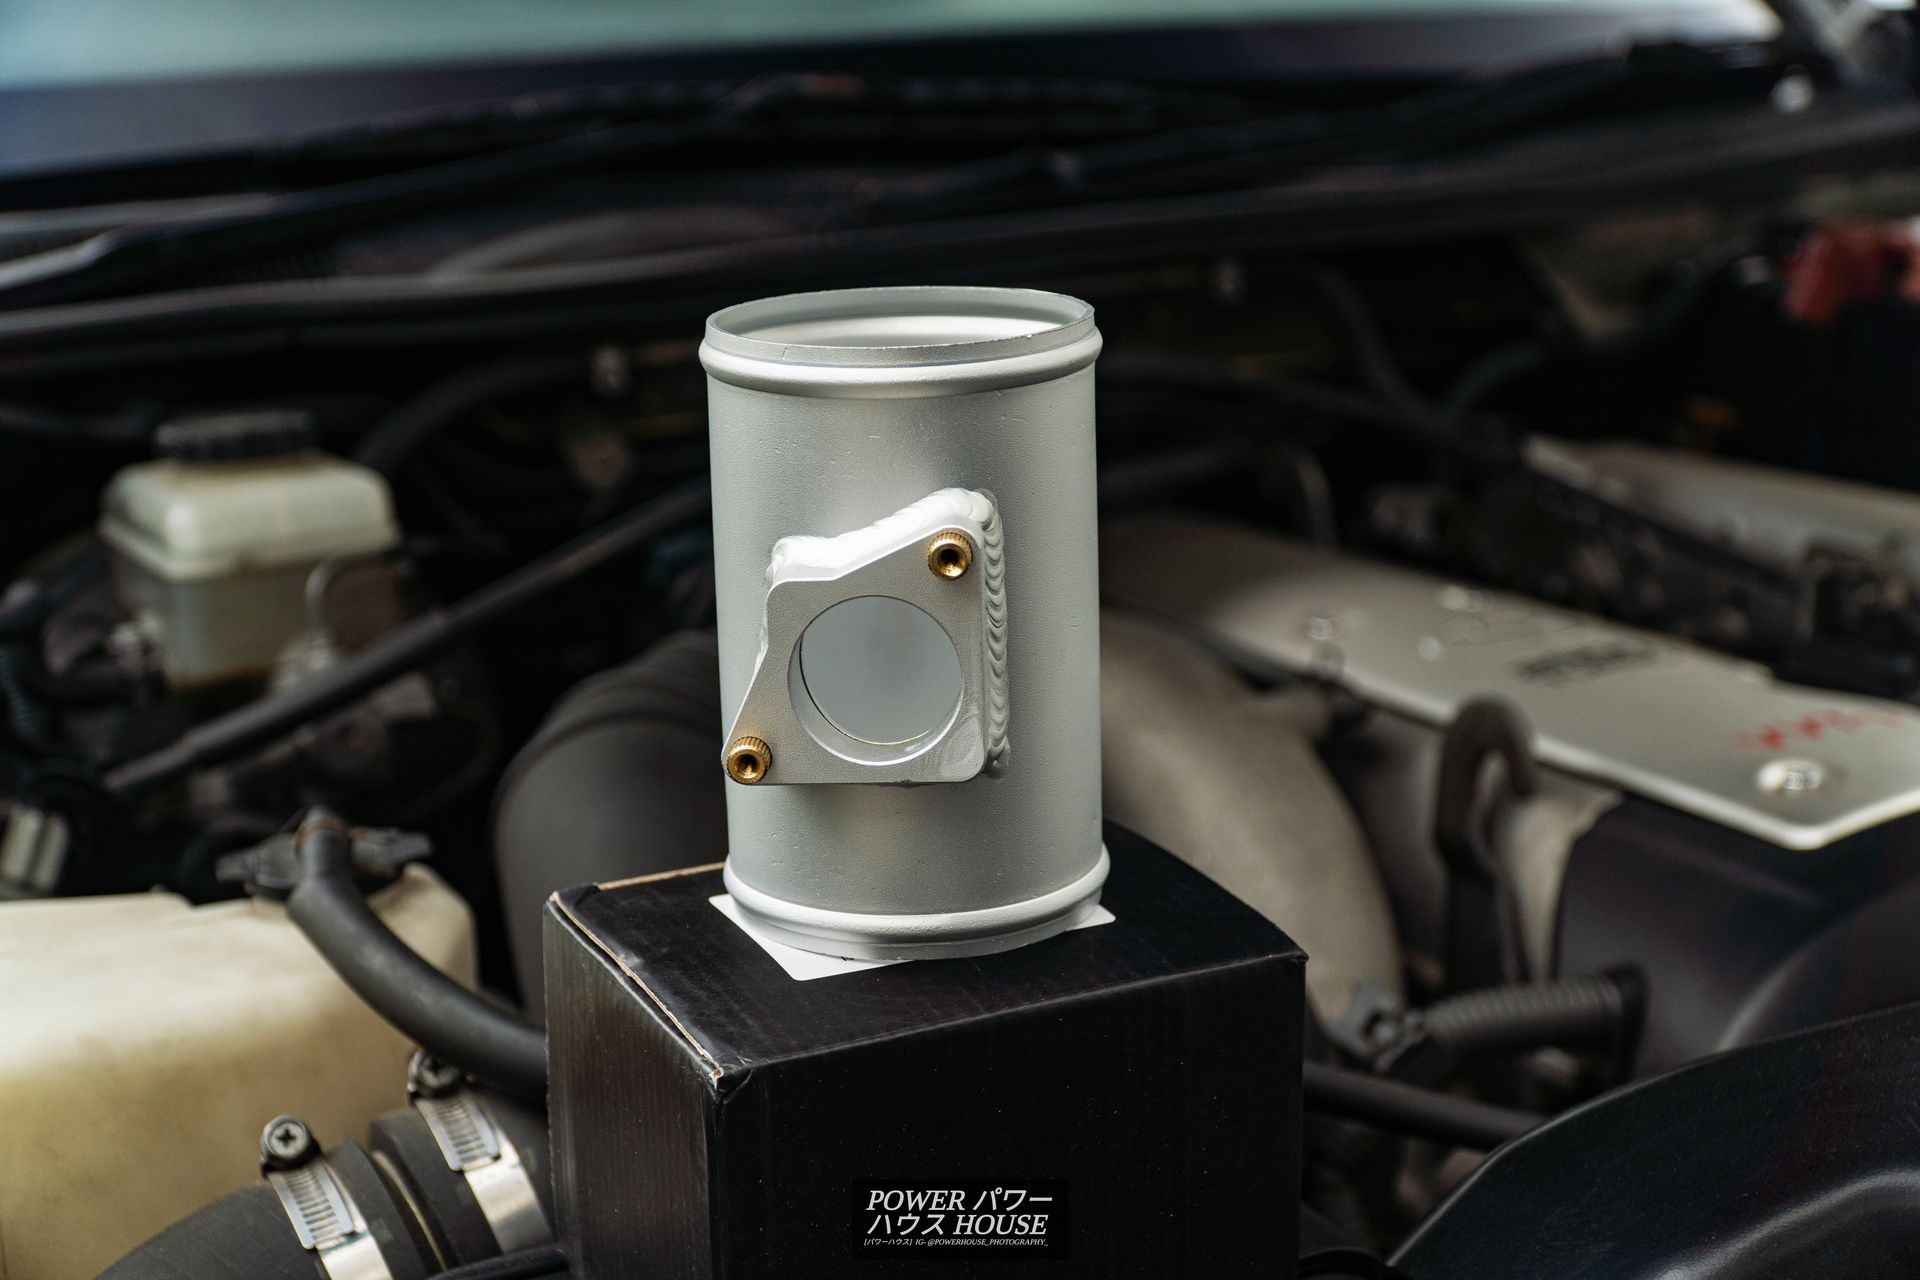
All fitted up, it looked a bit out of place in the stock engine bay, however, sounded amazing. Along with a blow-off valve block-off plate I fitted a while ago, the dose and turbo sounds were crazy! However, after a wee search in the garage, I also found a 76mm aluminium 90-degree elbow. Unfortunately it was a little too big, but that was nothing for a hacksaw to handle. After shortening it a little, and putting a plug over the port, I now had my self a fully-metal intake pipe, not only adding to the engine bay dress-up, but also enhancing the dose further.
And then a few weeks passed, and I happened to stumble across a TradeMe listing for an extremely cool piece, a genuine Sard R2D2 Racing Blow Off Twin Drive Type2 blow-off valve, more regularly just known as the Sard R2D2.
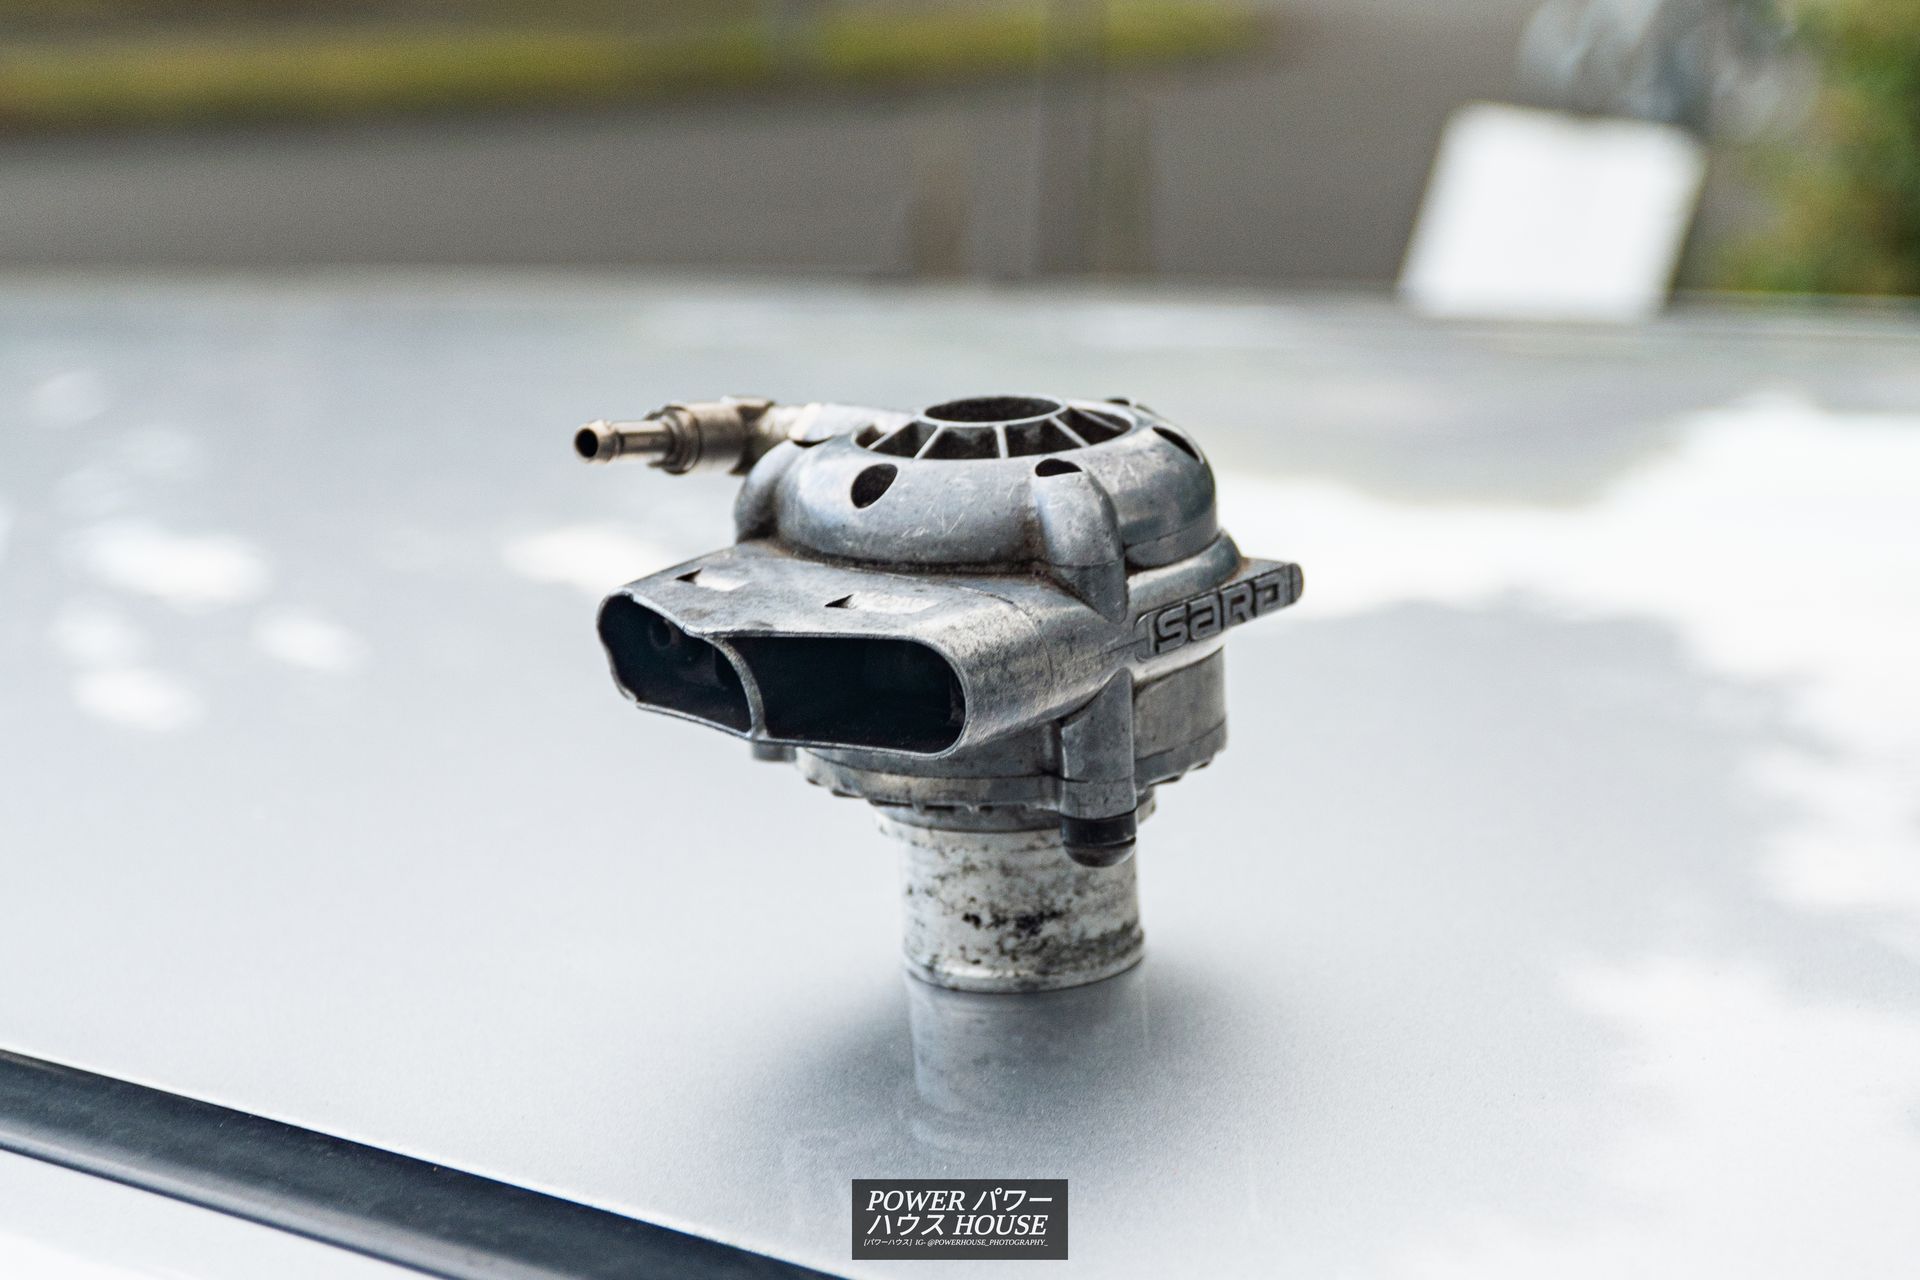
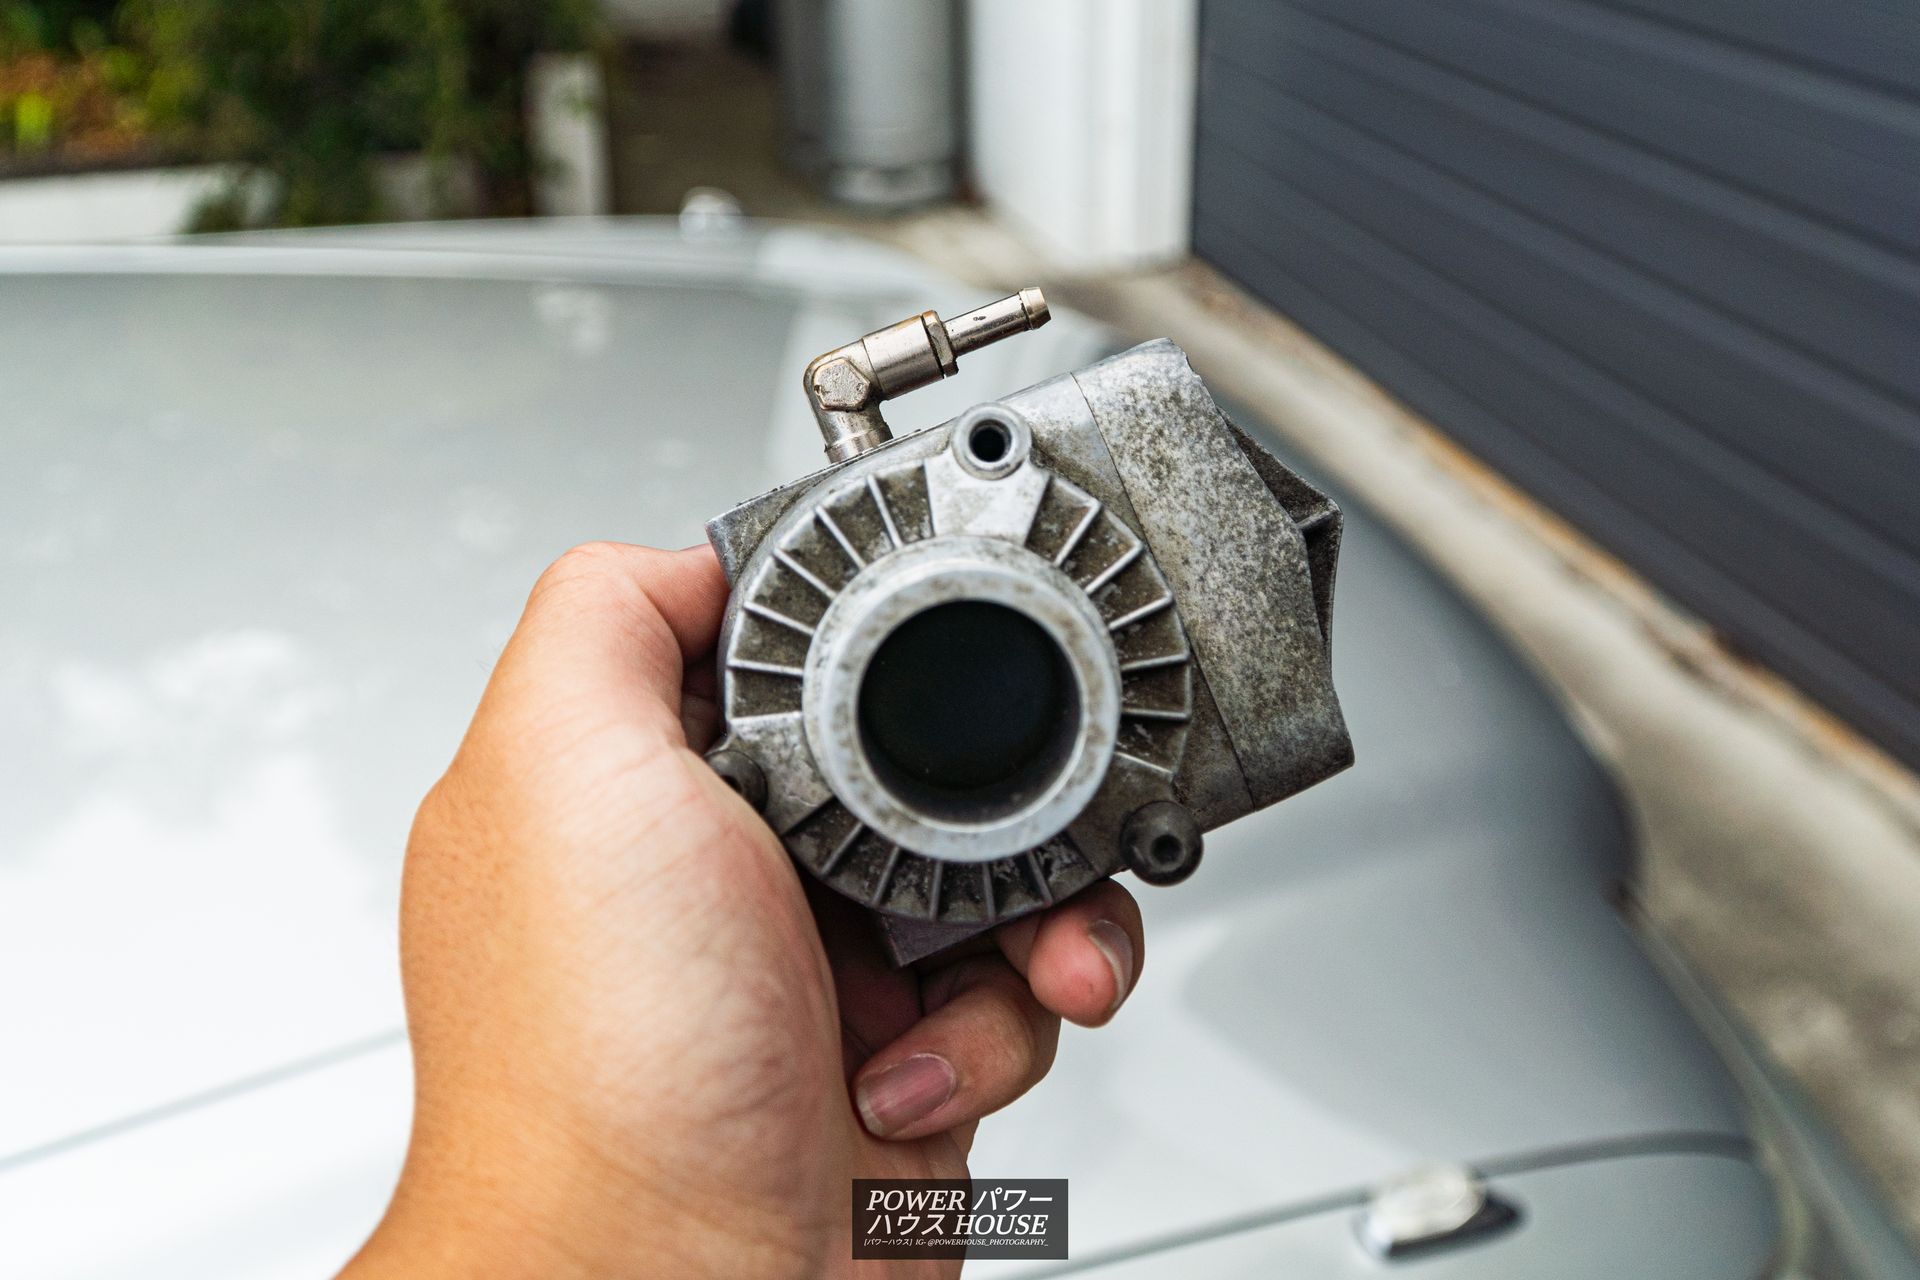
It looked a bit tired, so I hit it with some Autosol Metal Polish, and gave it all-new hardware to replace a loose and missing old hardware. It ended up looking pretty good!

As for fitting it, unfortunately, I didn't get the full Sard kit to fit a 1JZ, so I didn't have any mounting brackets or the block-off plate. Therefore, I needed to improvise. With a few head scratches, here is how I ended up mounting it. I installed it in the factory position, but using a zip-tie, I connected the new blow-off to the inlet for the OEM one. This gave the blow-off a sturdy mount and a eye-catching position. I then cut up an old rubber hose and double sided taped it on as 'padding' between the OEM blow-off valve and the Sard one which was resting on it.

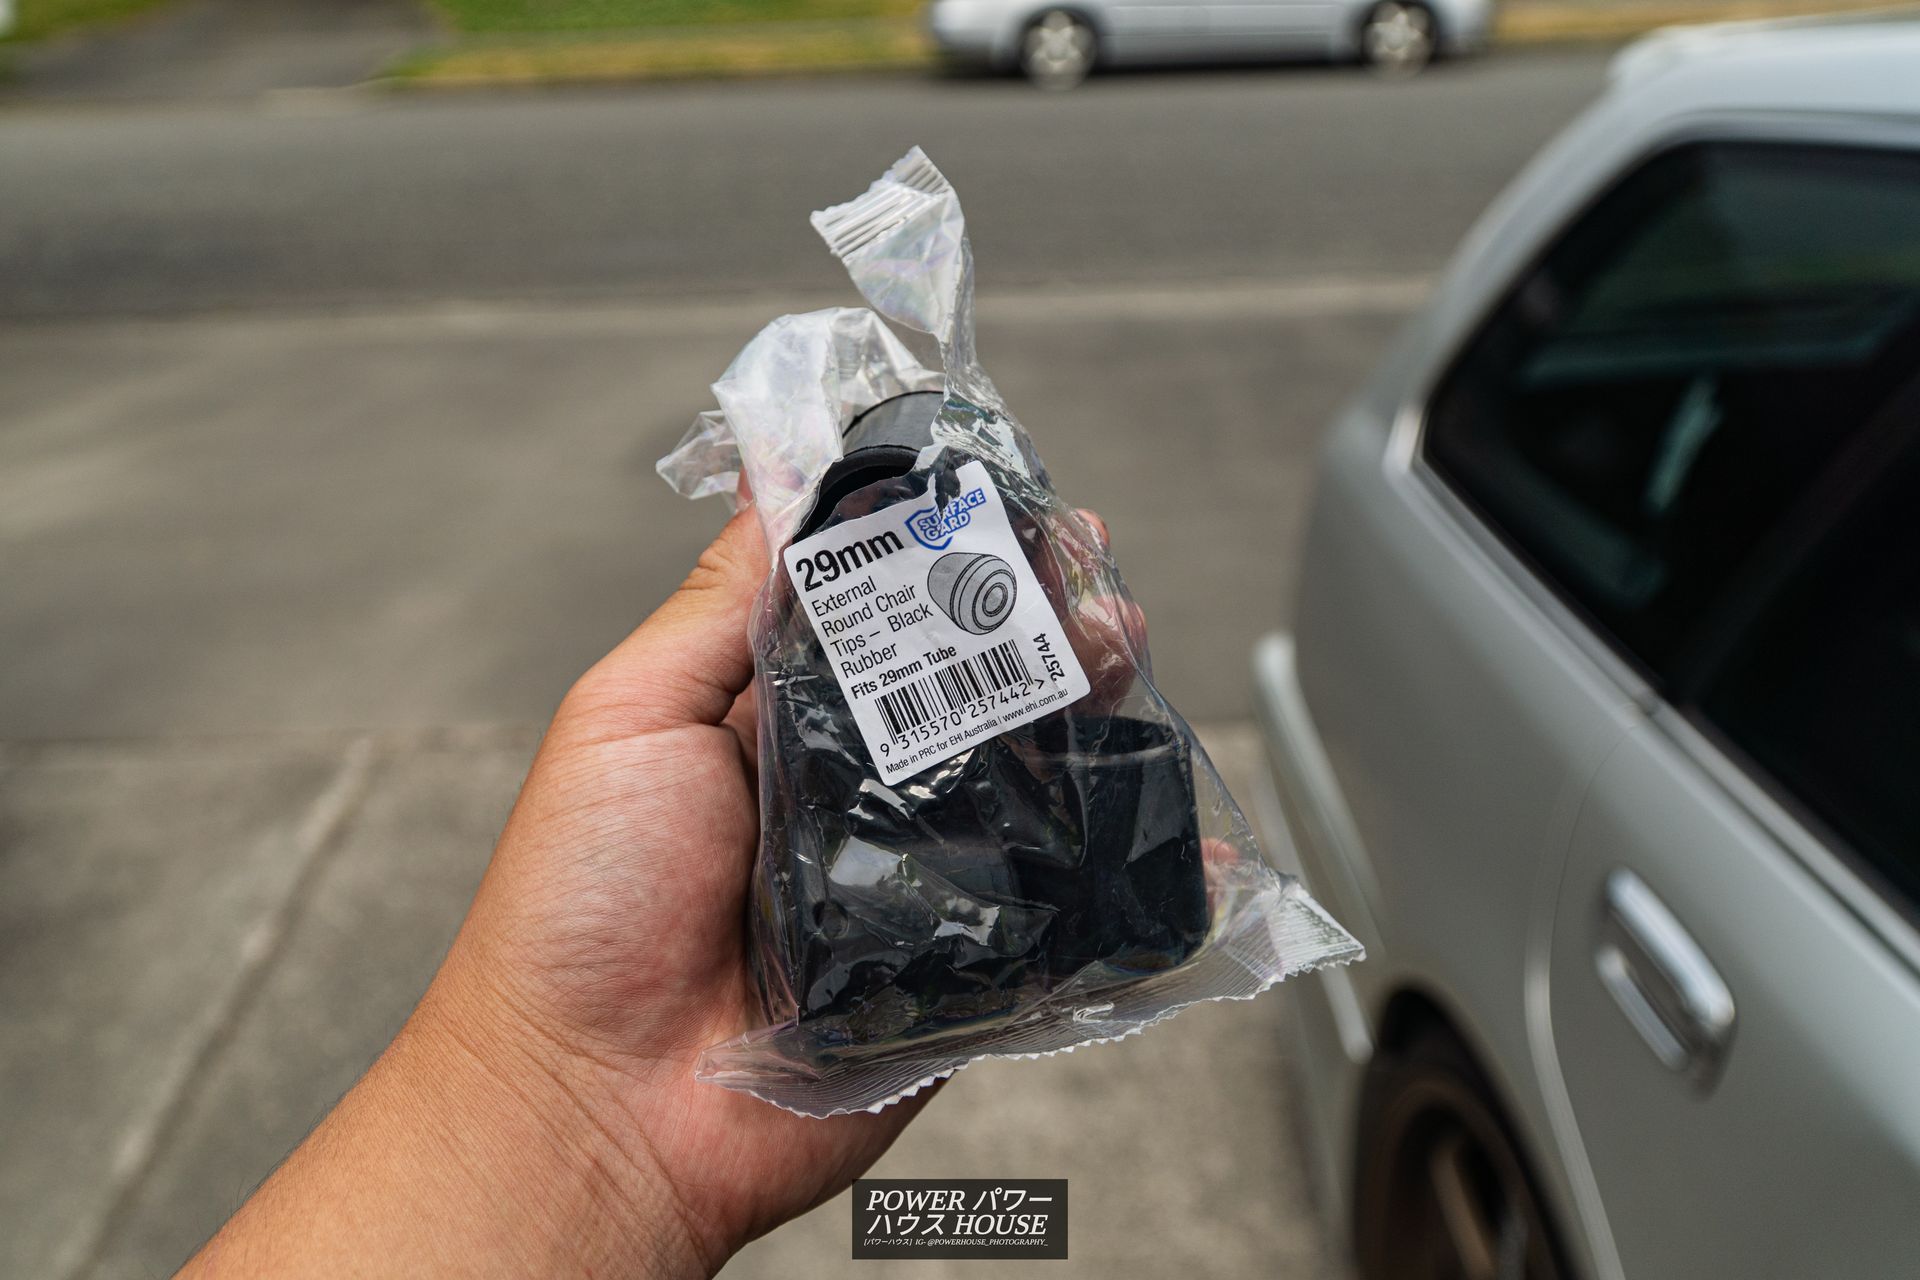
Lastly to make sure the zip-tie was secure on the OEM blow-off valve inlet, I put a 29mm external chair leg tip over the inlet to hold the zip-tie in place. Oh, also, I needed a new hose clamp for the Sard blow-off valve, as it has a 33mm inlet as opposed to the 30mm inlet of the OEM one, meaning the OEM clamp didn't fit. Not a problem though as a new 19-44mm worm-drive hose clamp slid right on.
As a finishing touch in the bay, I lined up a new Blitz sticker for the intake air duct, which was inspired by the likes of the Team Julius JZX110.
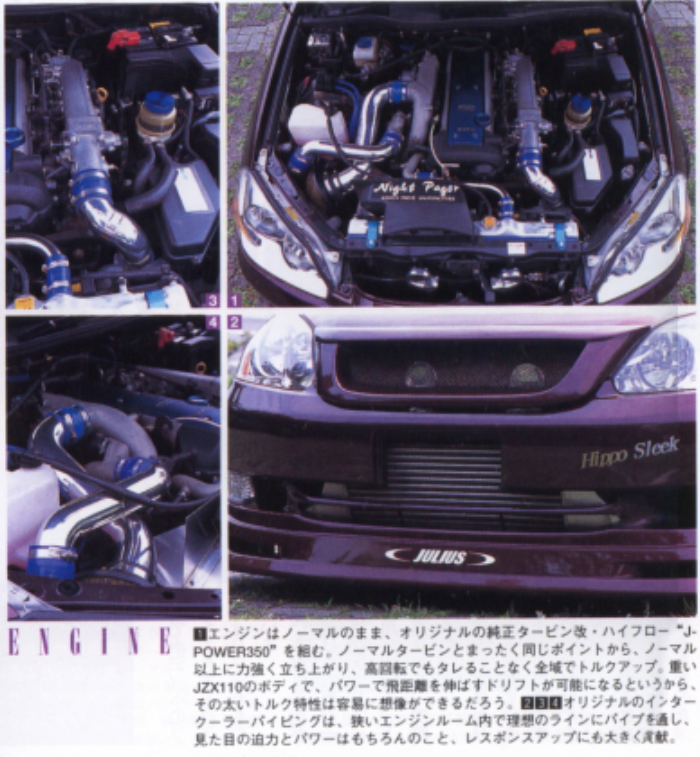
And for future reference, these are a few inspirations for my engine bay:
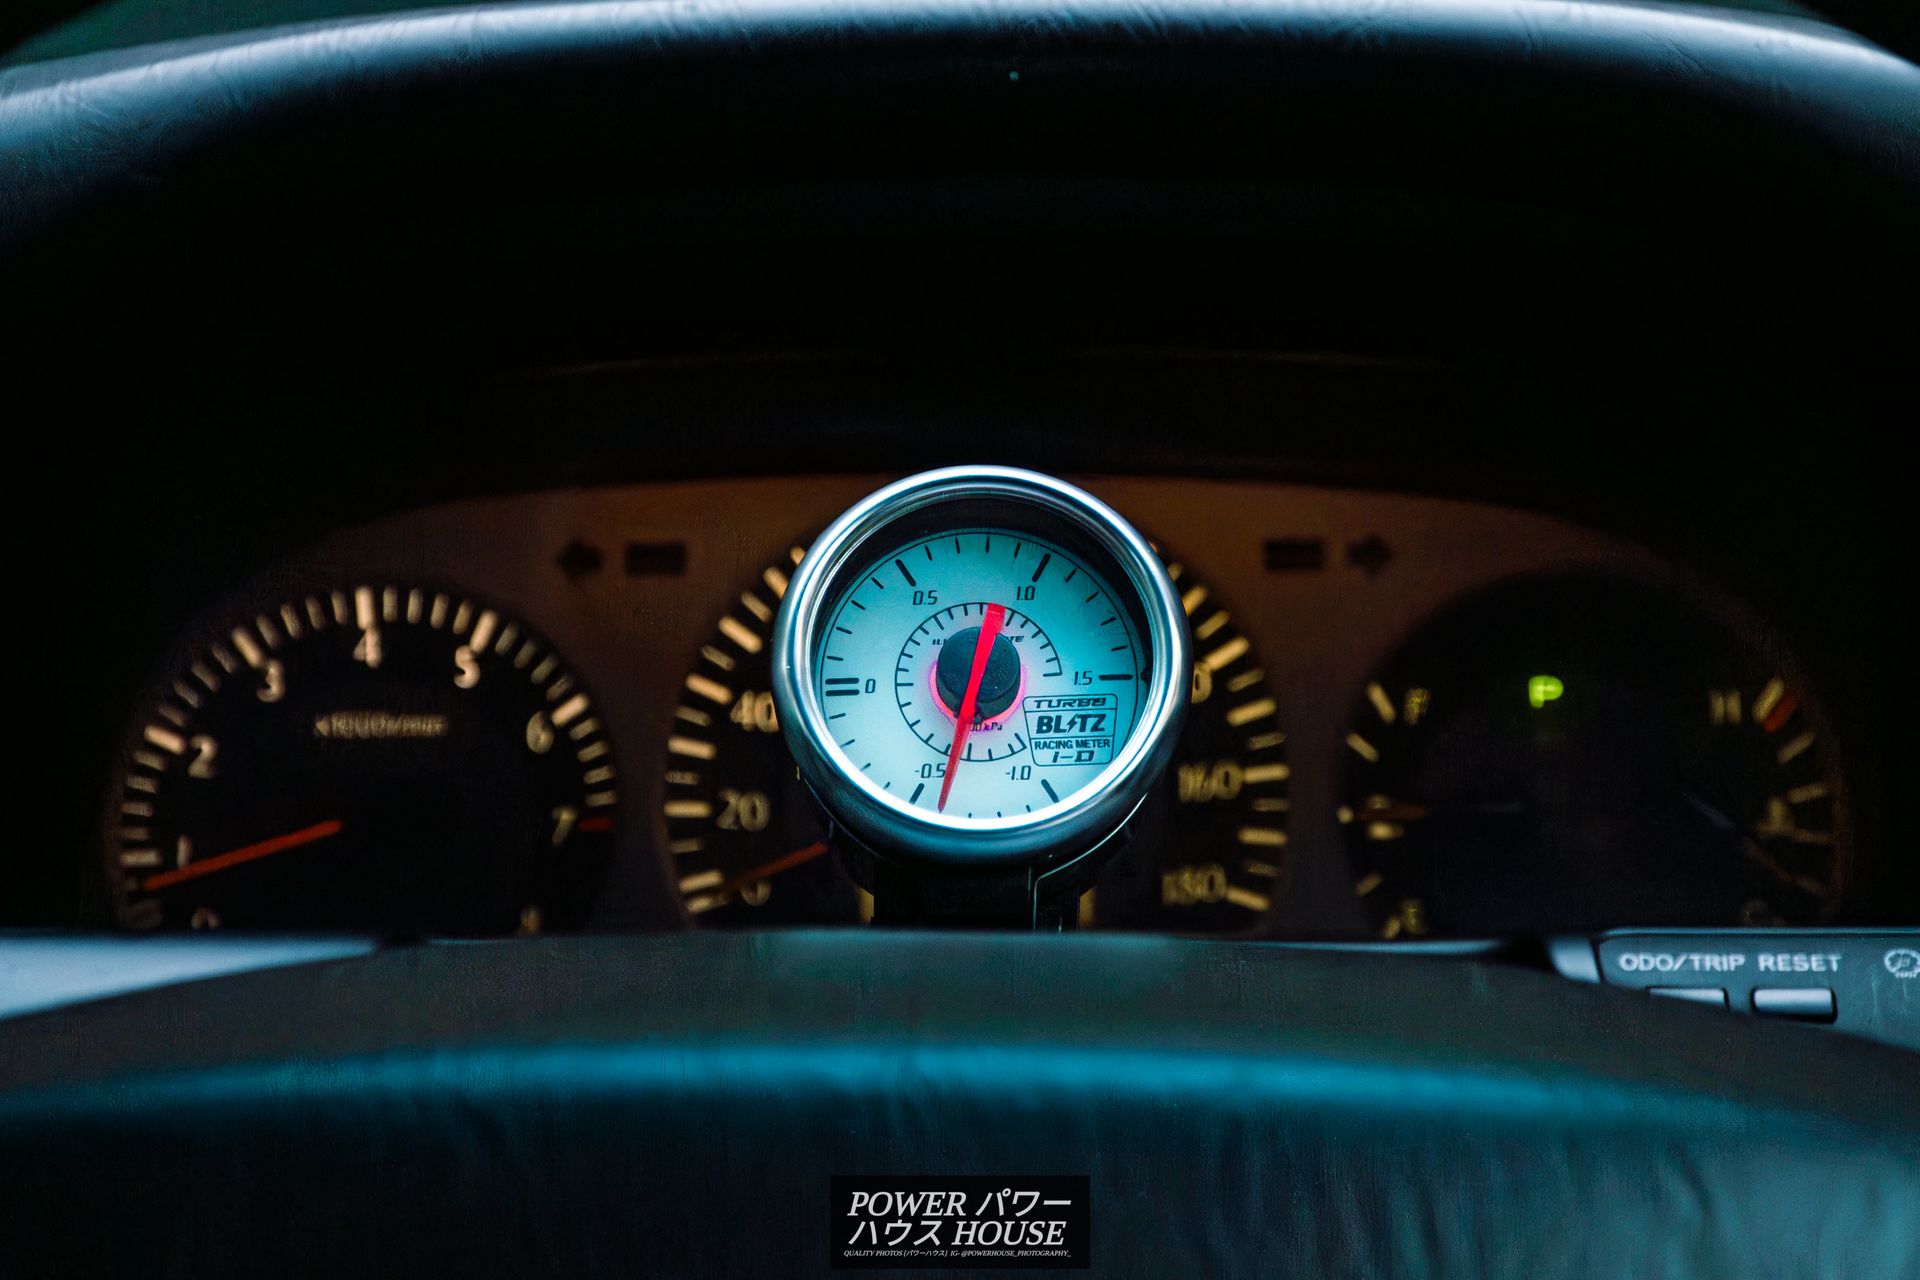
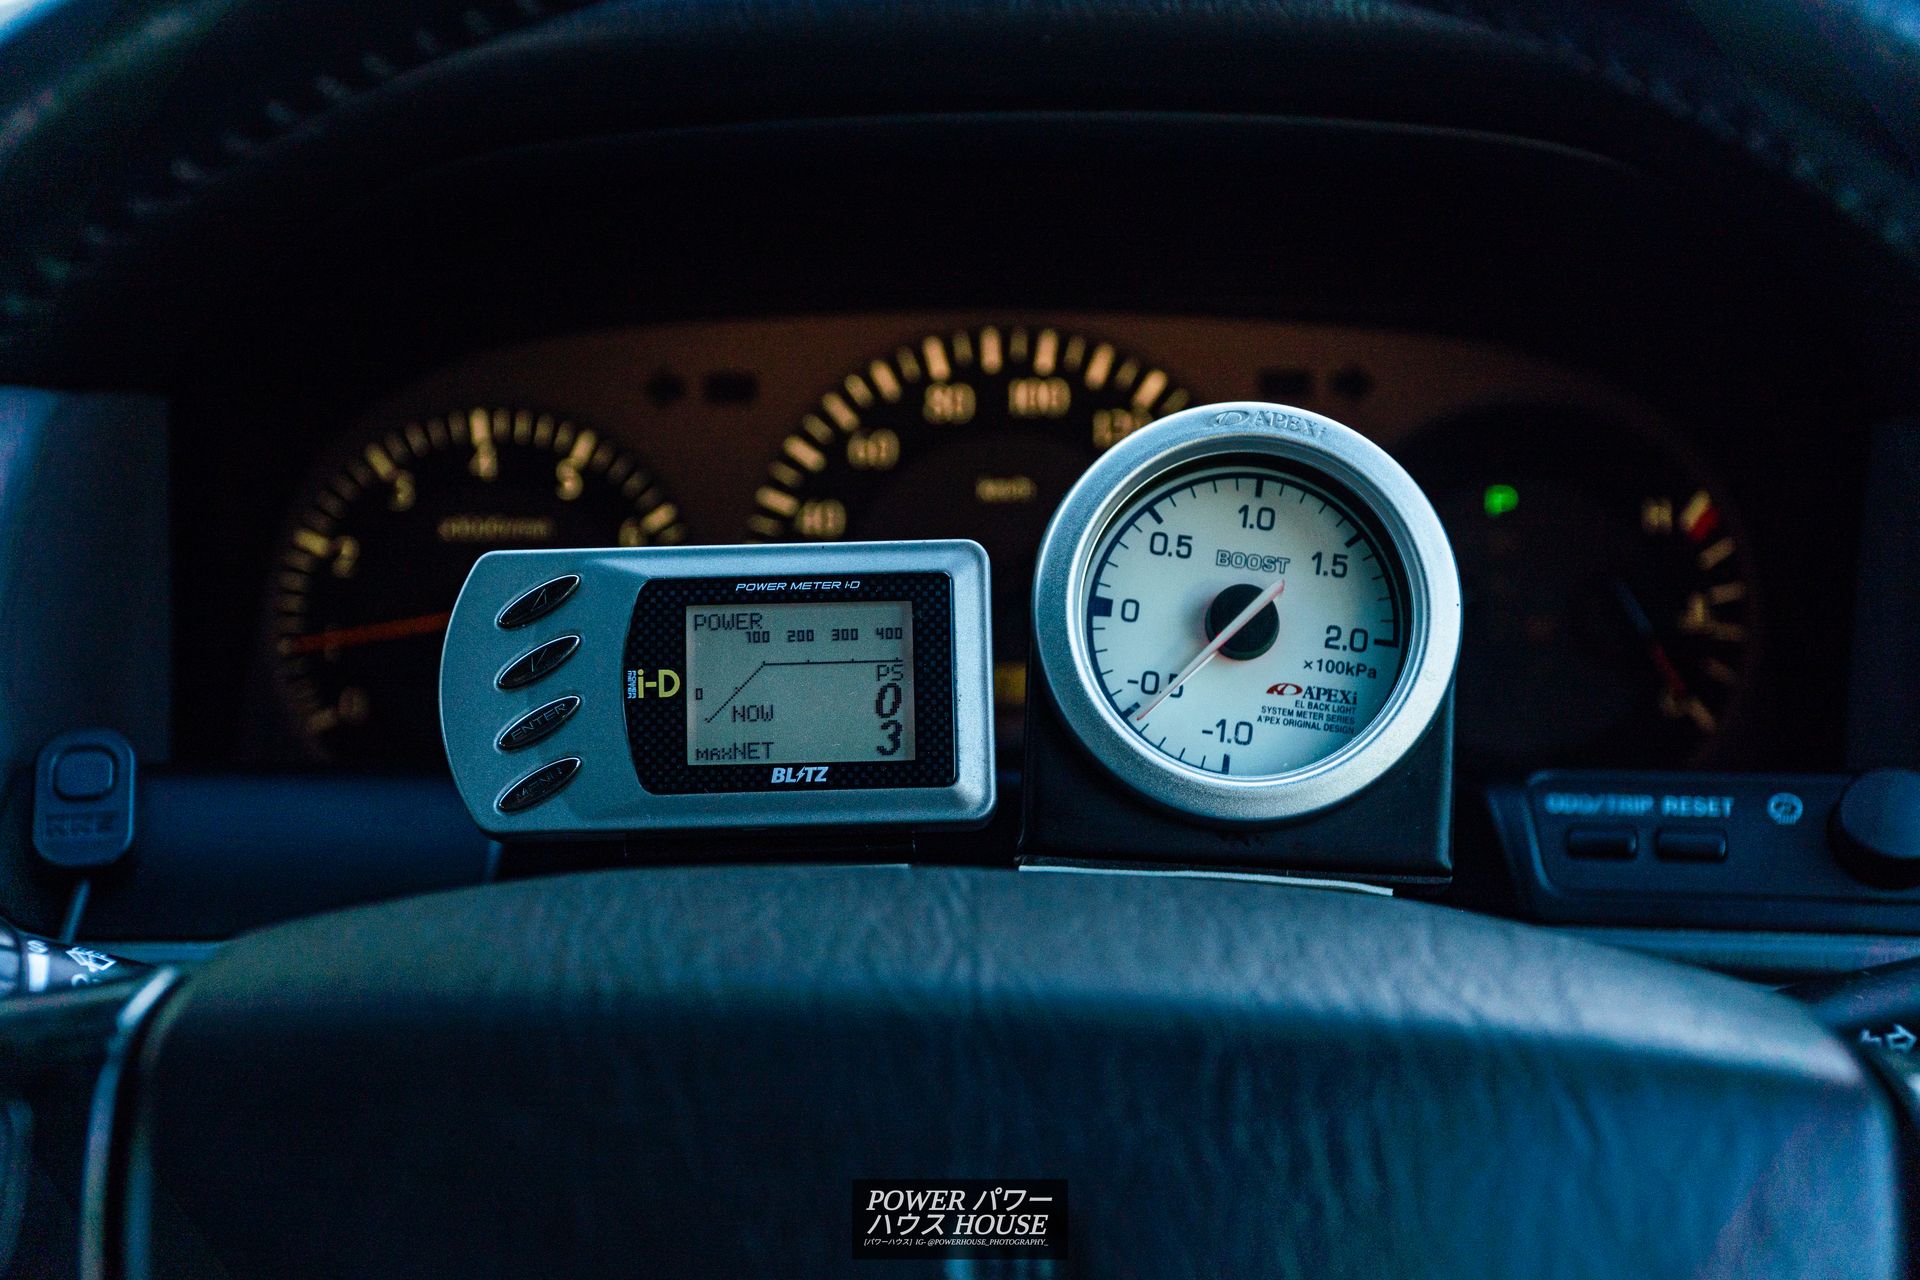
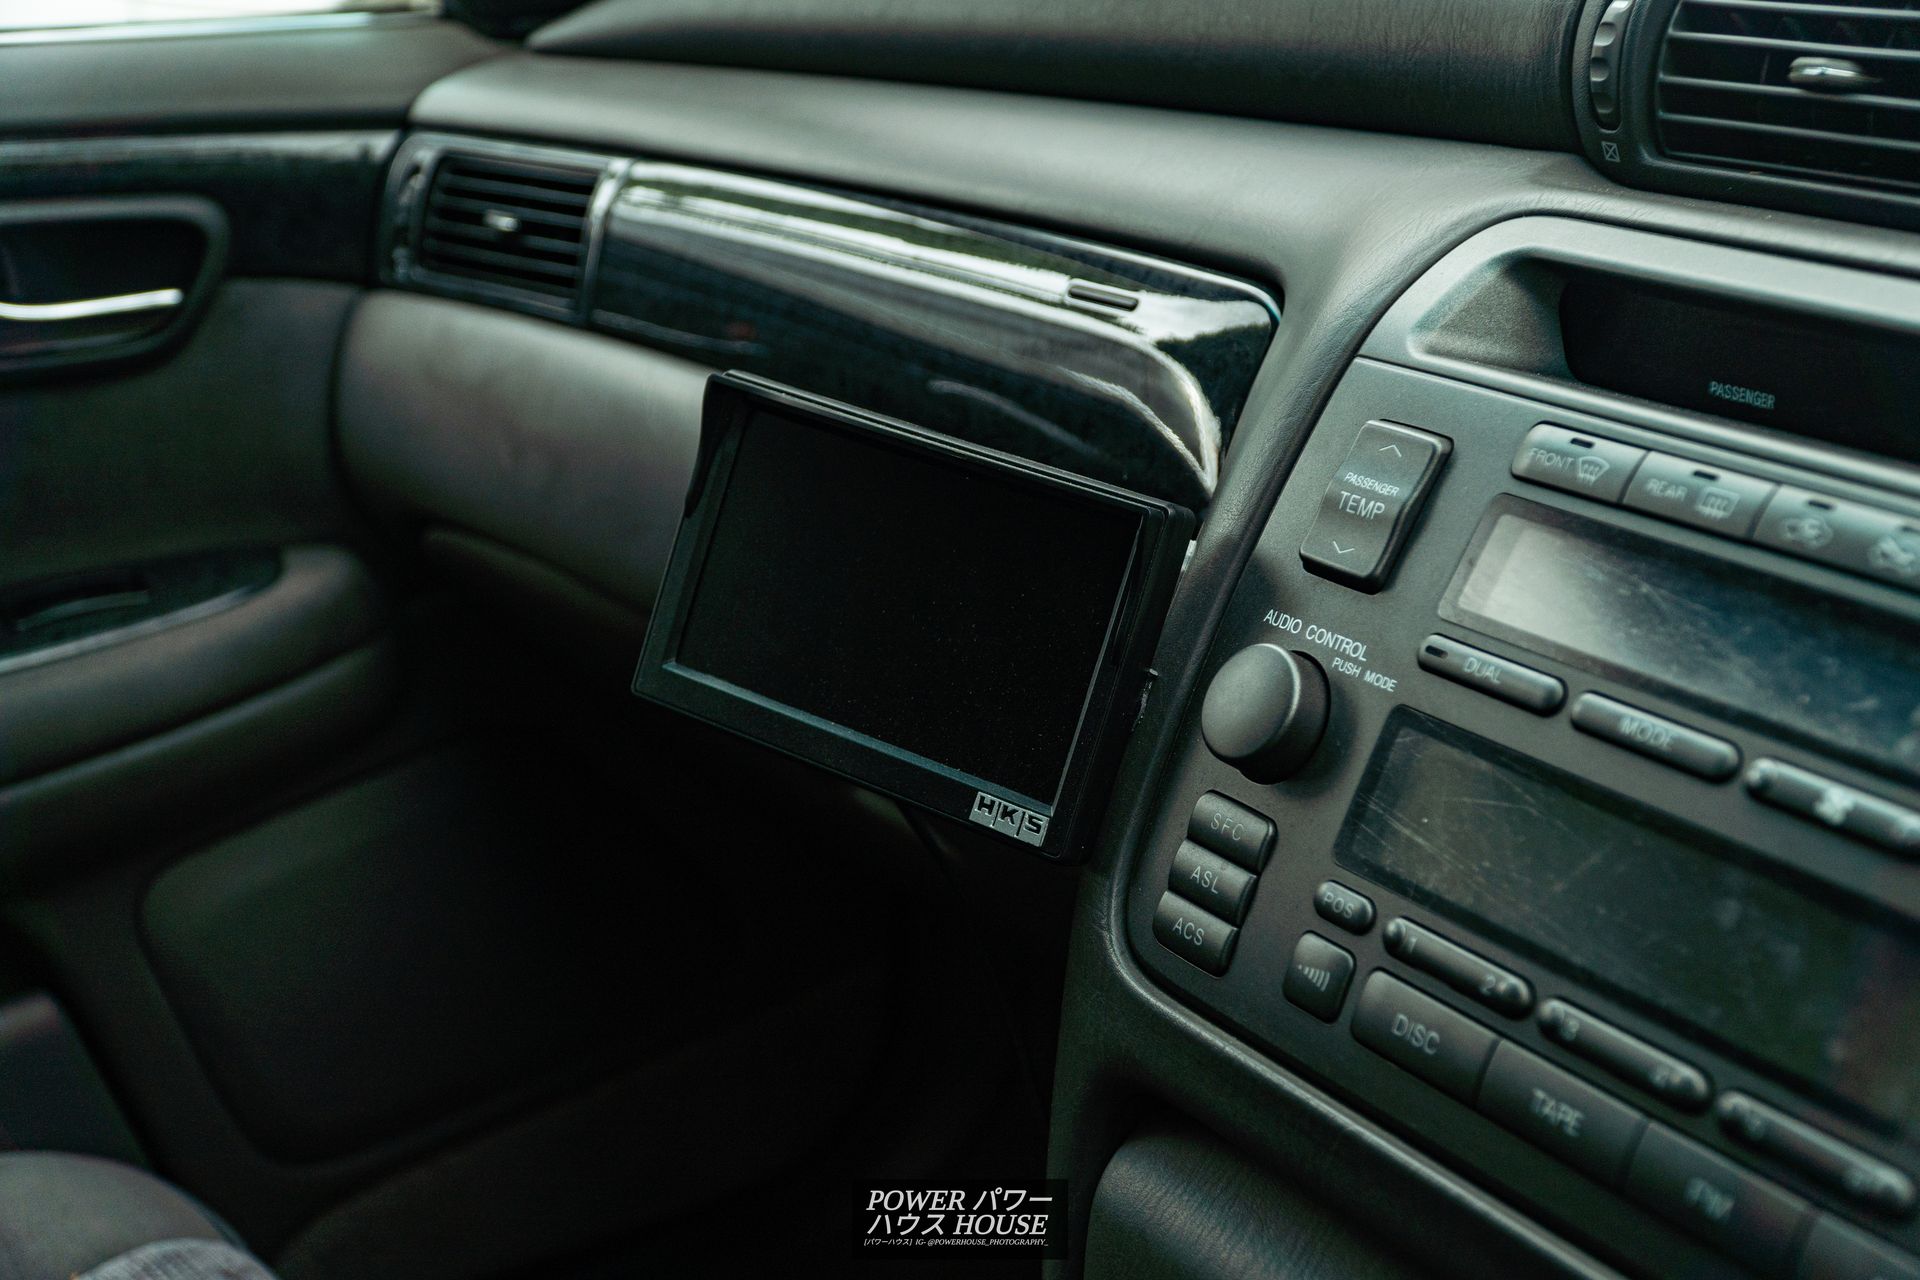
Not only did the engine bay get an update though, but also the interior. I already have a few 90s/00s pieces in here, including the Blitz Racing Meter i-D 52mm white-face boost gauge, and the Revolfe S.A. HKS CAMP2.
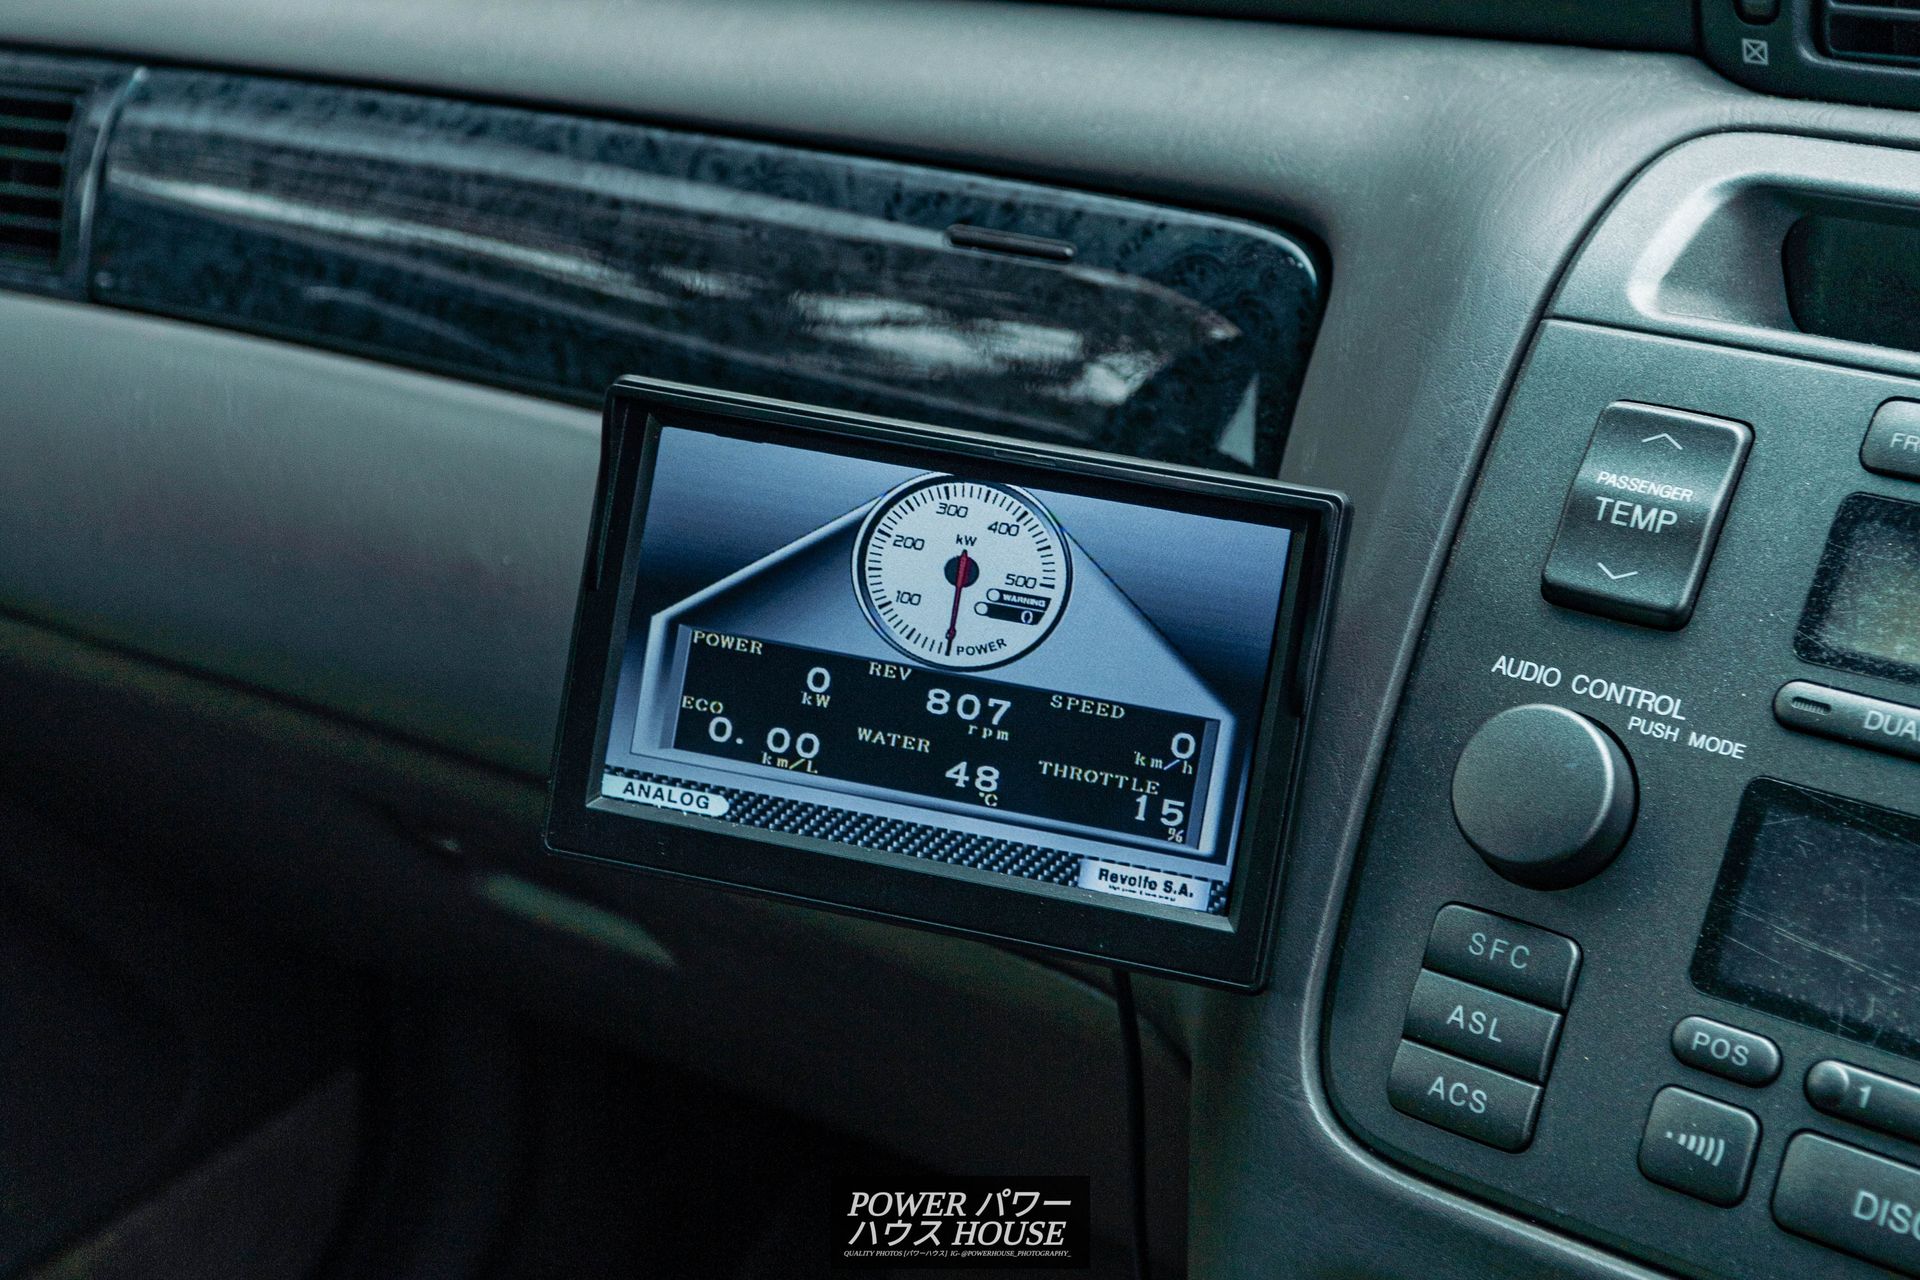
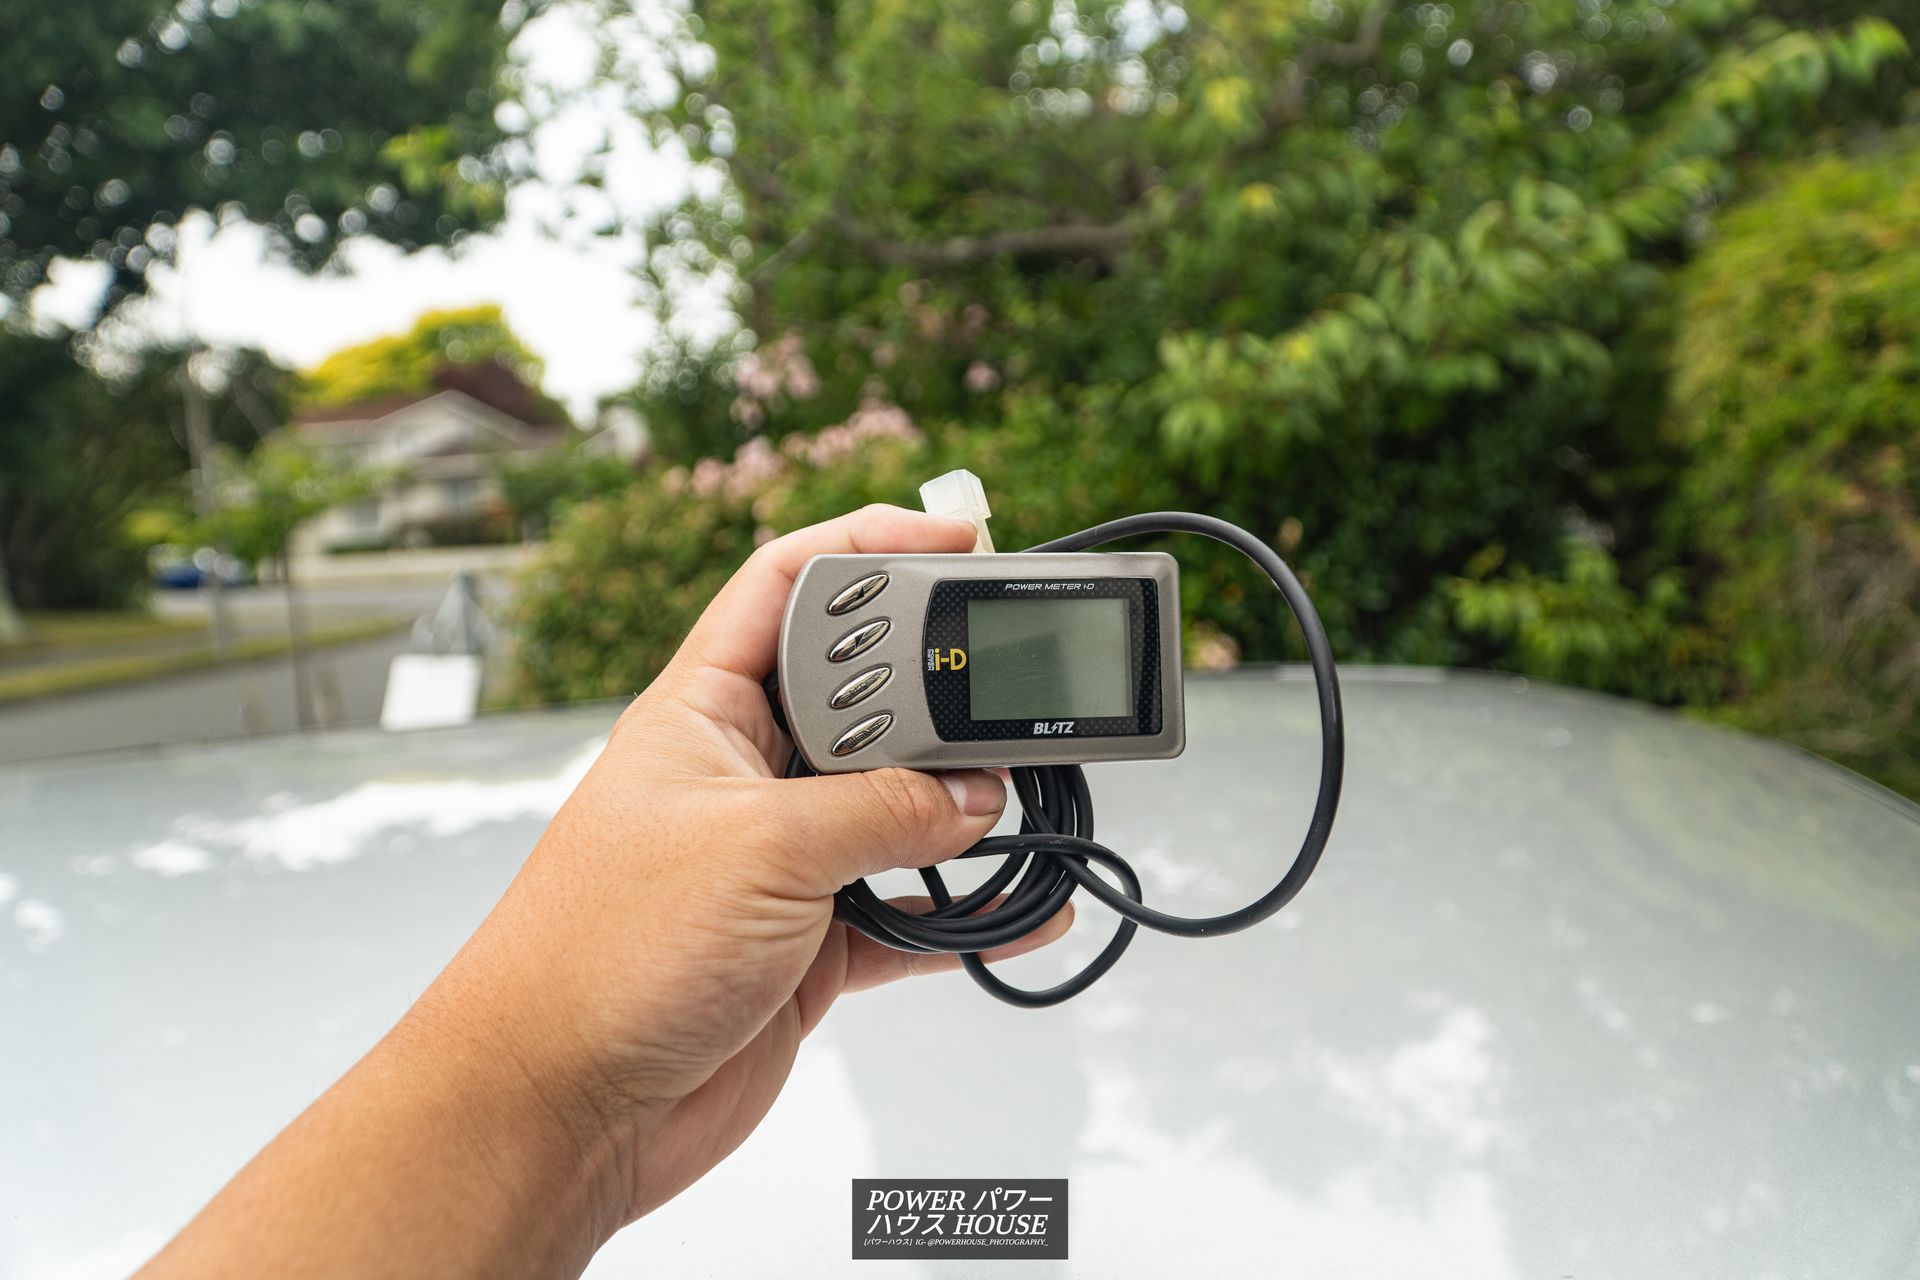
However, I will also be adding this... a Blitz Power Meter i-D III.
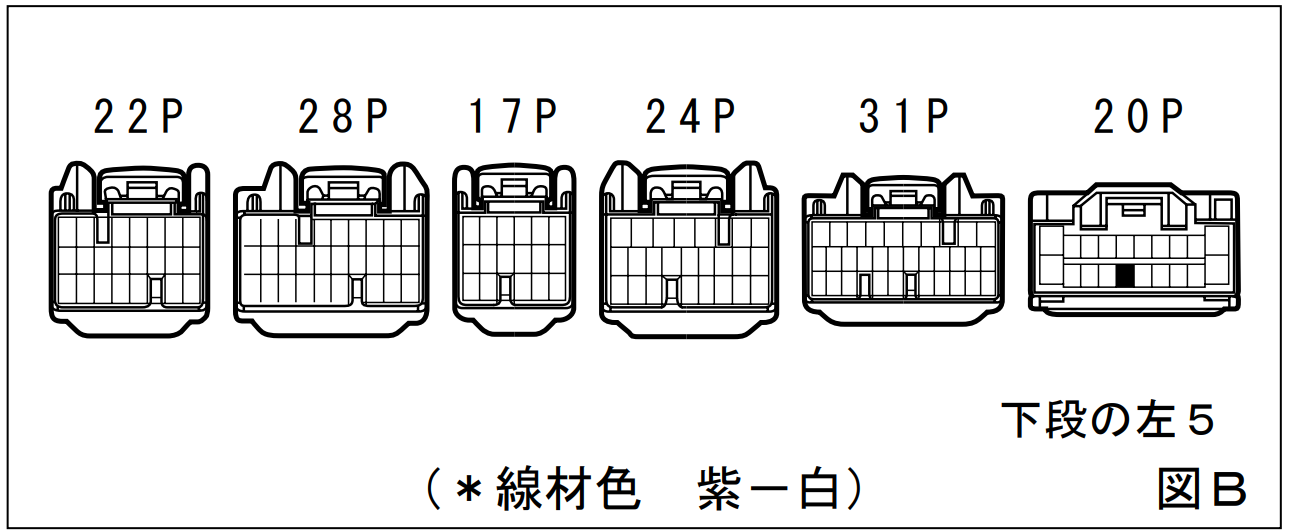
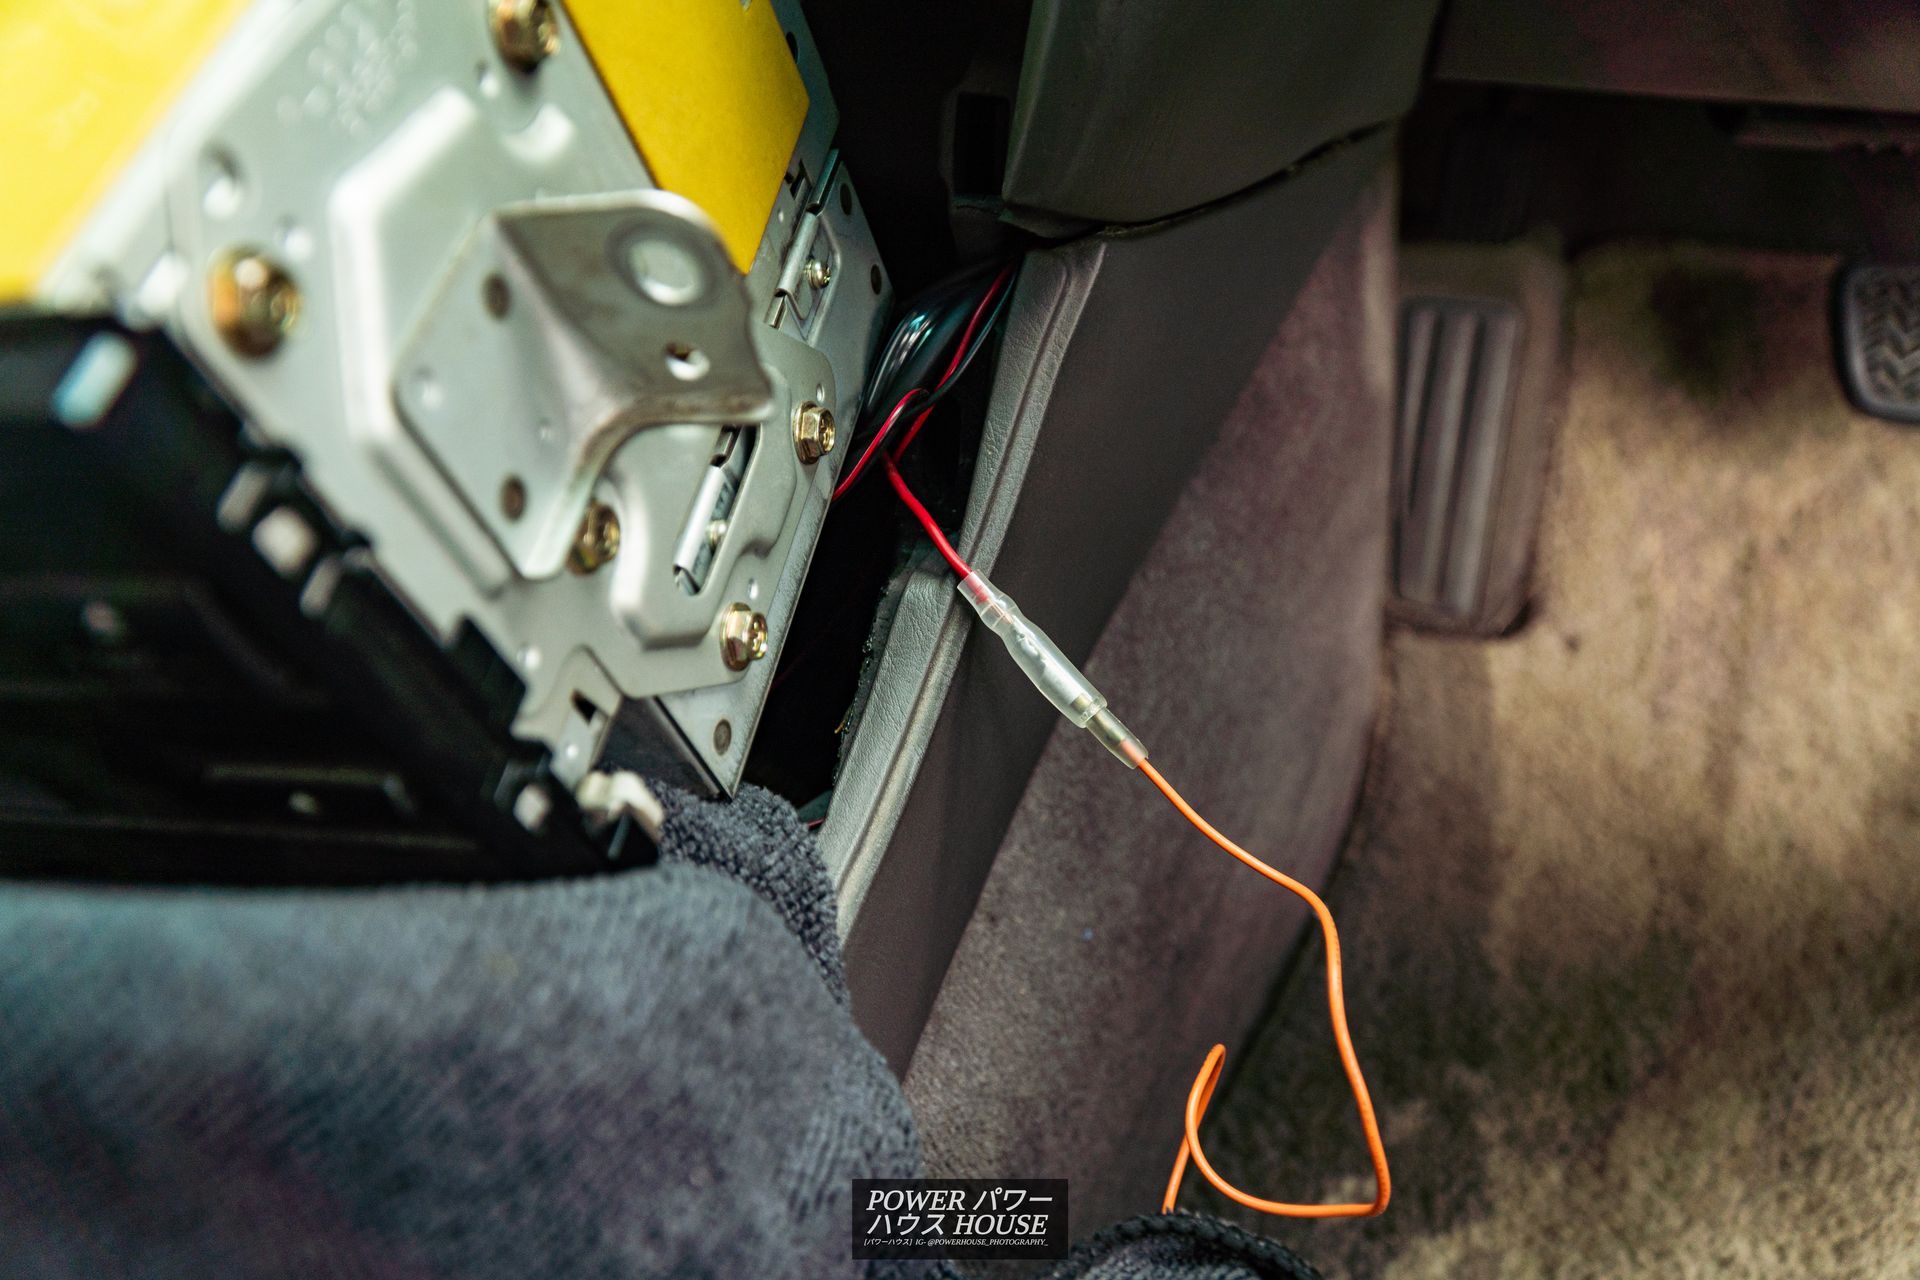
The installation was fairly easy. Hardest part was definitely finding the Vehicle Speed Signal (VSS) wire, which for future refence is this wire, the purple one, that is on the bottom row of the furthest most right plug on the back of the cassette unit.
Tap the orange wire into the VSS wire, and just add a positive and a ground, and that's the install done!
And I decided to move my boost gauge to the right and mount my Power Meter on the left of the steering column, just making a small metal bracket out of some thin aluminium off-cut.
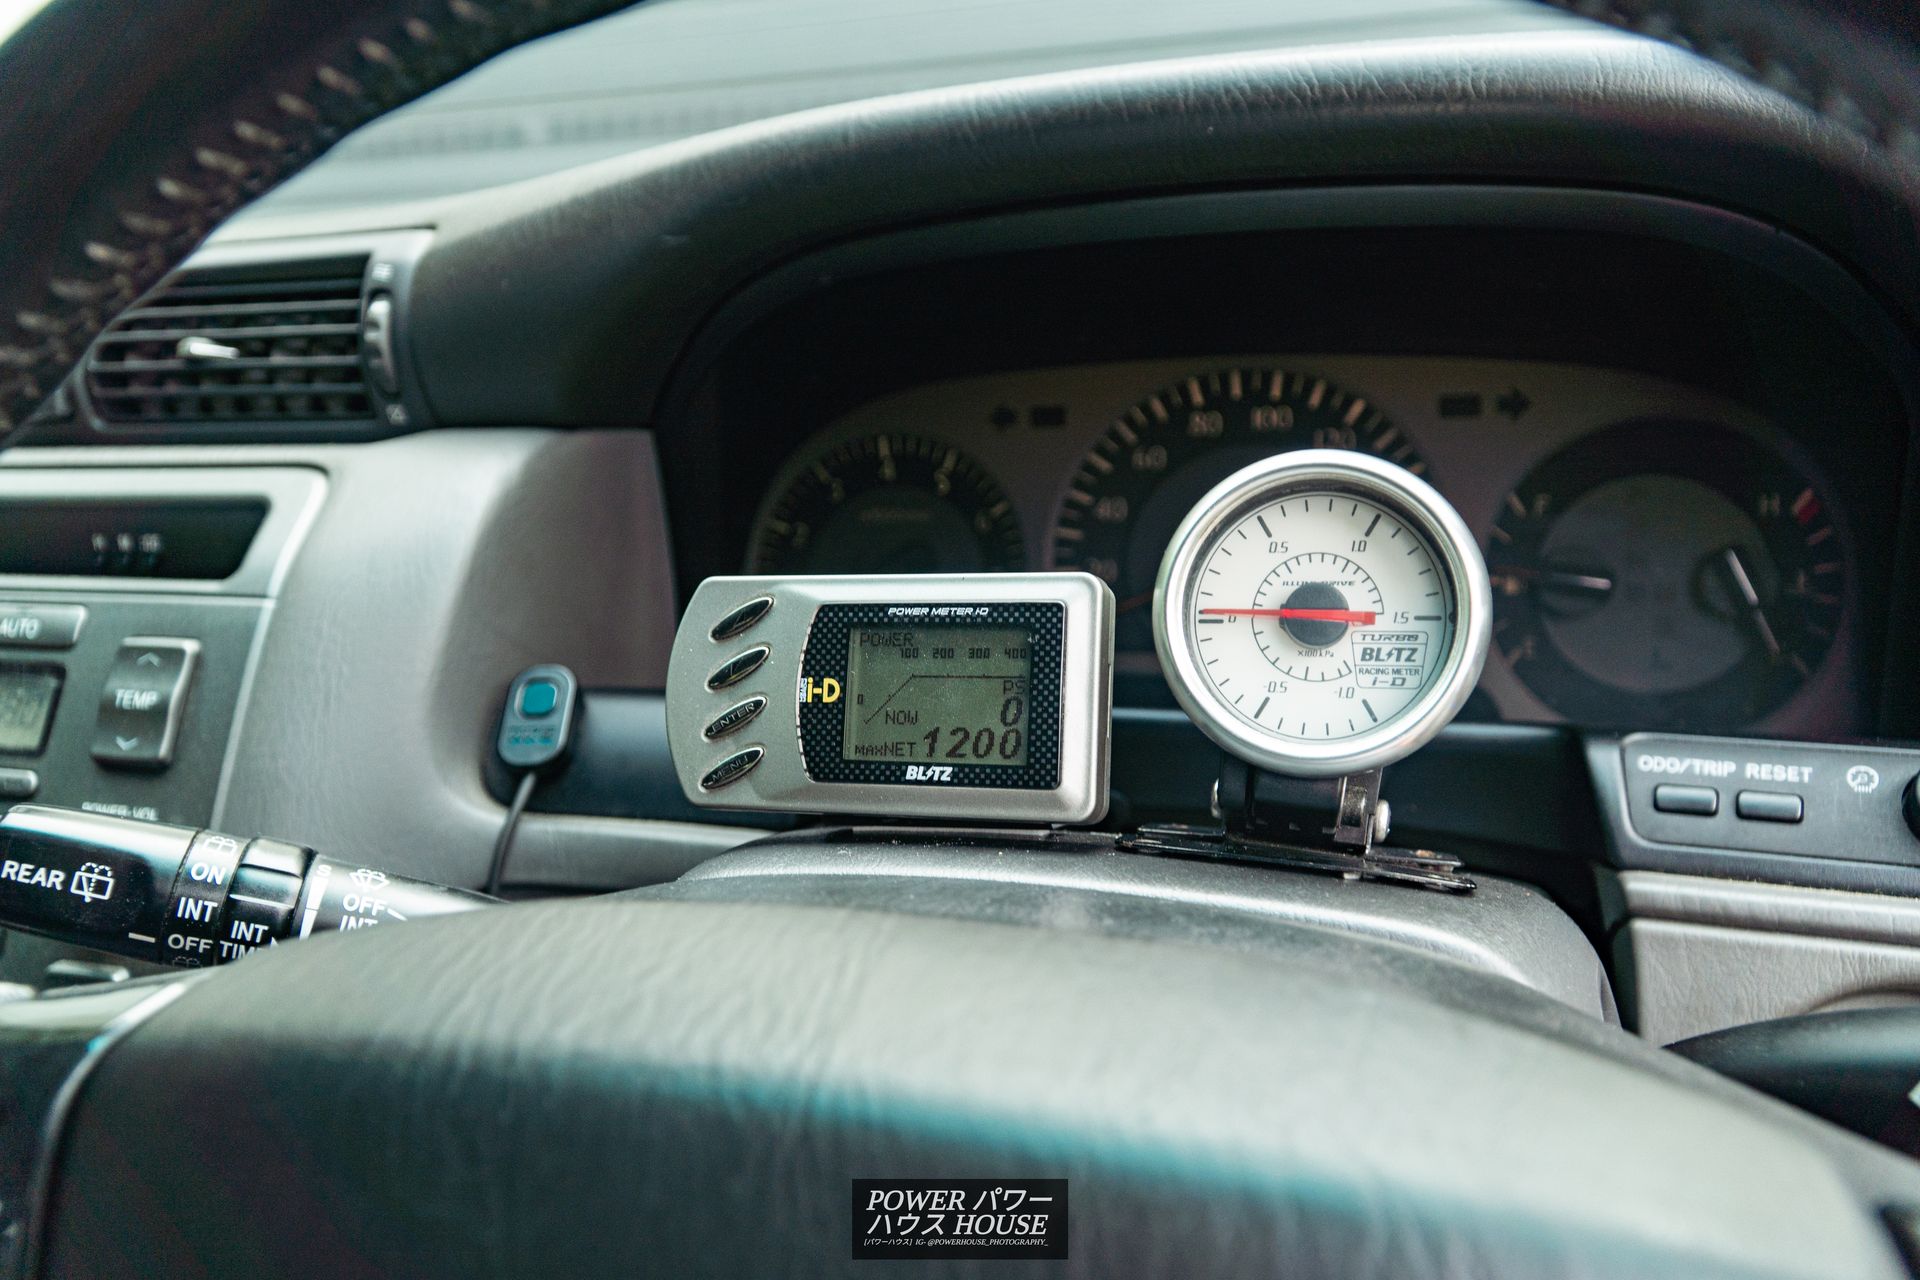
Super stoked with the finished product, and I personally think it looks very cool! It not only shows power output, but can also put the power output in a dyno graph, show speed, and measure 0-100 and 0-400m.
And although the Blitz + Blitz combo looks fantastic, to be completely honest, the Blitz boost gauge isn't my favourite design, that award goes for the A'PEXi EL1 line of gauges. Therefore, when one popped up for cheap on Trade Me, I pounced on it.
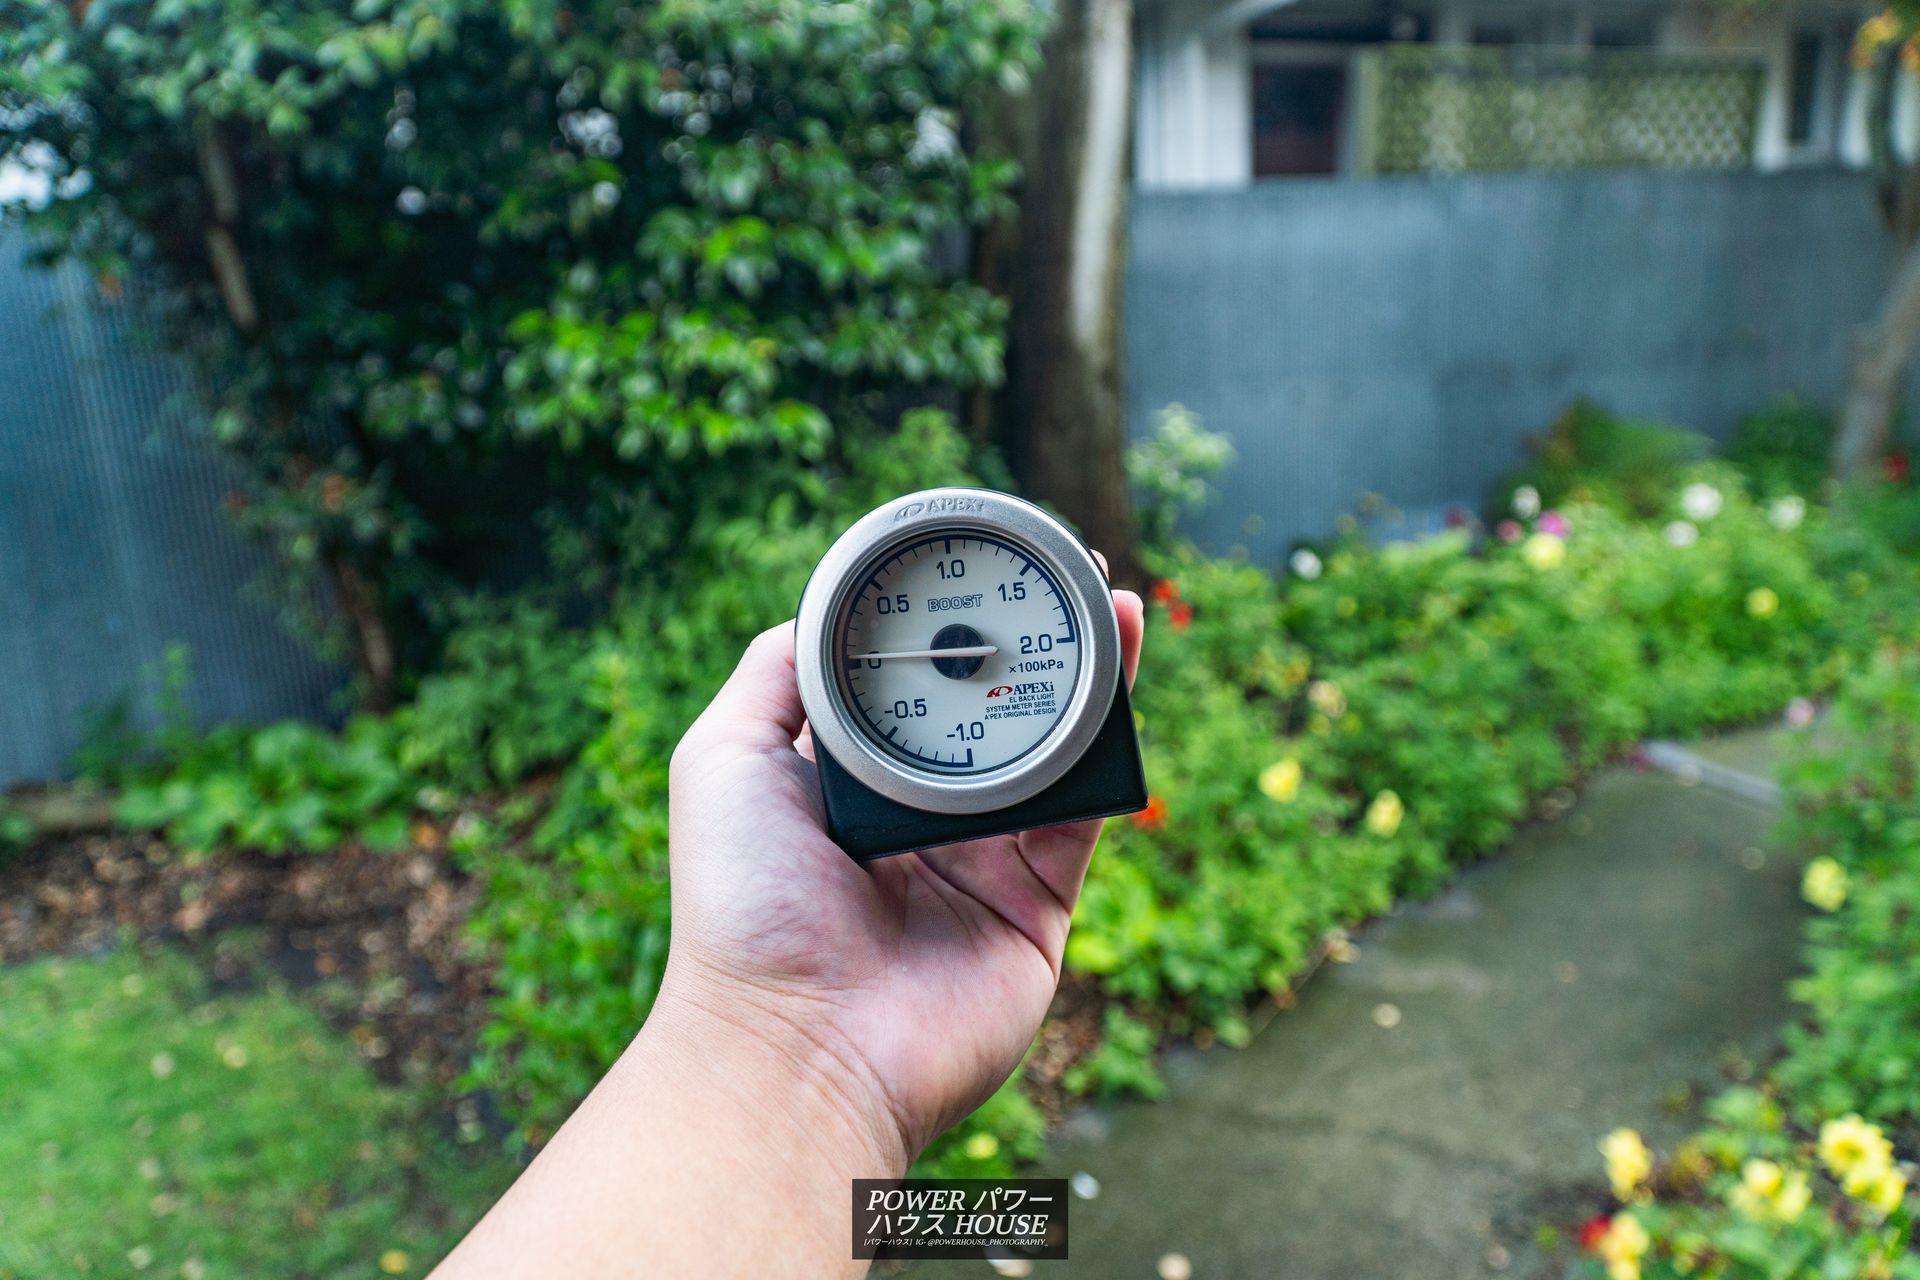
It's a A'PEXi EL1 white-face 60mm 2.0-bar mechanical boost gauge, and although it didn't come with the wiring harness, conveniently, it uses the same connector as the Blitz gauge, so the wiring was just plug and play.
And last but not least, to avoid the HKS CAMP2 monitor looking like a generic reverse-camera screen, I got a tiny HKS emblem 3D printed, which I then painted, and glued onto the screen. Makes the screen look a little less out of place in my option.
And so here is what the interior looks like... for now. Next up, I'm thinking maybe a new shift knob? Something like a Car Make T&E Vertex Monochrome V2 in white maybe?
Part 2: Upgrades
So, now not only have I installed period-correct parts, but I also got some stuff to make the car better! First of all... Bluetooth! Bluetooth is a must in the current day and age but firstly, I did not want to fork out for a Beatsonic and a 2-din head unit, and two, I wanted to keep the period-correct or OEM look of the cassette unit and cover instead of a modern screen. Therefore, I went down the route of researching cassette to Bluetooth adaptors.
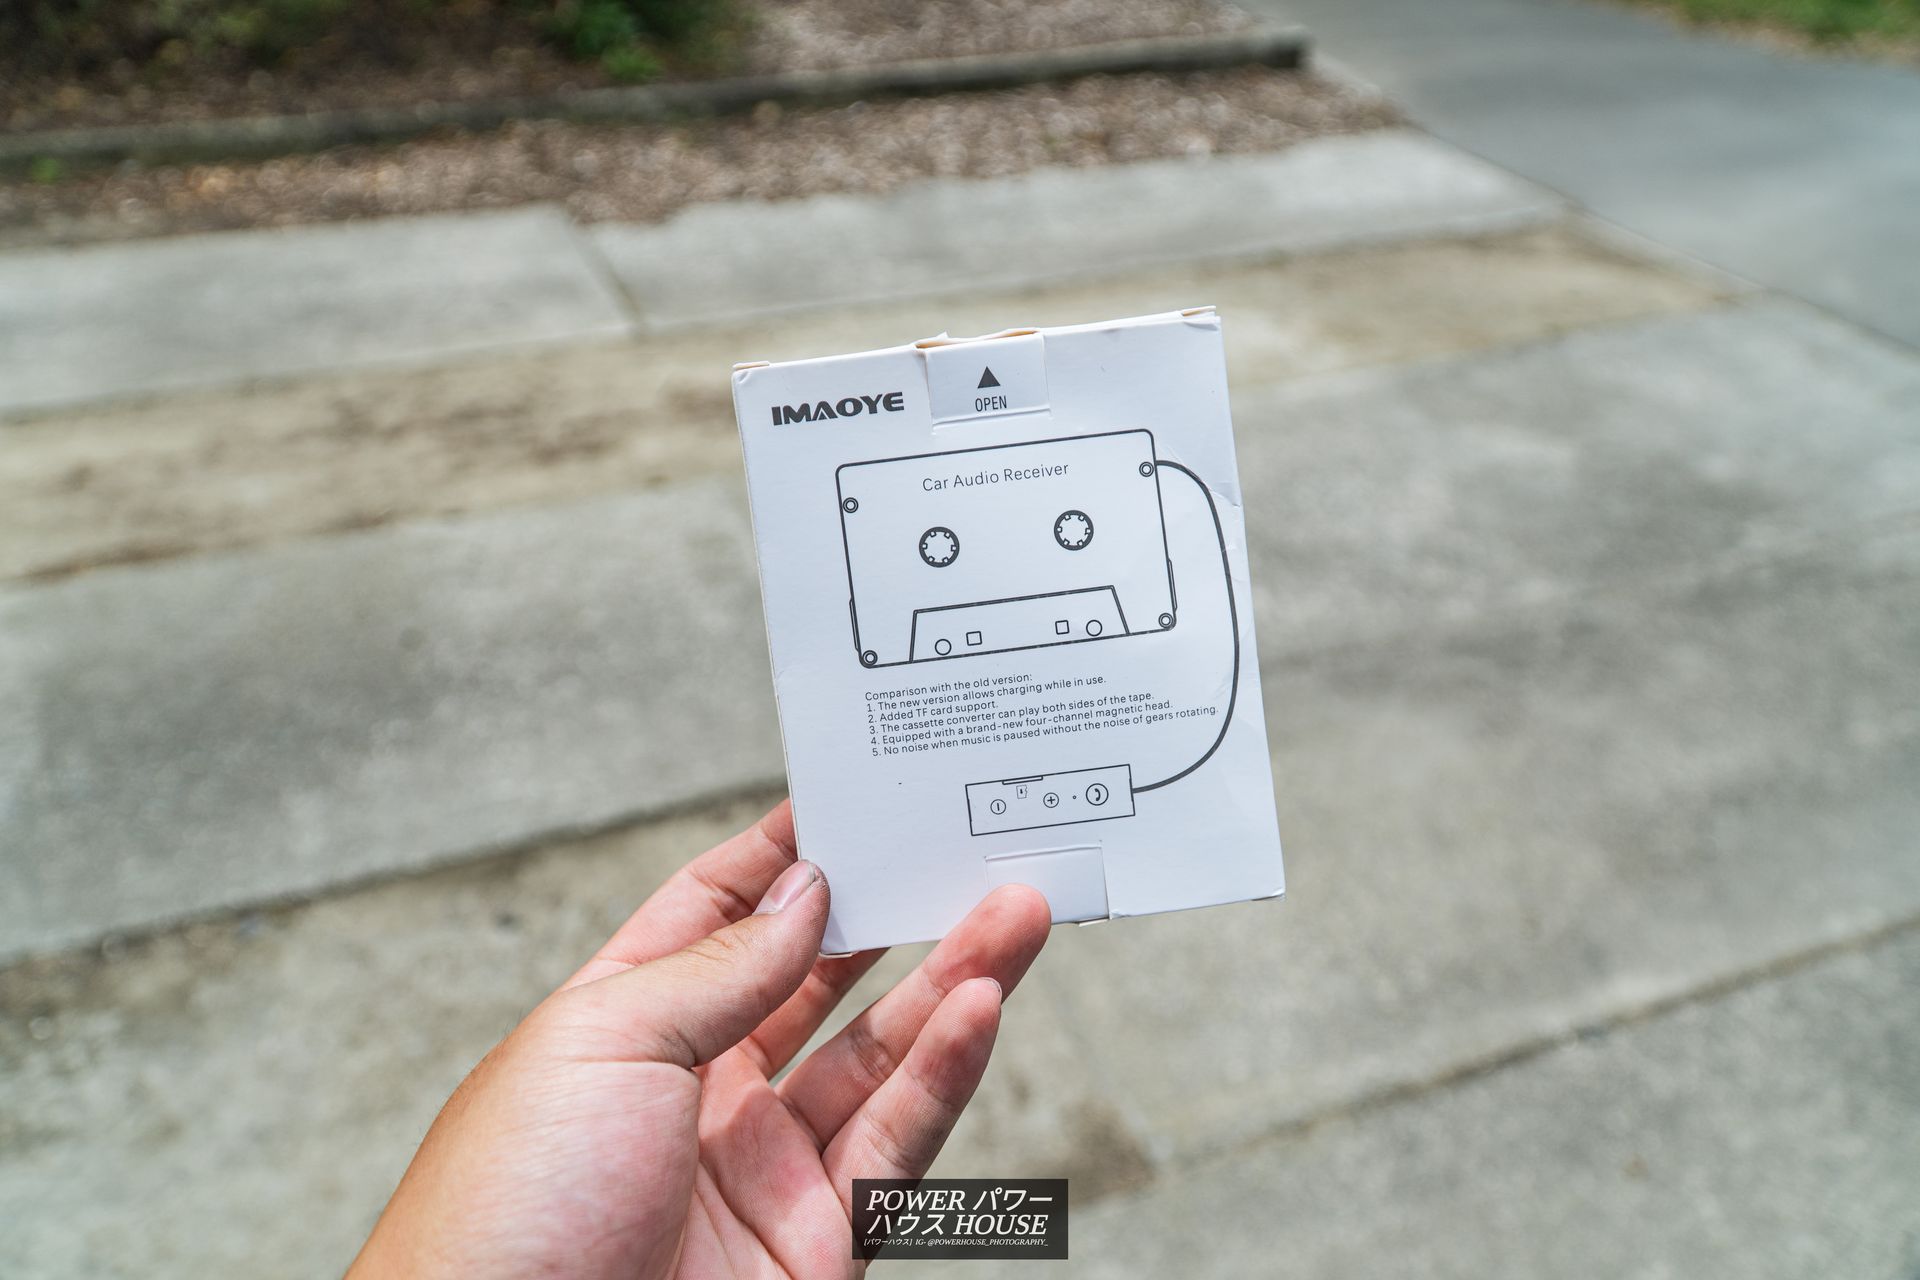
I got this, a Imoaye BT5.1 cassette to Bluetooth adaptor. Being BT5.1, it allows for charging while still installed in the car, meaning that I never have to remove it to charge. Furthermore, the BT5.1 means that the charging and buttons are all on a little wire, meaning that it is easy to pair and looks very clean in the interior.
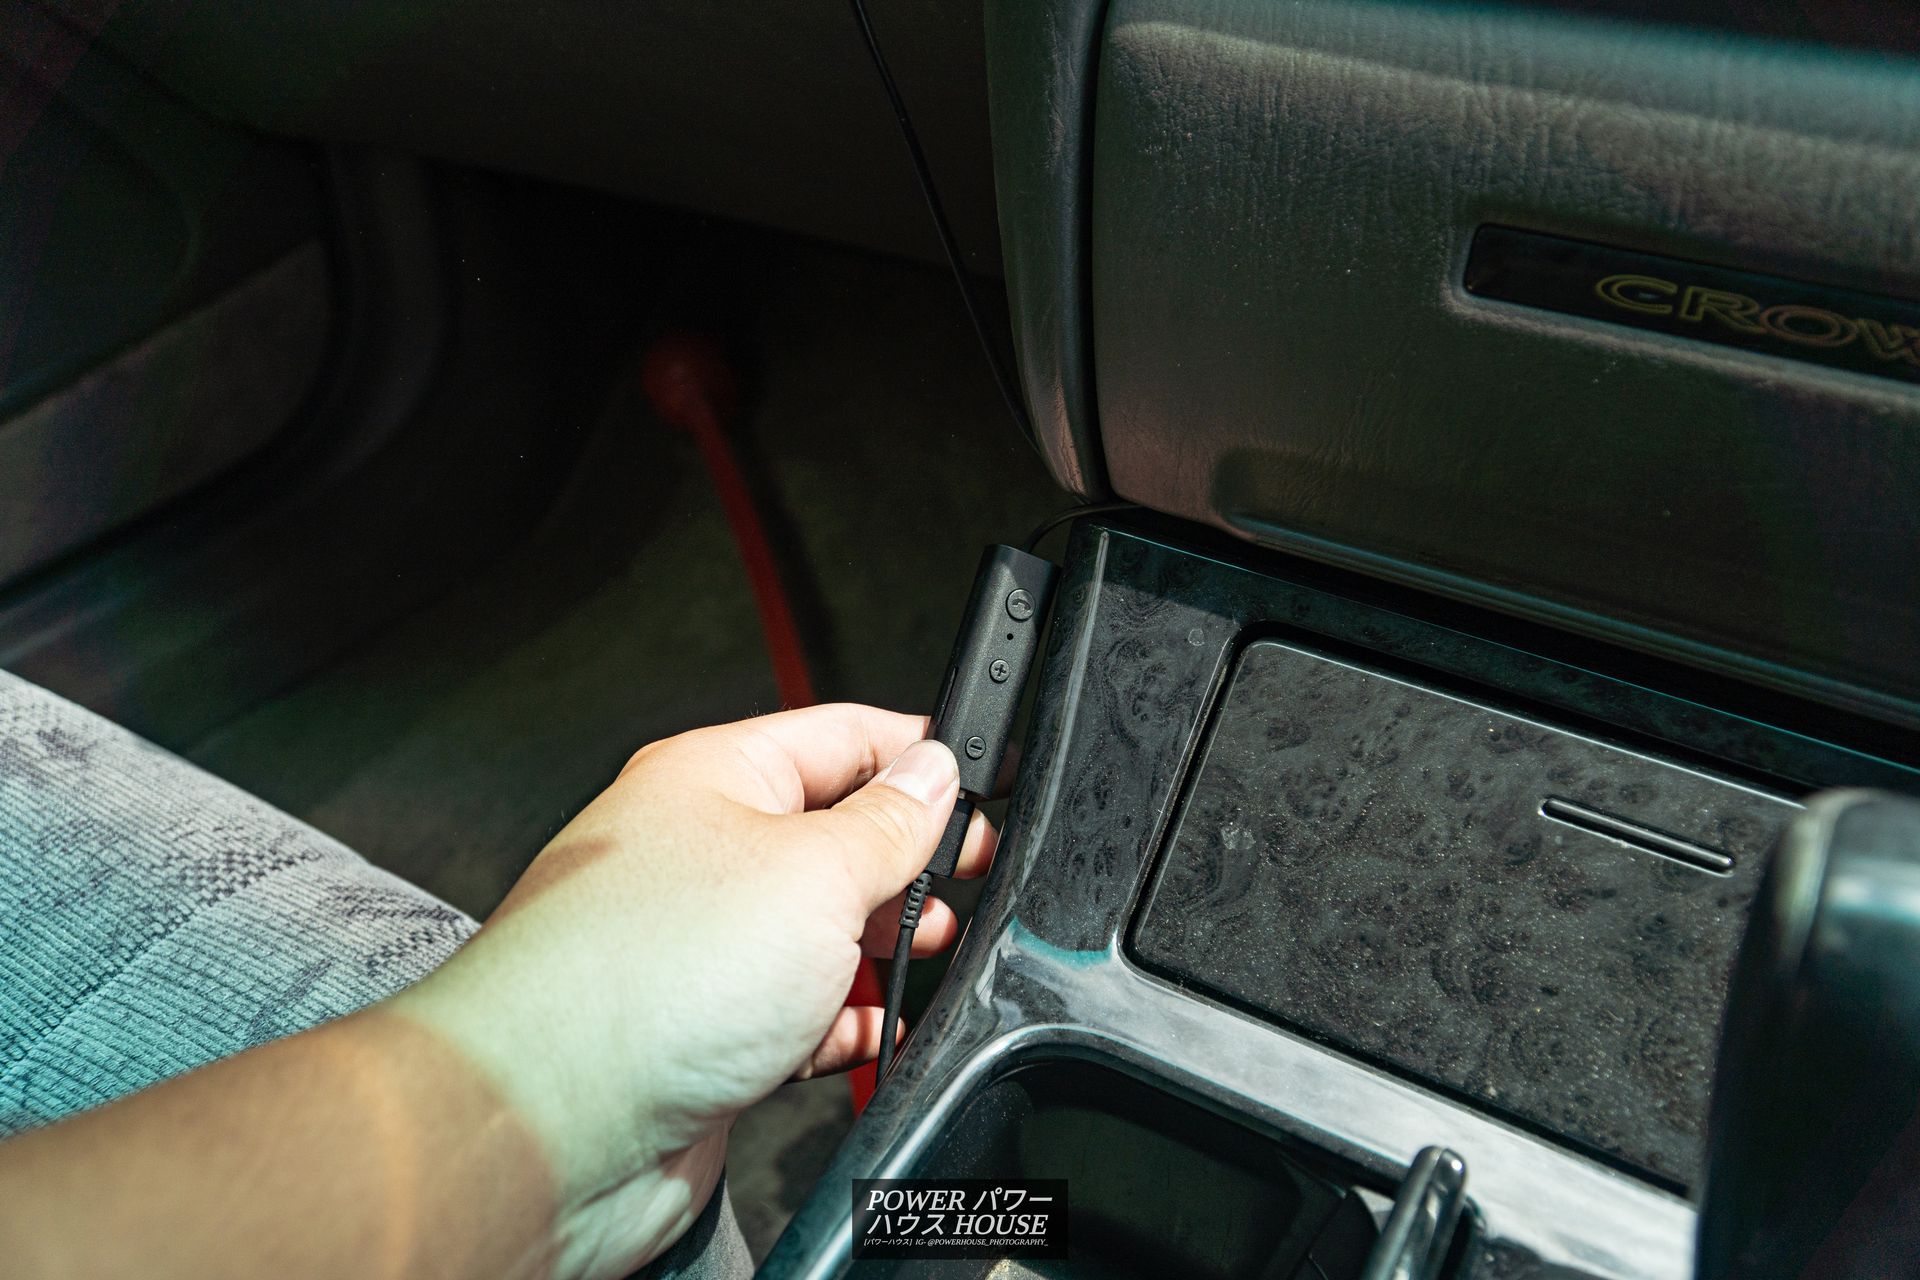
Being completely honest, it sounds pretty good! The bass is very good, however, the highs sound a bit 'cheap'. Also being based off of a cassette, there is a background hiss sound and clicking, however, that is quickly drowned out by some music. Overall, not a bad option for $30 NZD!!
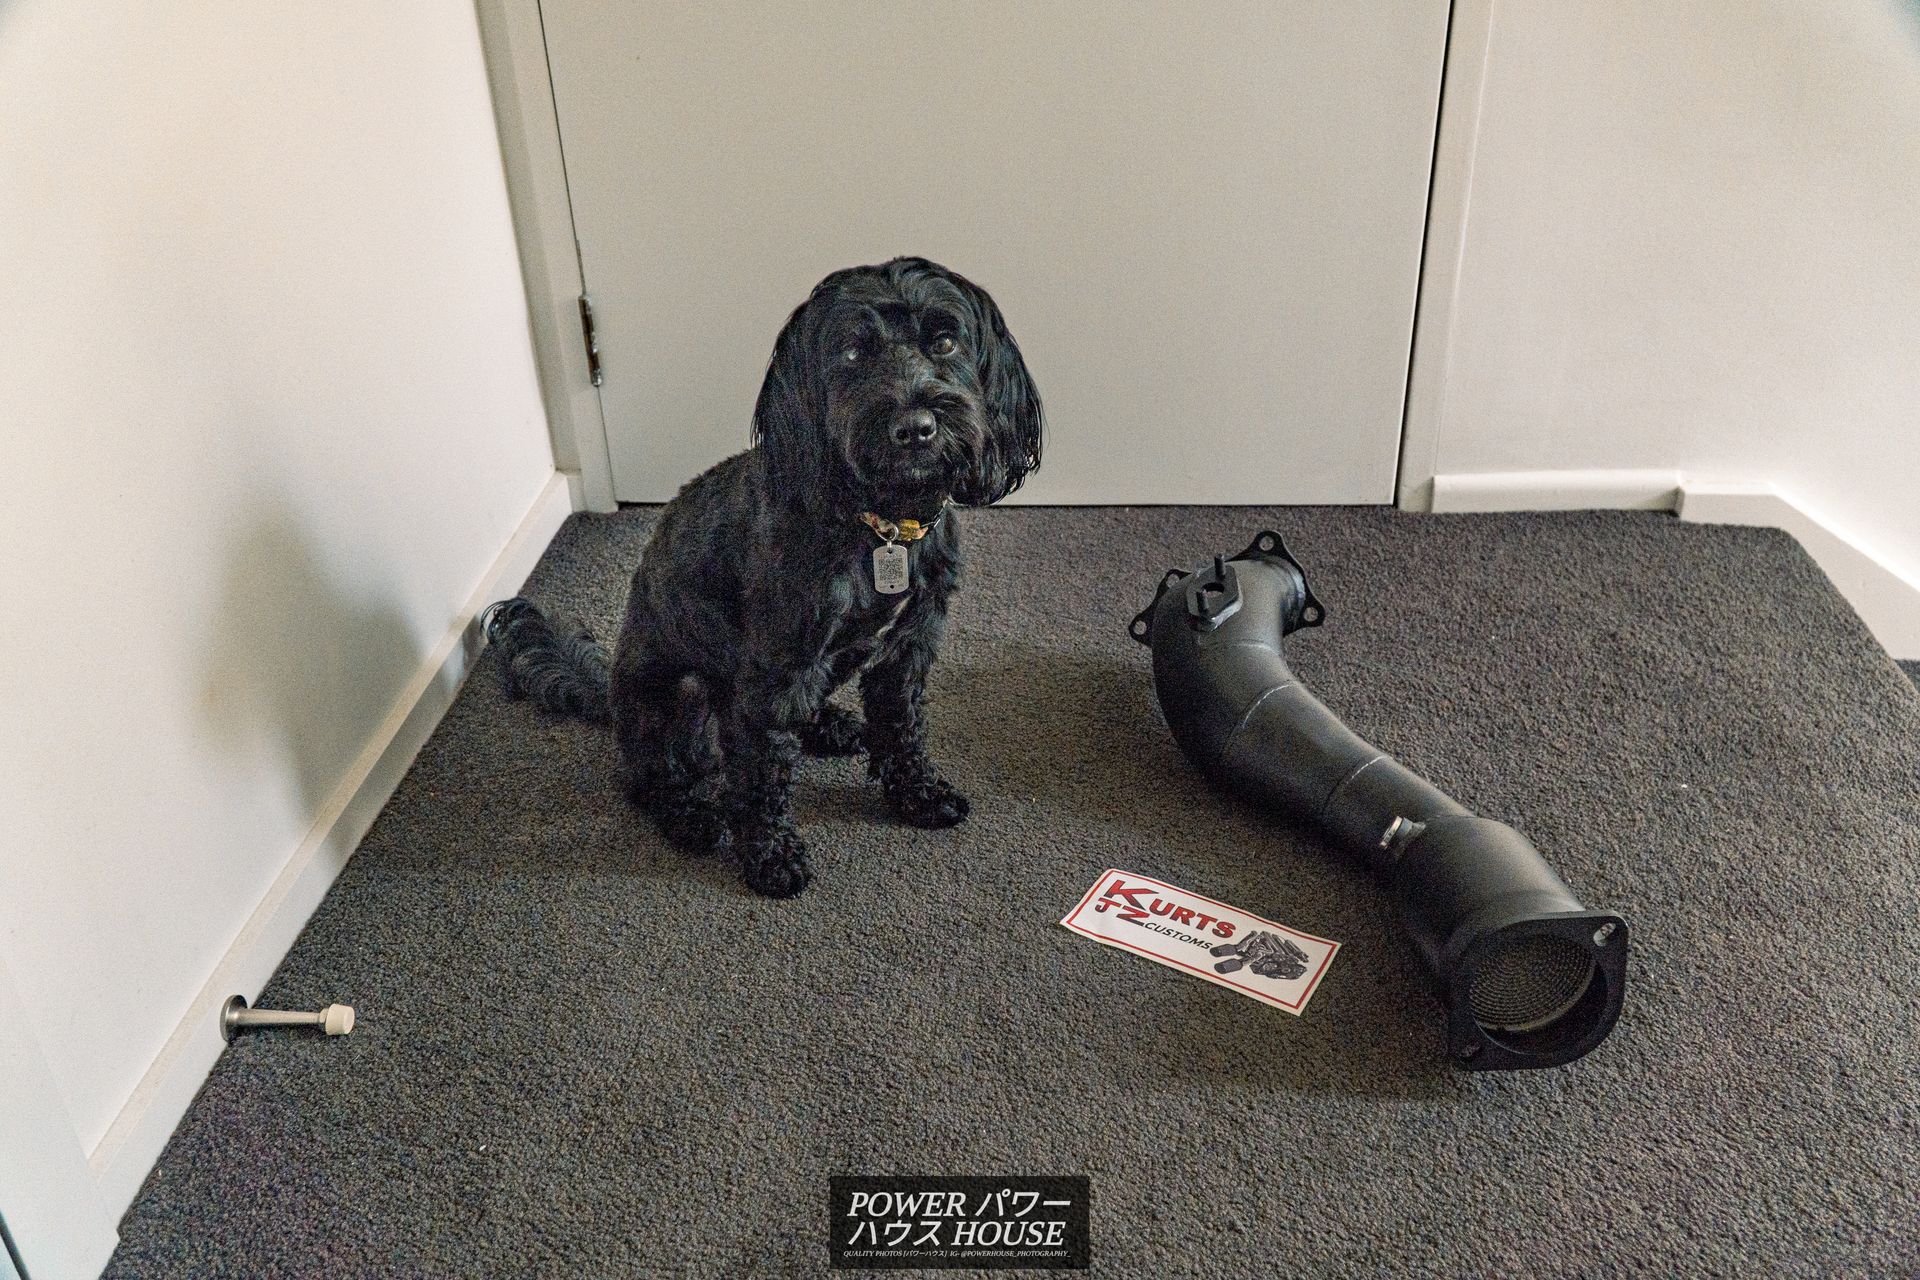
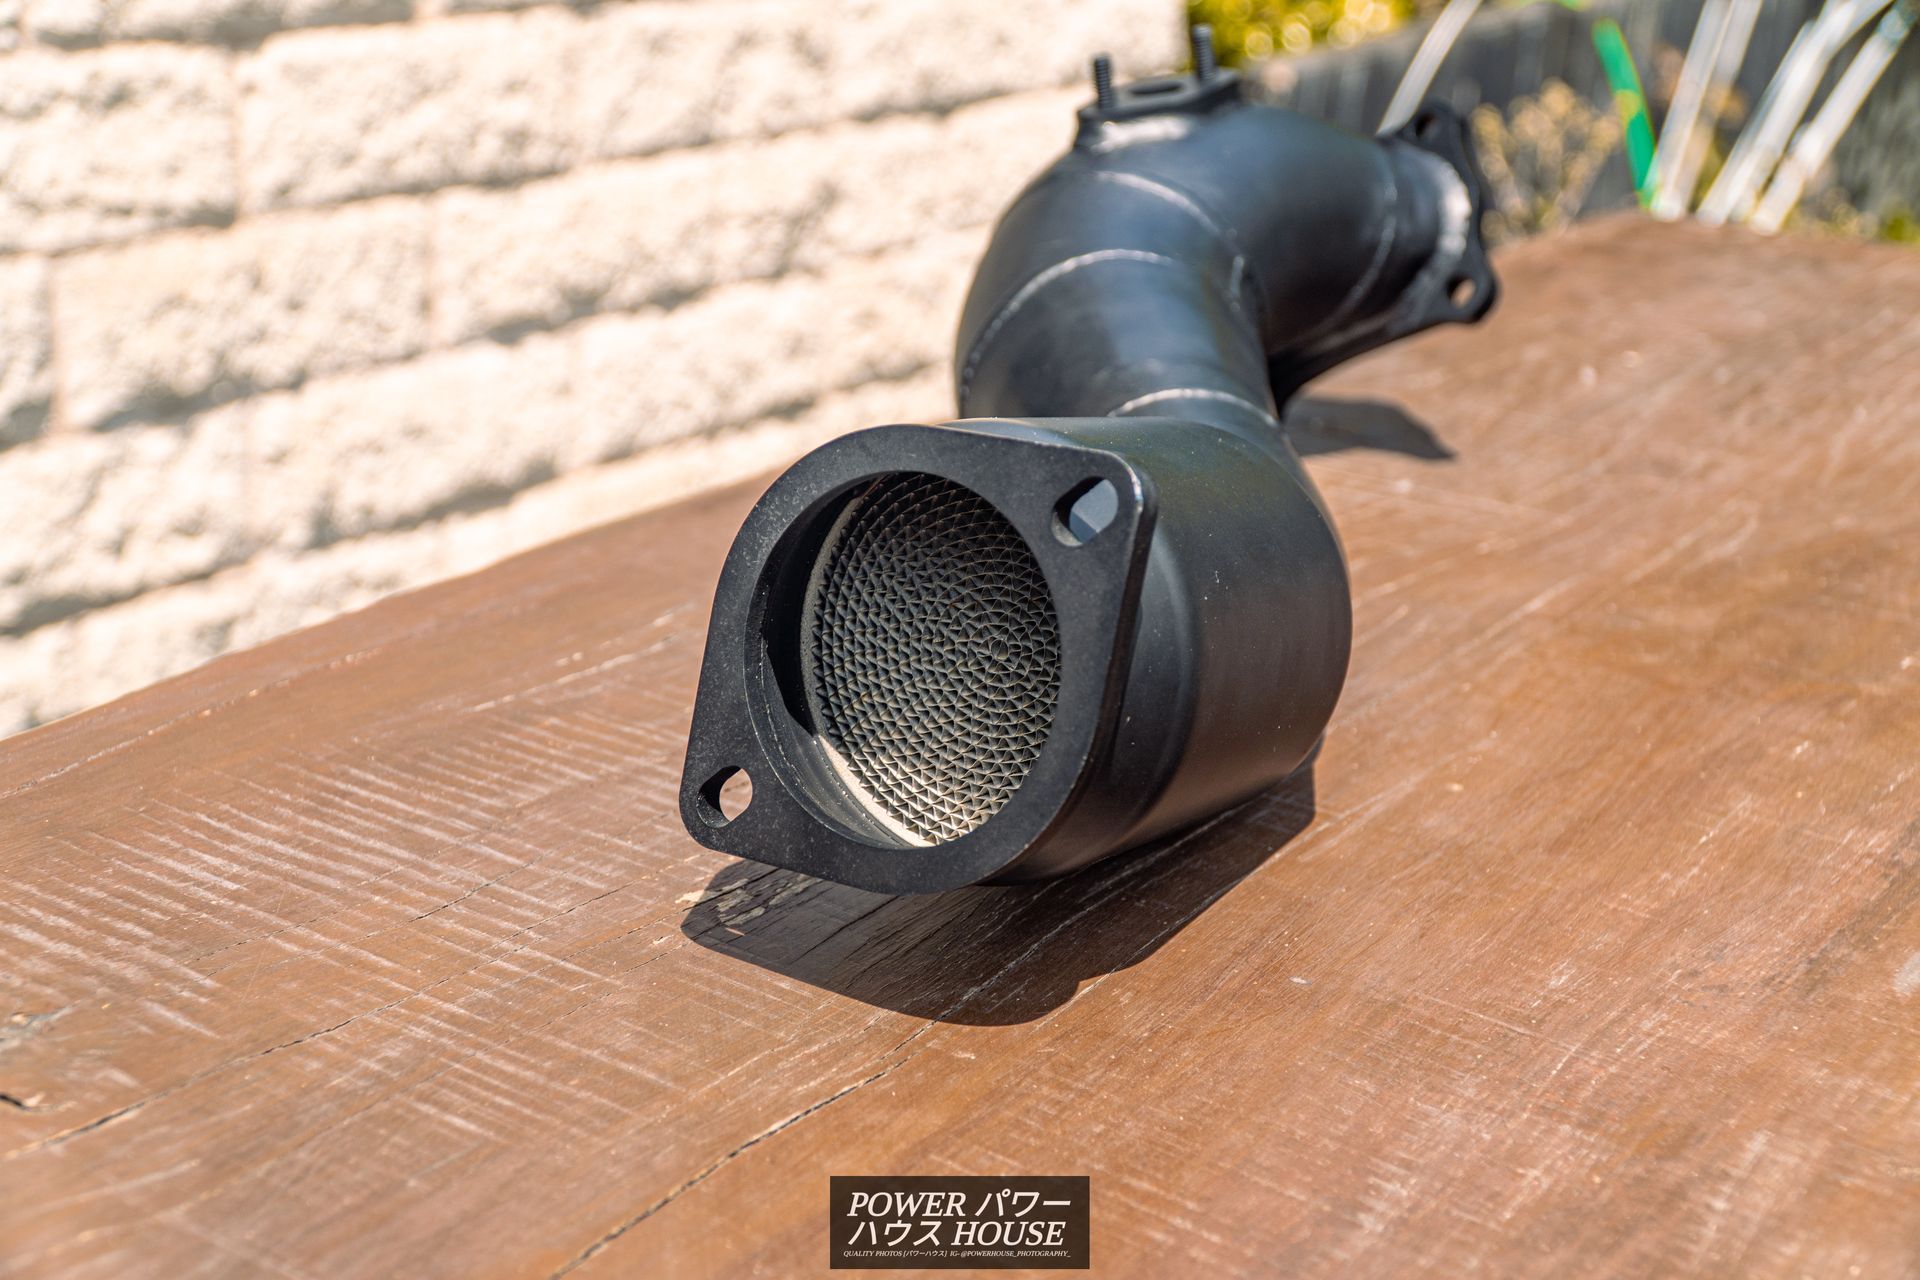
Next up, after promising the installation of my Kurts JZ Customs 4-inch catted down-pipe since 2023, finally I got it installed by Jacob at Purged Customs.
Equipped with a 100cel high-flow cat, and being constructed in mild-steel, this piece is 100% legal, makes the Crown sound a little throatier, and when paired with the new exhaust, makes the car make a little more boost.
Yes, you heard that right, new exhaust... well, sort of. 1J VVTi's suffer from boost spikes with a Kurts dump and a 3-inch exhaust as the exhaust flows too well. This will cause the turbo to fail prematurely, but more importantly, cause the car to hit boost cut. Unfortunately, due to my age and insurance, I can't install a boost controller to help with the boost. Therefore, it looked like a new exhaust was off the books.
However, the Tom's muffler just wasn't cutting it sound wise, and I really wanted to make just a couple more pounds of boost. Therefore, after a recommendation from friend and fellow Crown owner Mike, I decided to get my mid-pipe and front-pipe modified.
Purged Customs got rid of the two centre mufflers, custom making most of the front-pipe and mid-pipe in stainless-steel, meaning the exhaust is a straight 2.5-inch from the cat to the Tom's muffler. The result, a nice, deep sound, thats not too loud, and has a bit of that iconic 1JZ rasp - the perfect volume and tone. Furthermore, with the help of the Kurts down-pipe and the increased flow from deleting the mufflers, the car now makes 14PSi give or take, making the car feel much more responsive and quick. I could not be happier with the end results!
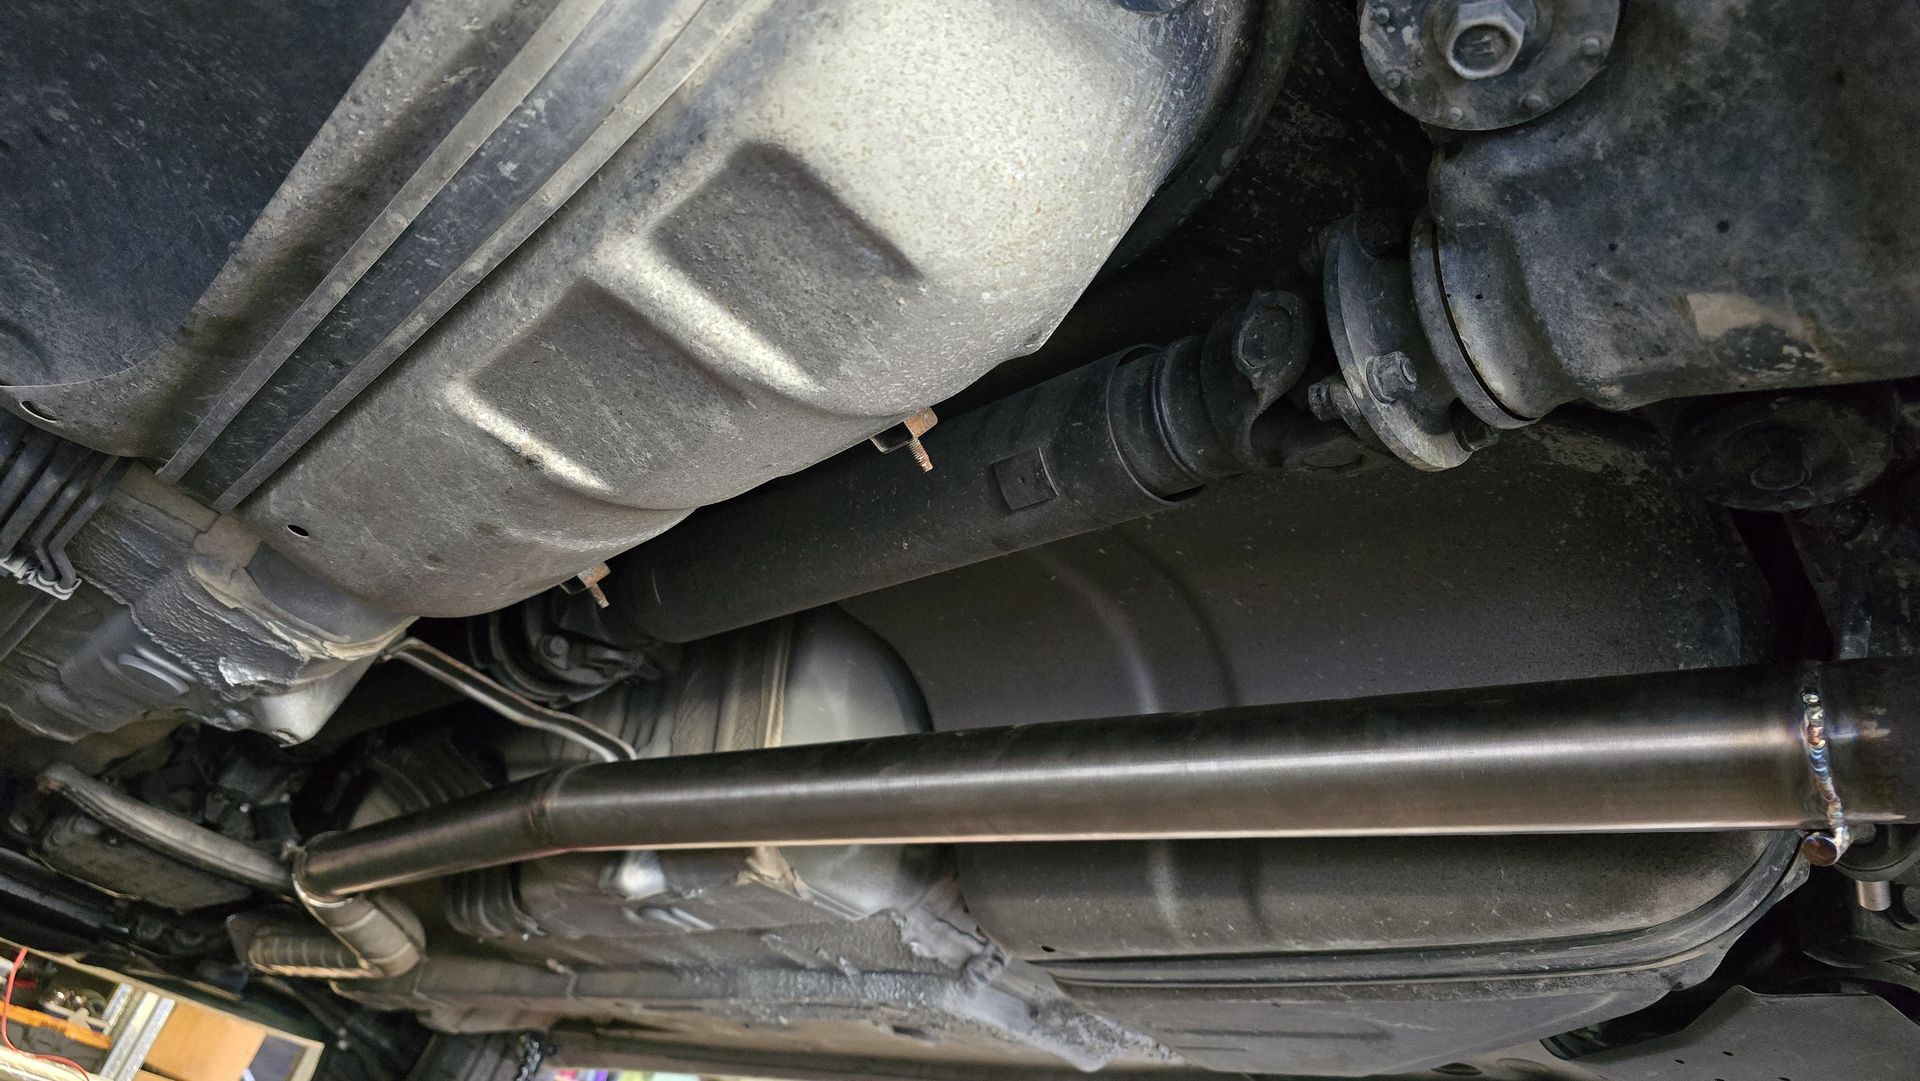 Image from Jacob Gaskins - Fabricator
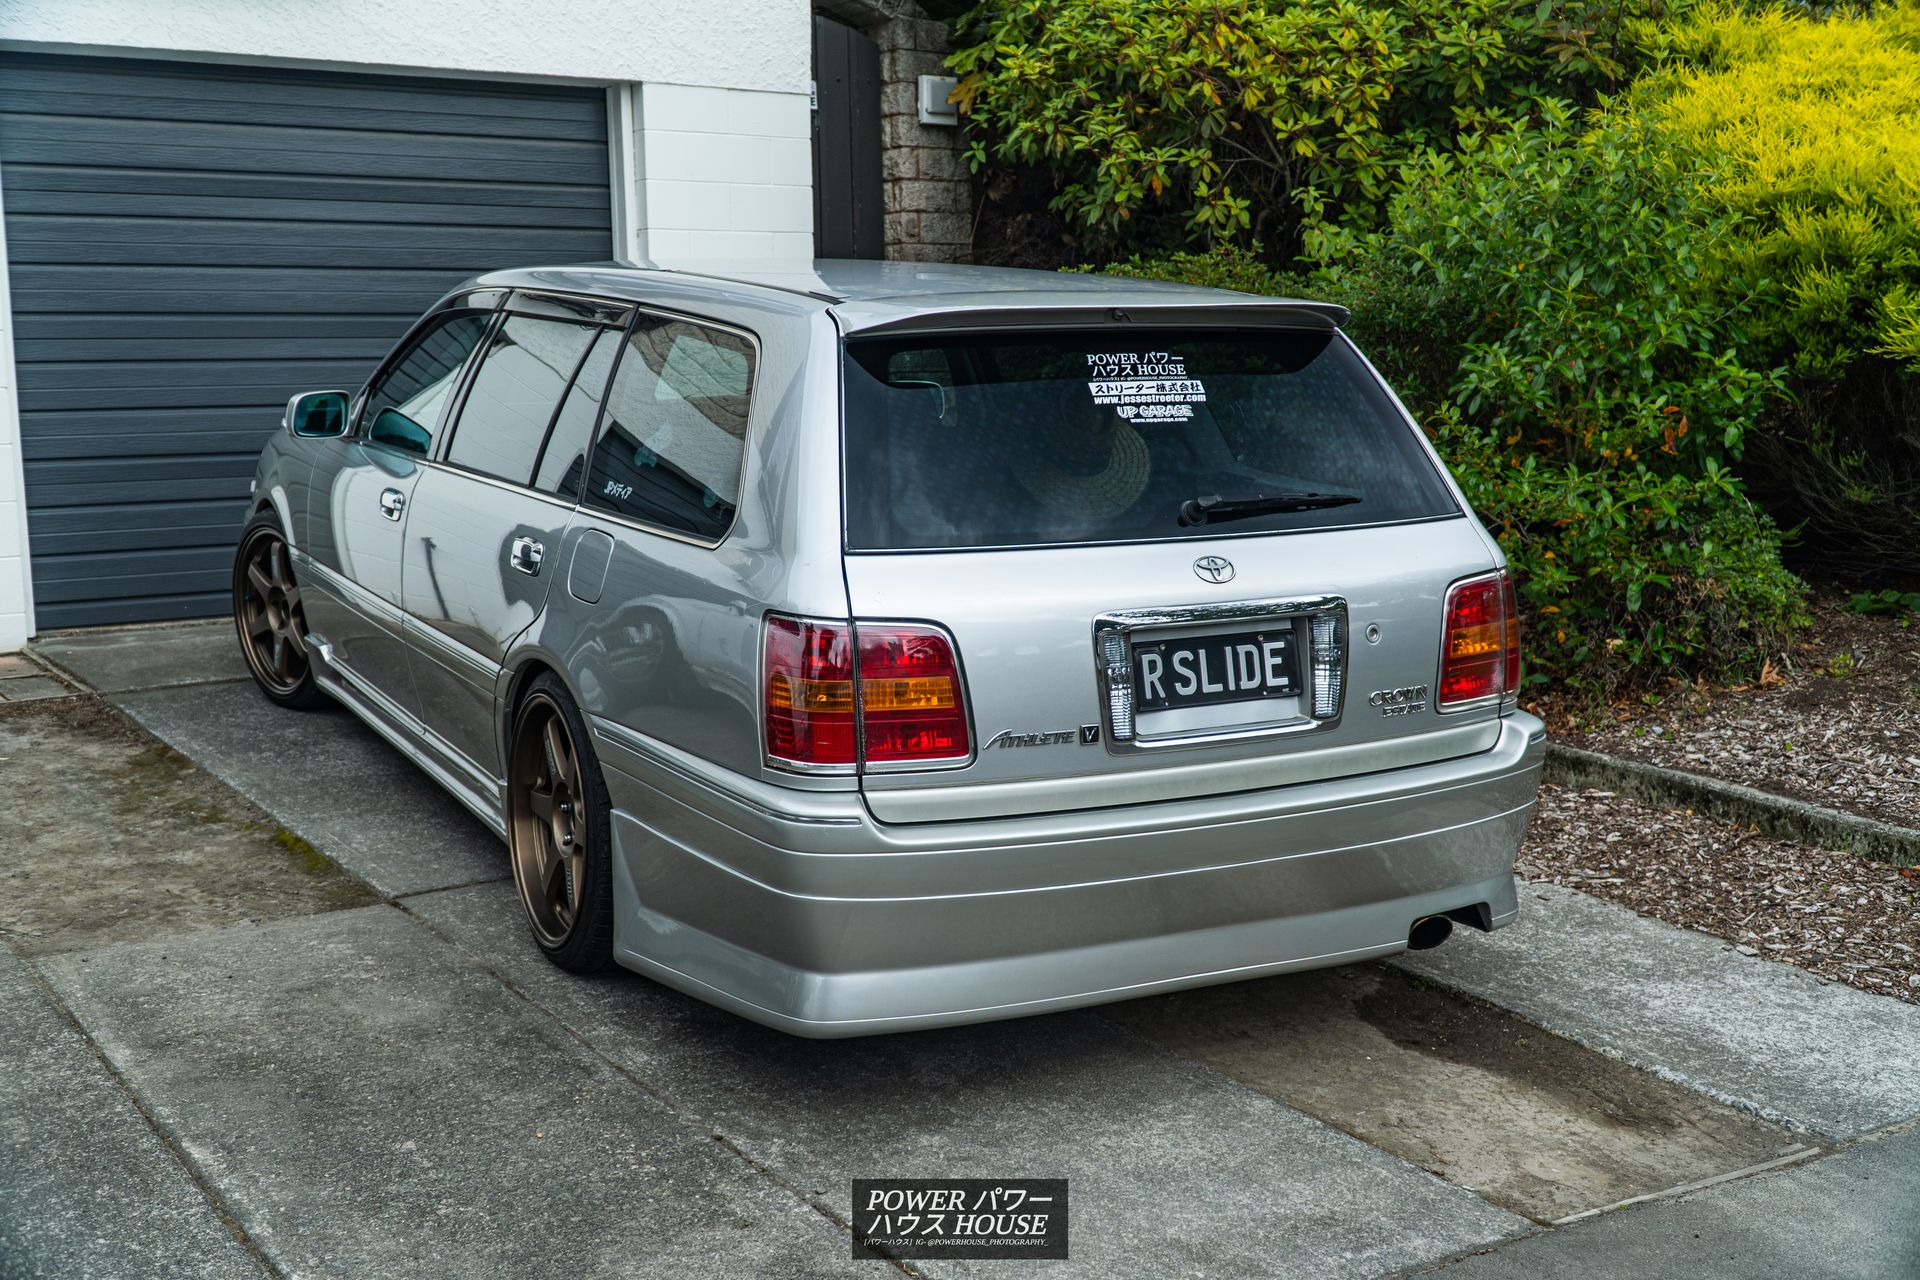
Now that the car was a little more up to date, features wise, and containing a little more power, it was time for the looks to have a change as well. For this, right before the beloved black on silver plates were discontinued by the NZTA, I copped a set for my 'R SLIDE' plates.
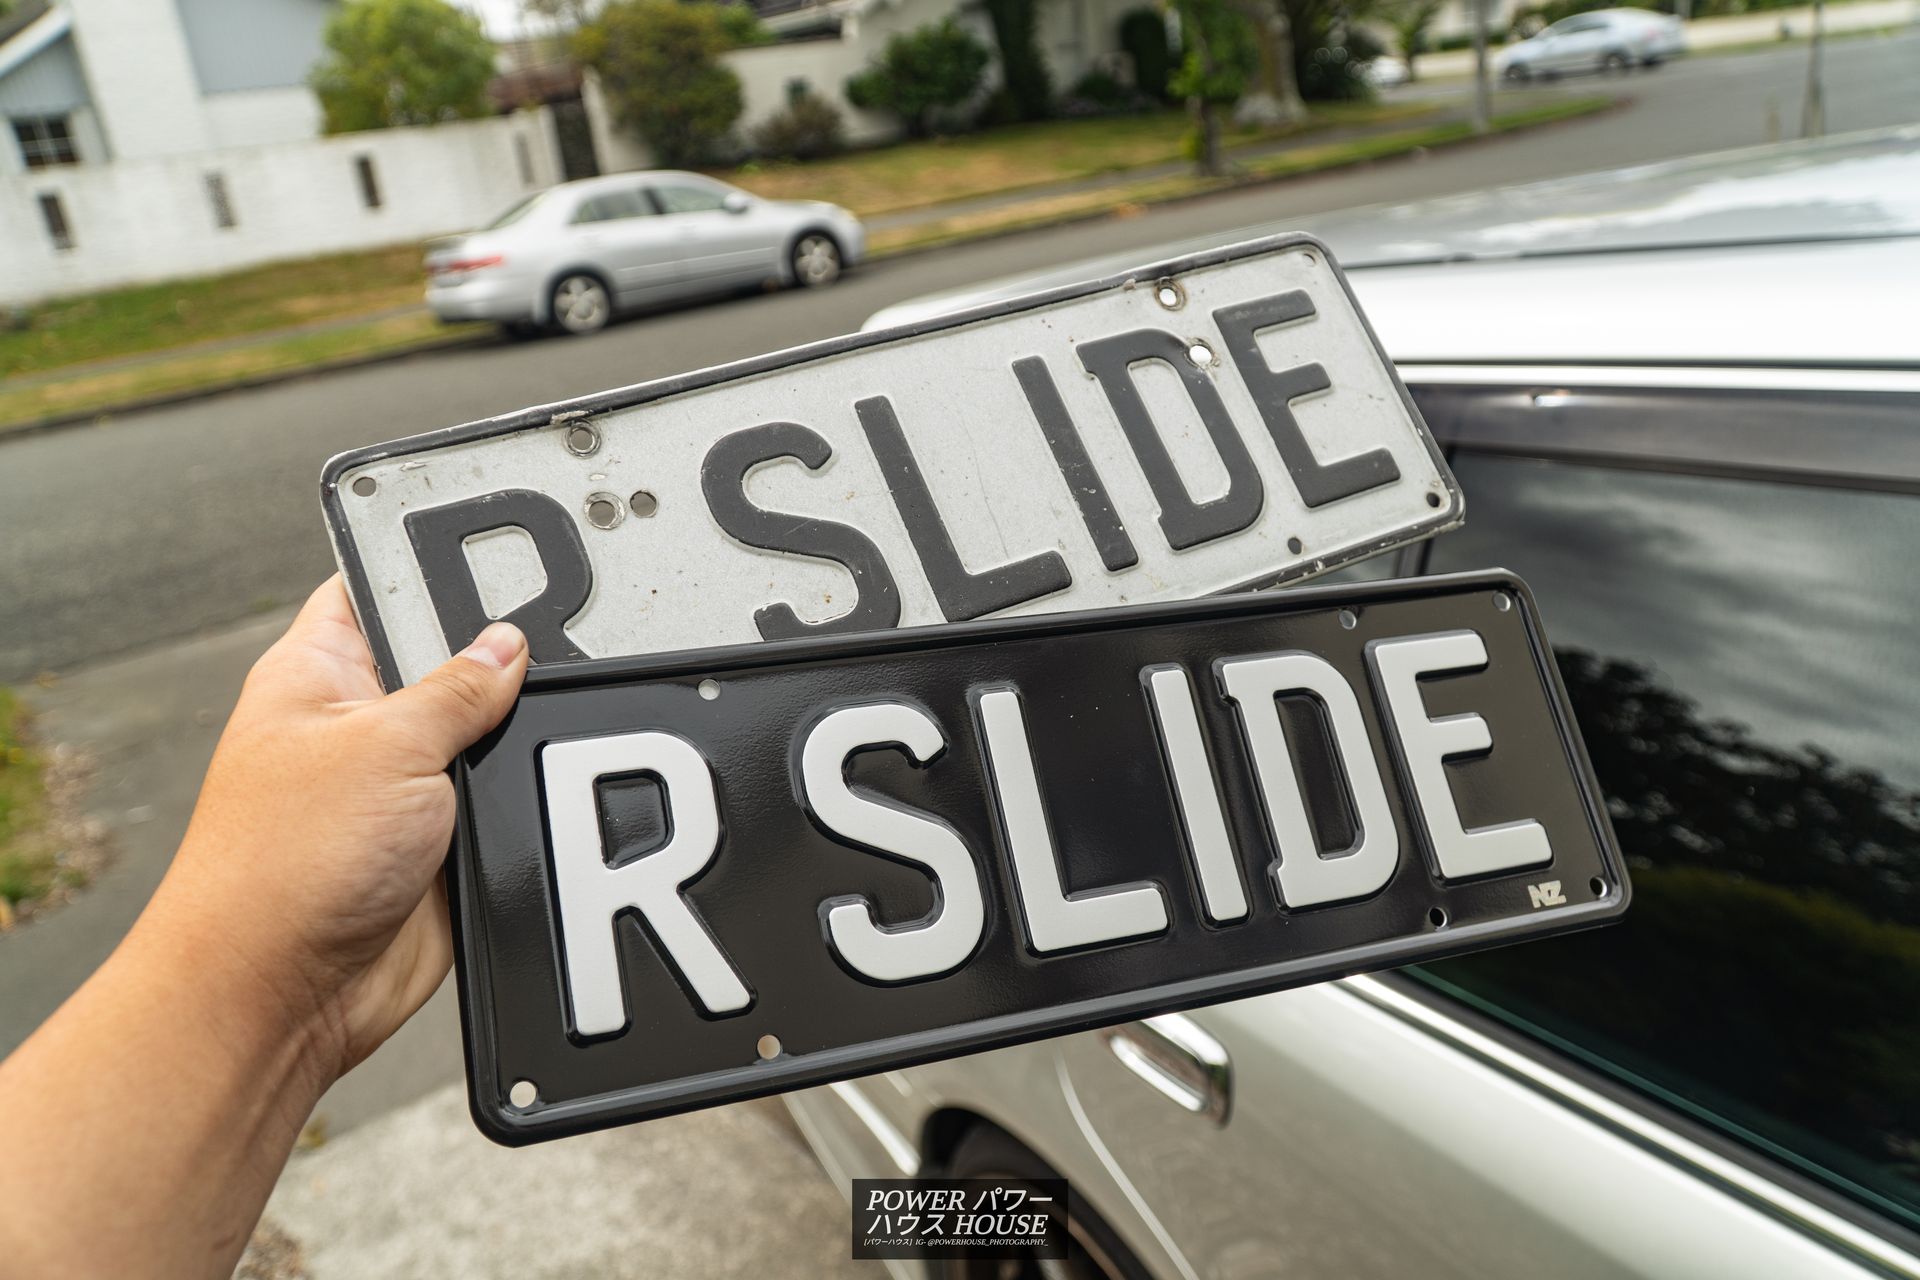
Looks much better now!
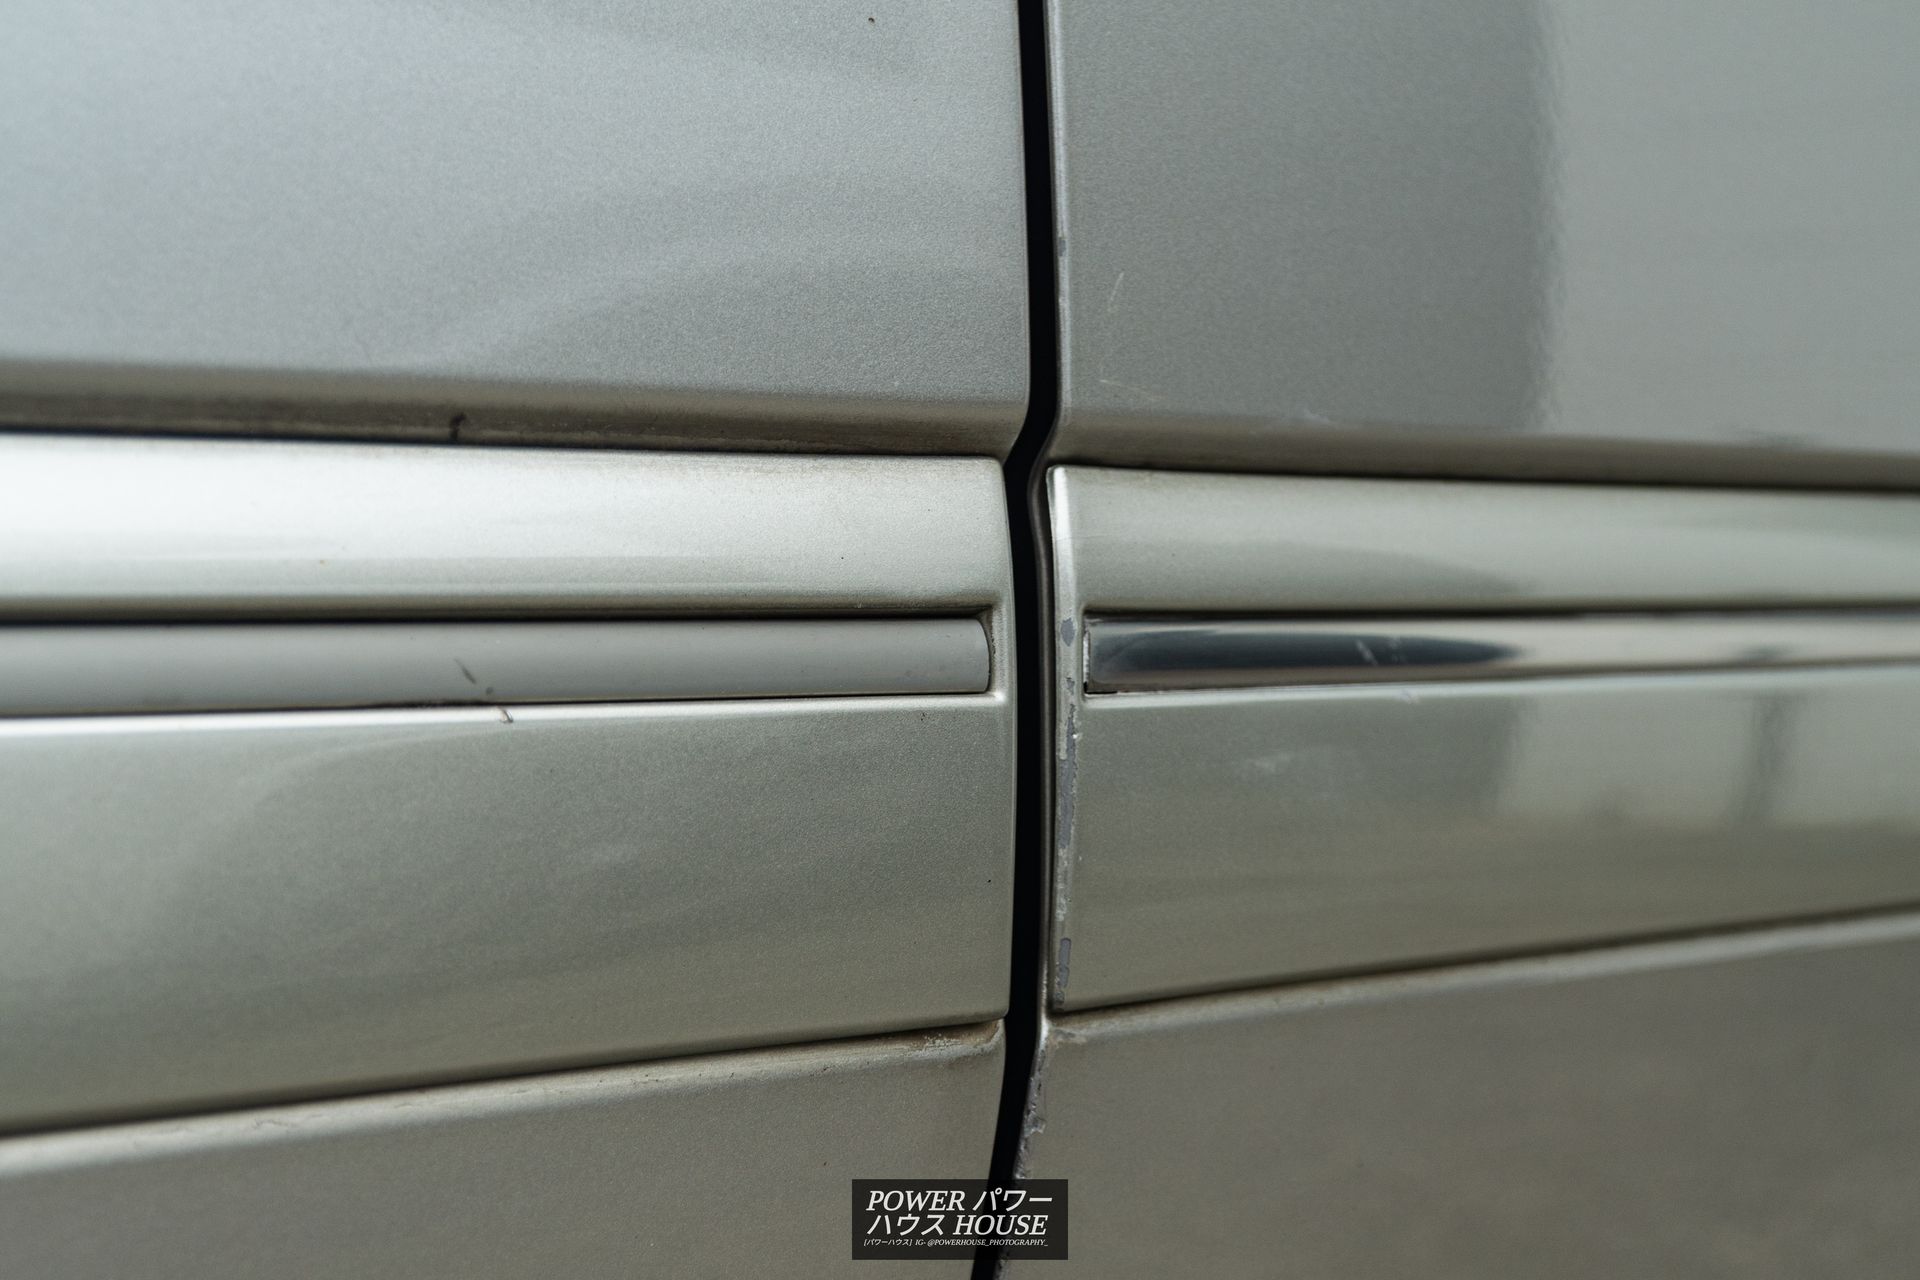
Now, not really an upgrade, but just maintenance. The 'chrome' trims on the JZS171 are notorious for becoming... well, not chrome. I in fact did not even know that they were supposed to be chrome, and instead thought they were supposed to silver until I saw a Facebook post of someone polishing them up. With this newly gained information, I took some metal polish to the trims, getting them back to a slightly shinier state.
As for maintenance, with a long 5 hour drive down to Cromwell in March planned for 2025 Toyota Fest, I wanted to make sure the Crown would, mechanically, be in tip top shape. I checked the lower ball-joints, and they appeared to be mint. And so, the only other thing I had on the list was engine oil as 12 months was just around the corner since the last service. For this, I got some more Penrite HPR10 10W-50 full synthetic oil along with a Blitz Racing oil filter.
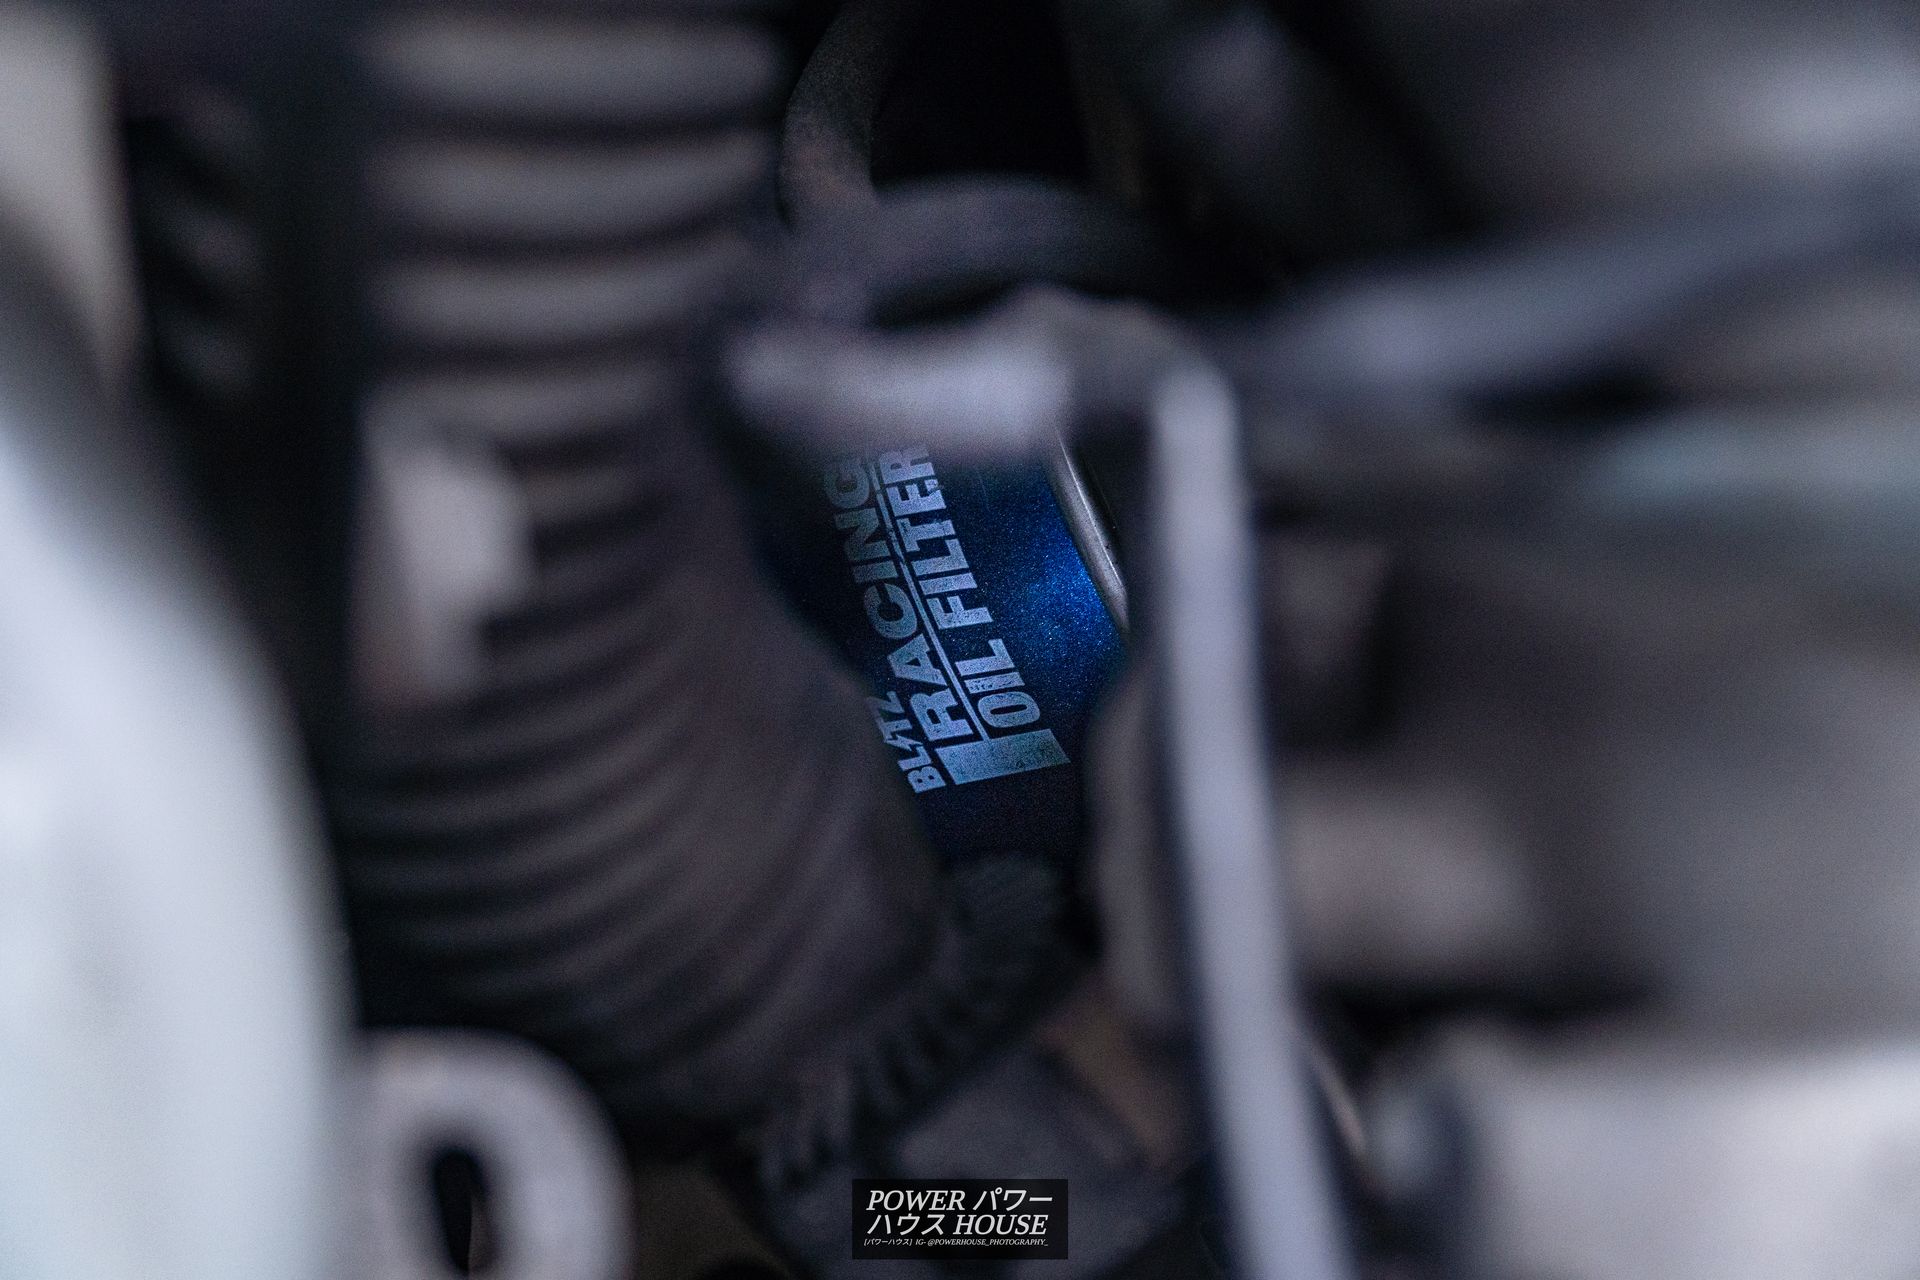
With the oil filter tool I bought last time, the oil change was a breeze!
Part 3: Dramas
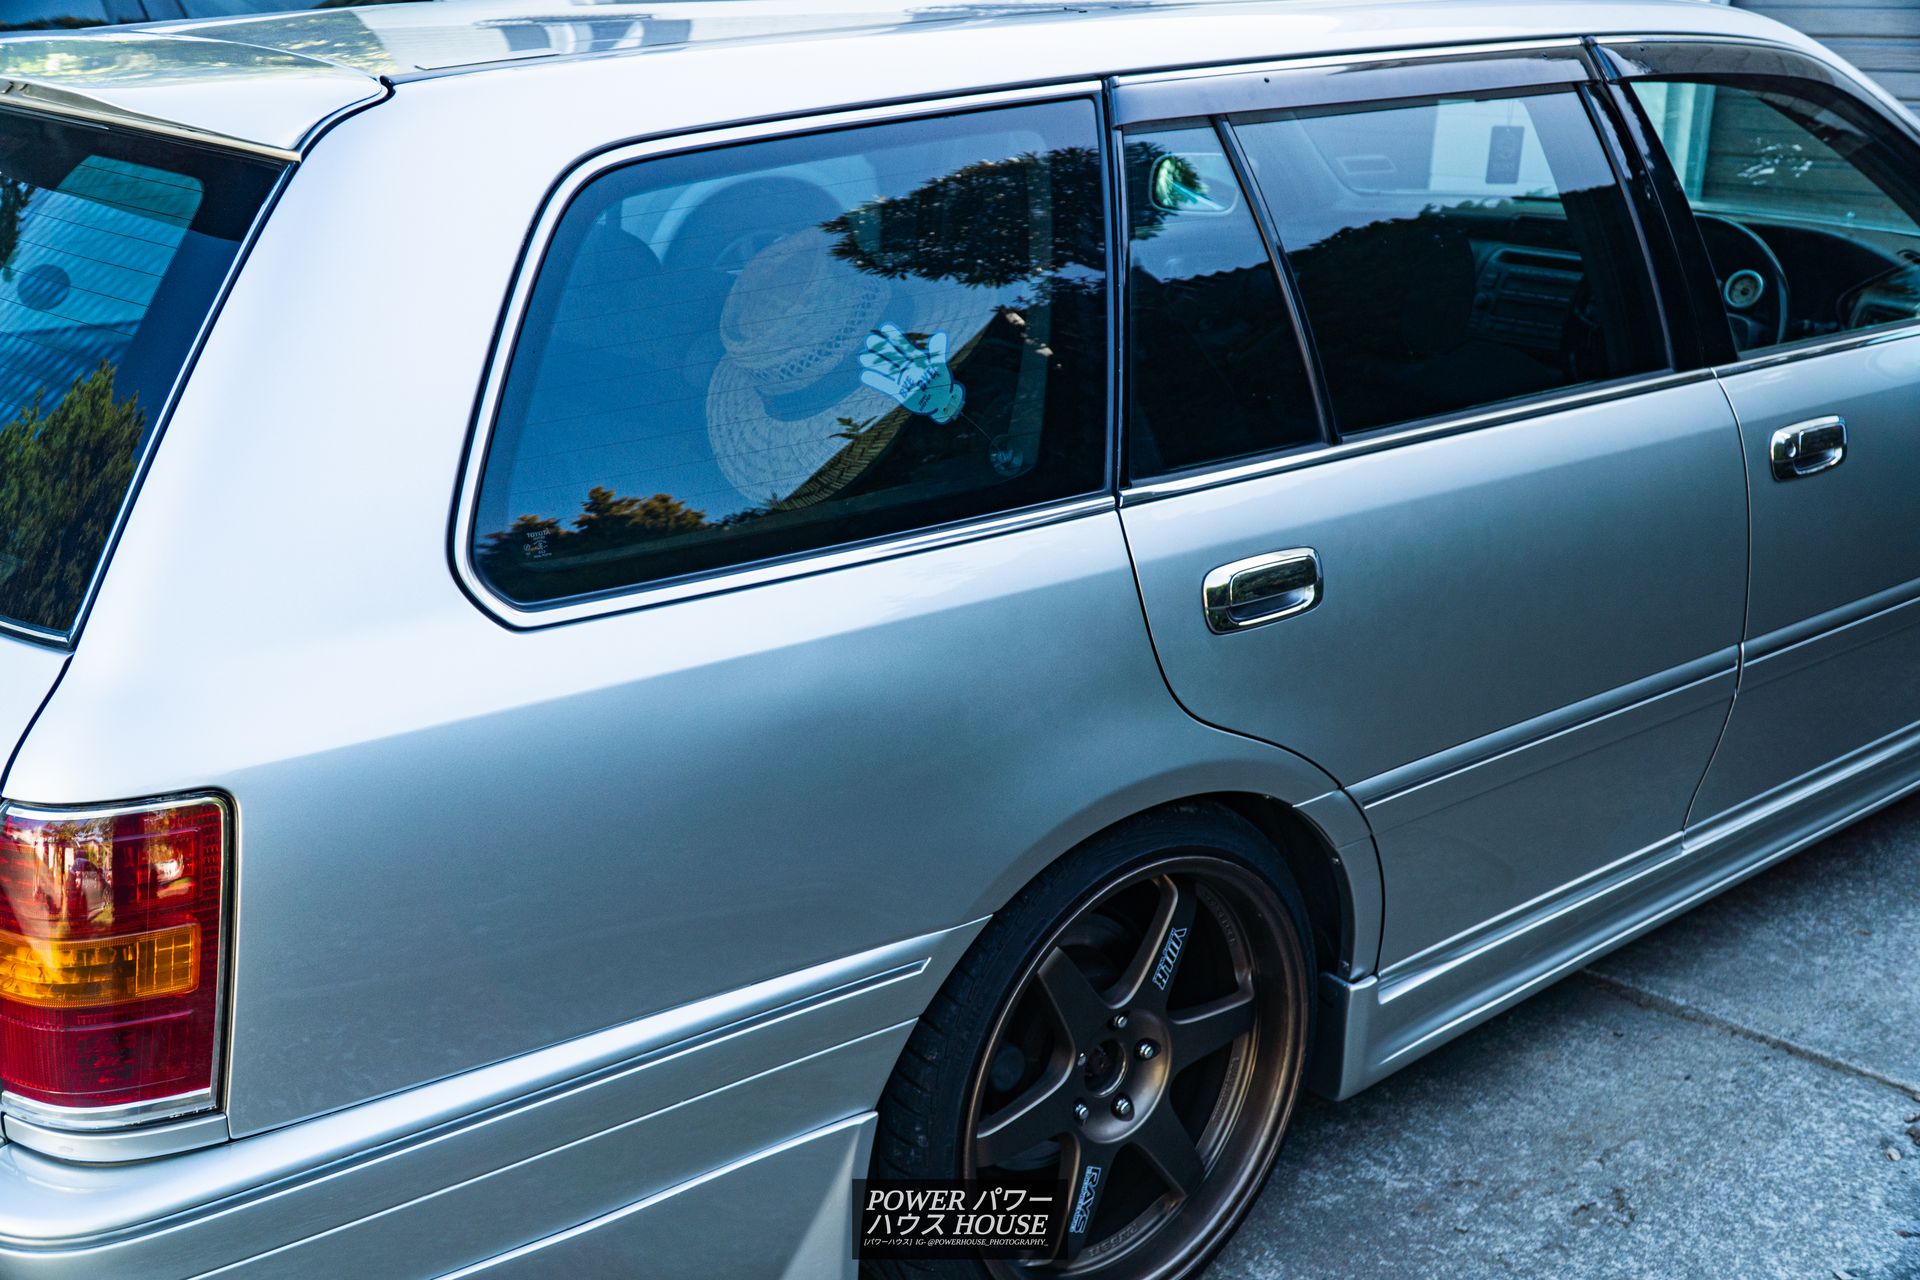
Ah yes, there always has to be drama. Well, unfortunately, I was backed into. While over at a mates house, his mum accidentally backed into the rear passenger door while the Crown was parked. Luckily all damage was isolated to the door, however, a little chip on the quarter panel meant that I was also able to get fresh quarter panel paint!
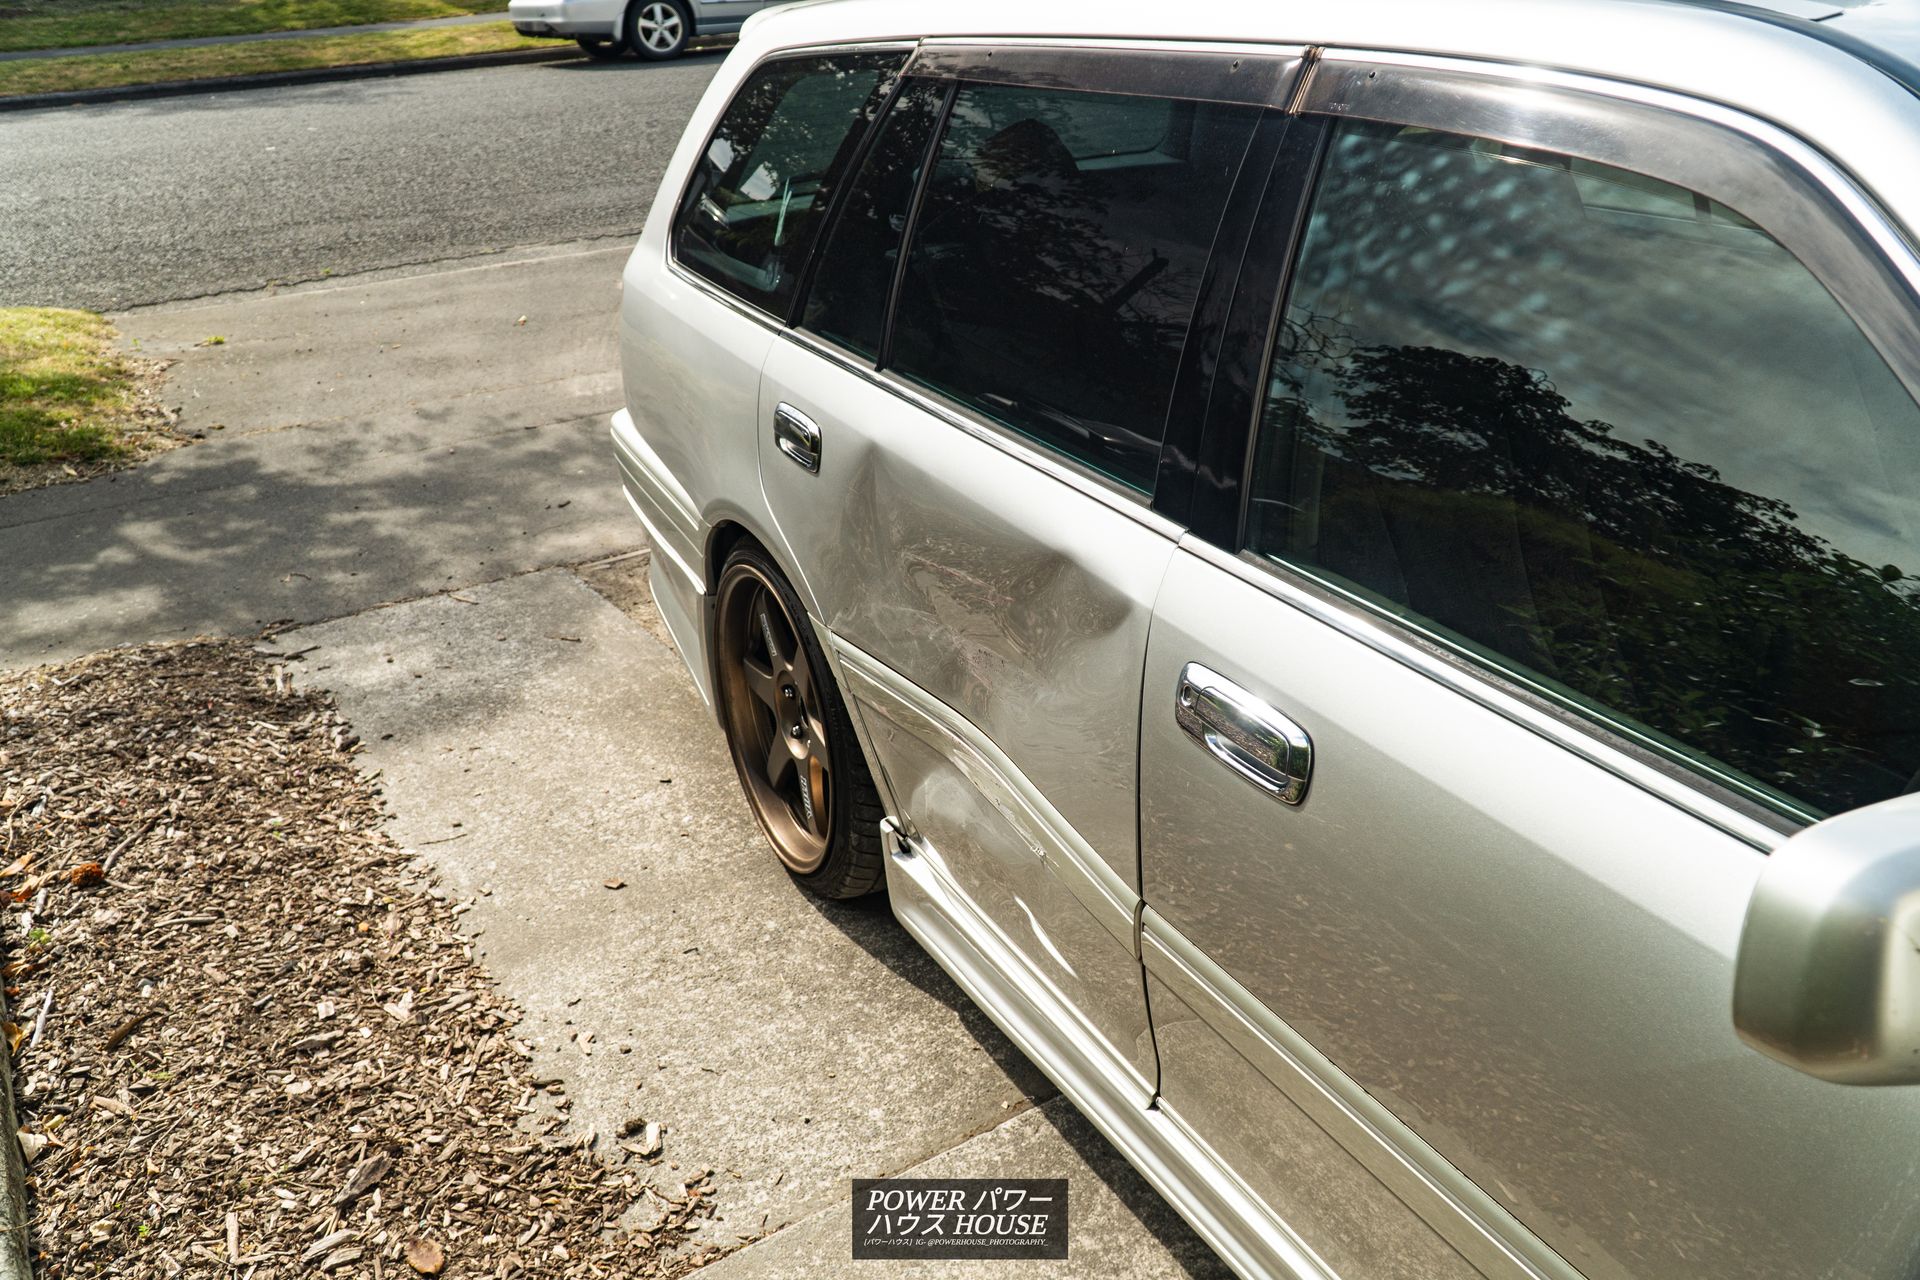
Anyways, these things happen, and so insurance dealt with it. The car went to D.A. Classics and Customs in Rangiora to get its repairs done. While there, the Crown was also treated to the jack points being all straightened to factory spec and the floor pan stiffeners all straightened as well.
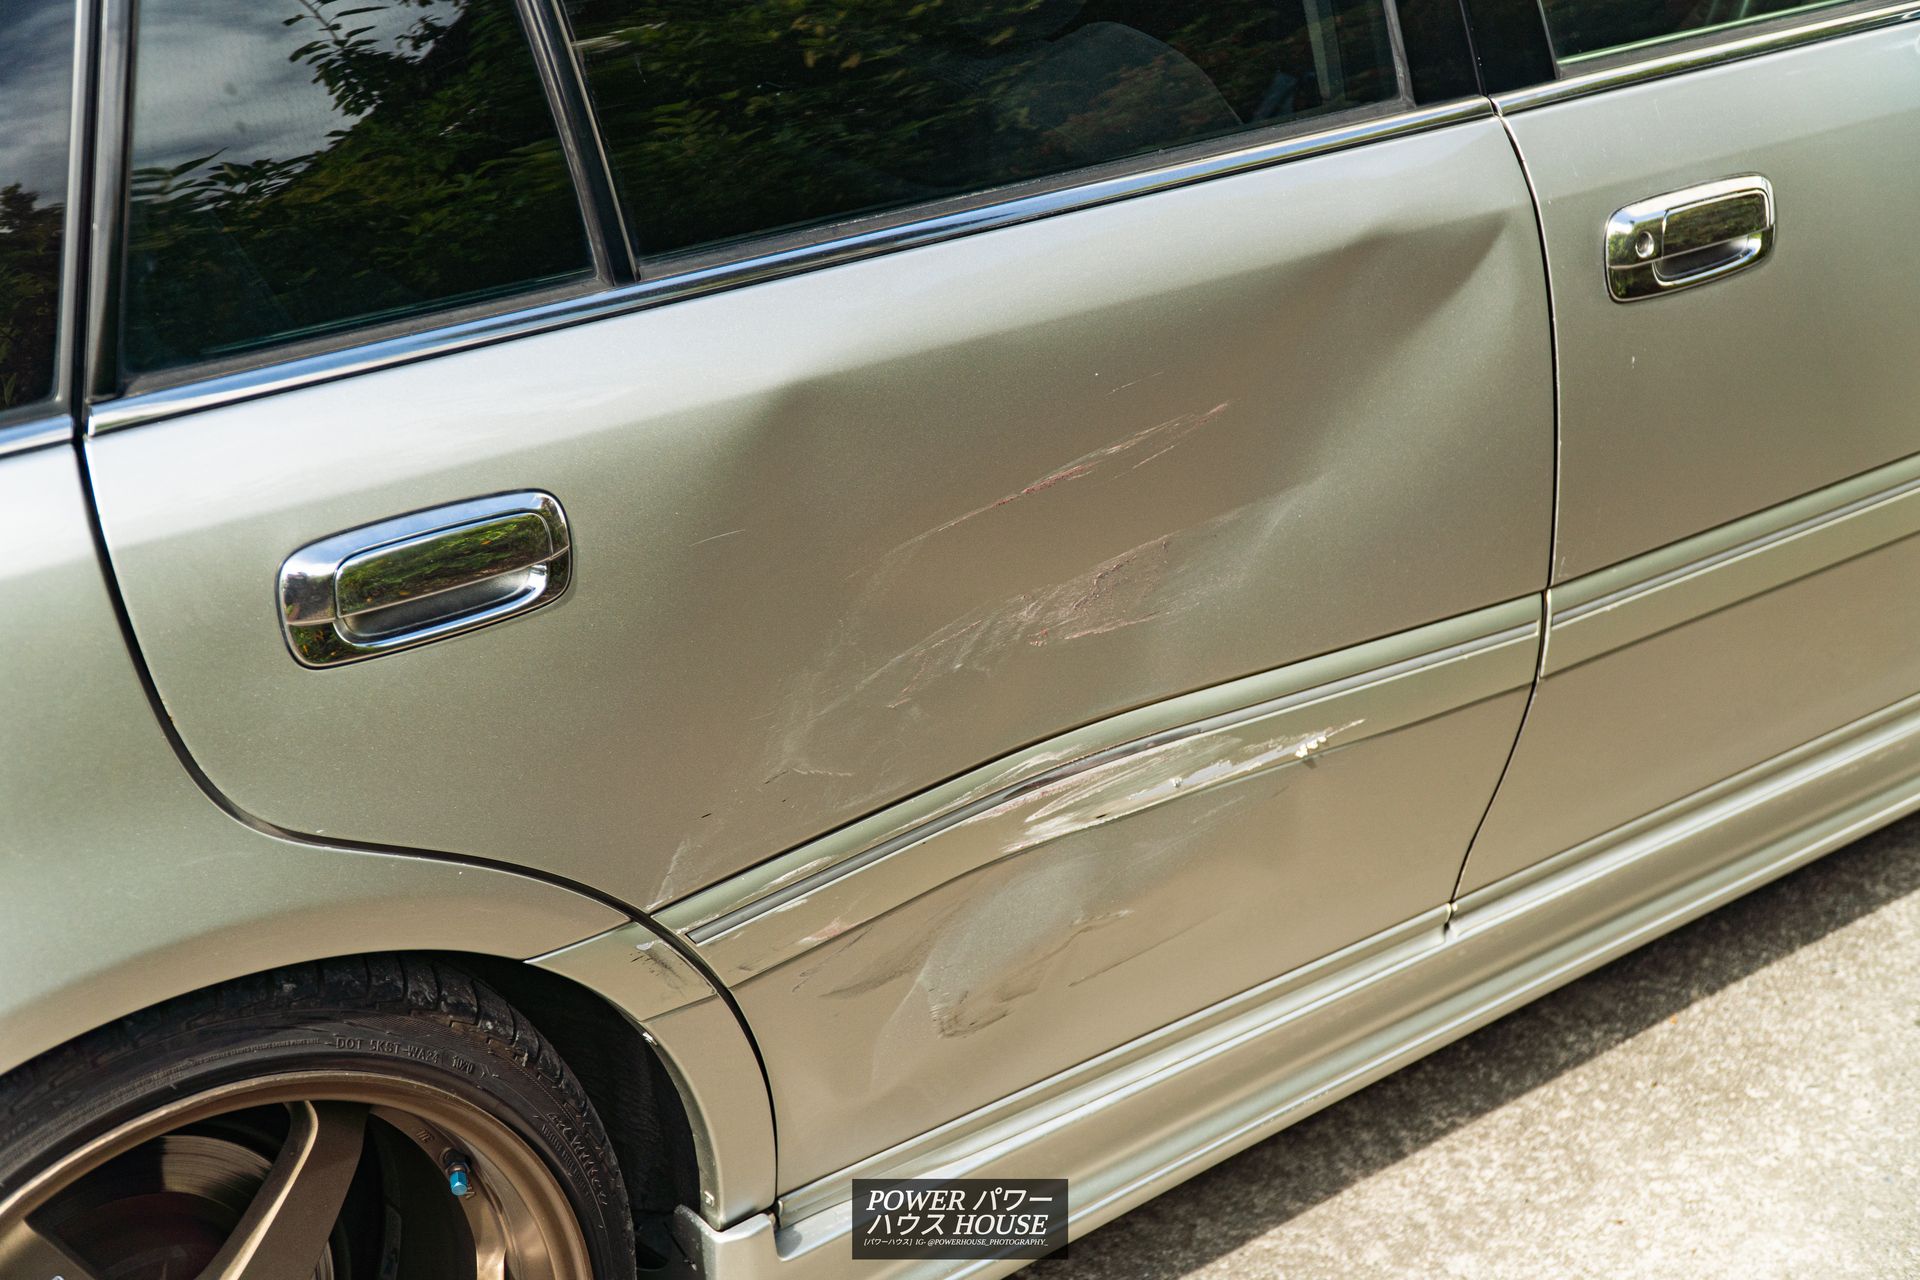
And therefore, the Crown came out looking better than it was before the crash!
Unfortunately, this was not the end of the dramas. About a week afterwards, I went on a short drive to Oxford and back, and during that drive, I noticed that the Crown was really down on power. After launching, it'd hold boost at 0.3-0.4 bar for a second and then make 0.7 bar. Even still, it felt weirdly slow throughout the whole powerband, taking a whopping 8.3 seconds for 0 to 100. More concerningly, the alarm went all weird. The keyless entry stopped working, the alarm stopped going off when the battery was disconnected, and concerningly, the trunk decided to stop opening, even with the key.
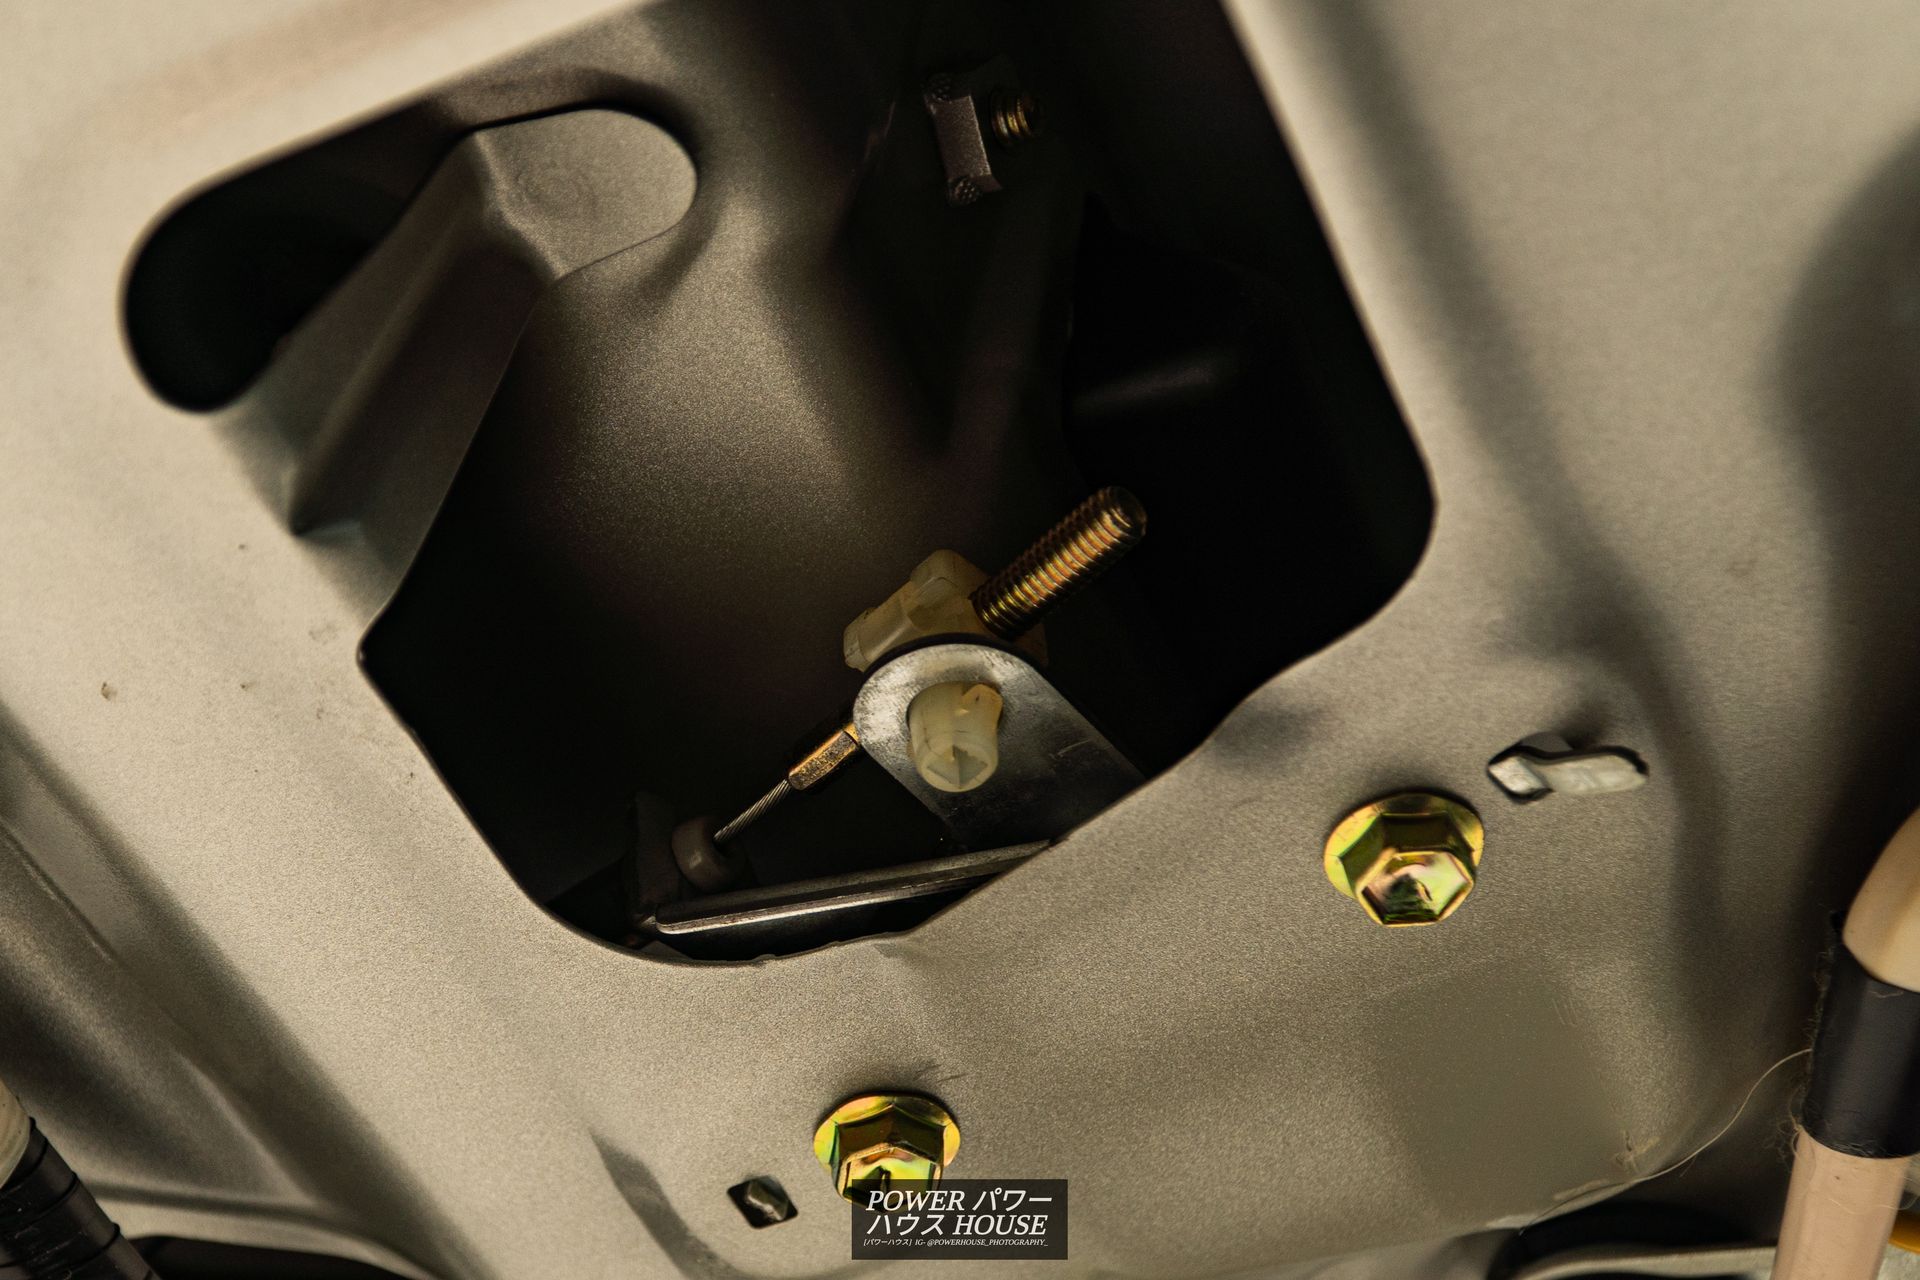
The first to be resolved was the trunk. My trunk straight up refused to open, even with the key, central locking button, and key fob. It turns out that the release cable was just a hair too lose, so after a bit of troubleshooting, I found that after unclipping the plastic clip holding the threaded end of the trunk release cable could be tightened after it is unclipped, therefore fixing my issue.
The next to tackle was the weird boost issue - however as the car was booked in to get the down-pipe installed the following week, I was praying that the issue was a clogged cat. Thankfully, it appears that that was the issues, as now it builds boost quickly and sprints from 0 to 100 in just 6.05 seconds - not bad for a heavy wagon.
Lastly, the alarm. After a quick diagnostic at Installer Services, they found a couple connectors had undone themselves, so plugging them back in fixed the central locking issue. However, they also found that my back-up siren had gone bad, and so sent that off to AVS for a warranty claim. As of writing this, it has been a month, and there is no word from AVS.
To make things even worse, the paint of the resprayed door began to bubble and lift around the door handle - so off the car will be, back to the panel beaters once again.
The accident was an unfortunate end to 2024, and 2025 has started a bit shaky, but I am hoping that the rest 2025 will be a (mostly) trouble free year for the Crown!