Project Supra: The Changes Begin
28.10.2025
So after settling in to it's new home in Christchurch, the Supra immediately started to get a few little tickle ups. Juggling with time during my Level 3 NCEA Exam Period, progress was a bit slow to begin with, but we managed, and the Supra is already a bit nicer to look at, and a bit nicer to drive.
Chapters
1. Sound System.
2. The Small Details.
3. An Unreliable Toyota.
1. Sound System
A key thing that bugged me with the Crown was the fact that it had a completely lackluster sound system. The car was still on the stock 140w head unit and had a blown drivers speaker. While the rears had Pioneer components, further inspection also showed that the passenger-side speaker and tweeter both weren't functioning.
The first step in the sound system fiasco was to figure out why the passenger side rear wasn't functioning. After taking the speaker grille off, I was surprised to find not a Pioneer component, but a random no-brand 6.5-inch coaxial.
I tested the wiring, tried bypassing the crossovers and tweeters, but still no speaker function. While the tweeters didn't make any sound, a low buzzing sound could still be heard. With all of this information, my main suspicion was put on the relic of a head unit potentially having a faulty channel.
While I do love the OEM head unit, and honestly hate to remove it, I'm wanting a little better sound quality and desperately want to diagnose the faulty rear speaker.
Knowing that the front drivers speaker is blown, the passenger rear speaker doesn't work, and the head unit is likely faulty, it came time to order a bunch of parts to overhaul the whole sound system.

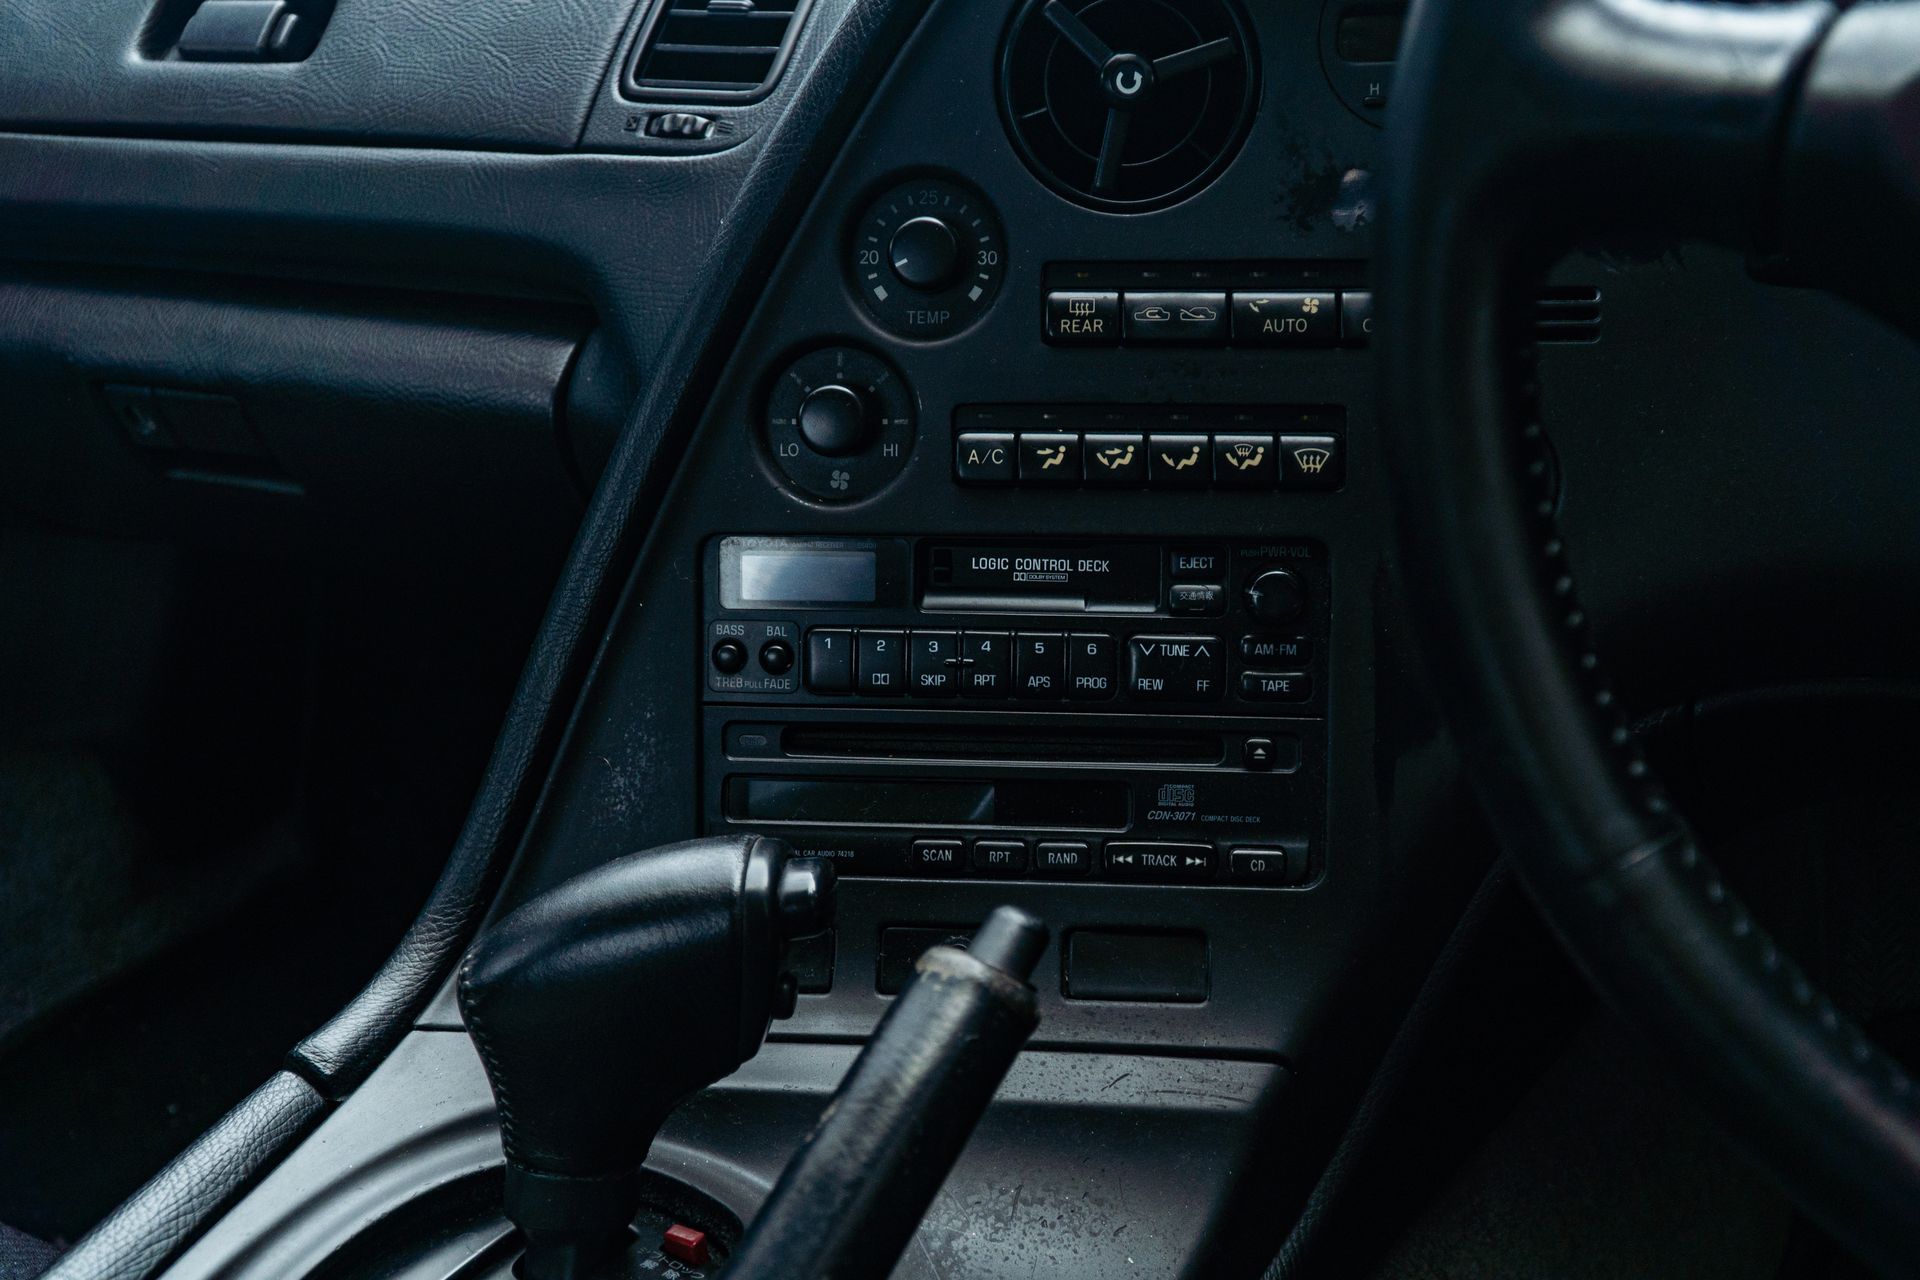
Firstly, the head unit. I didn't want to ruin the analog 90's interior with a big ugly screen, and I have a big liking for early 2000's head units. So, the perfect head unit for me: a Kenwood KDC-X8529. This head unit features RCA aux outputs, 22w x4 RMS, and a screen with a pixilated man of a jet skit - the most 2000's thing ever. It should add a good bit more punch to the sound system, add a bit of retro bling, and will either solve, or rule out the rear speaker not working.
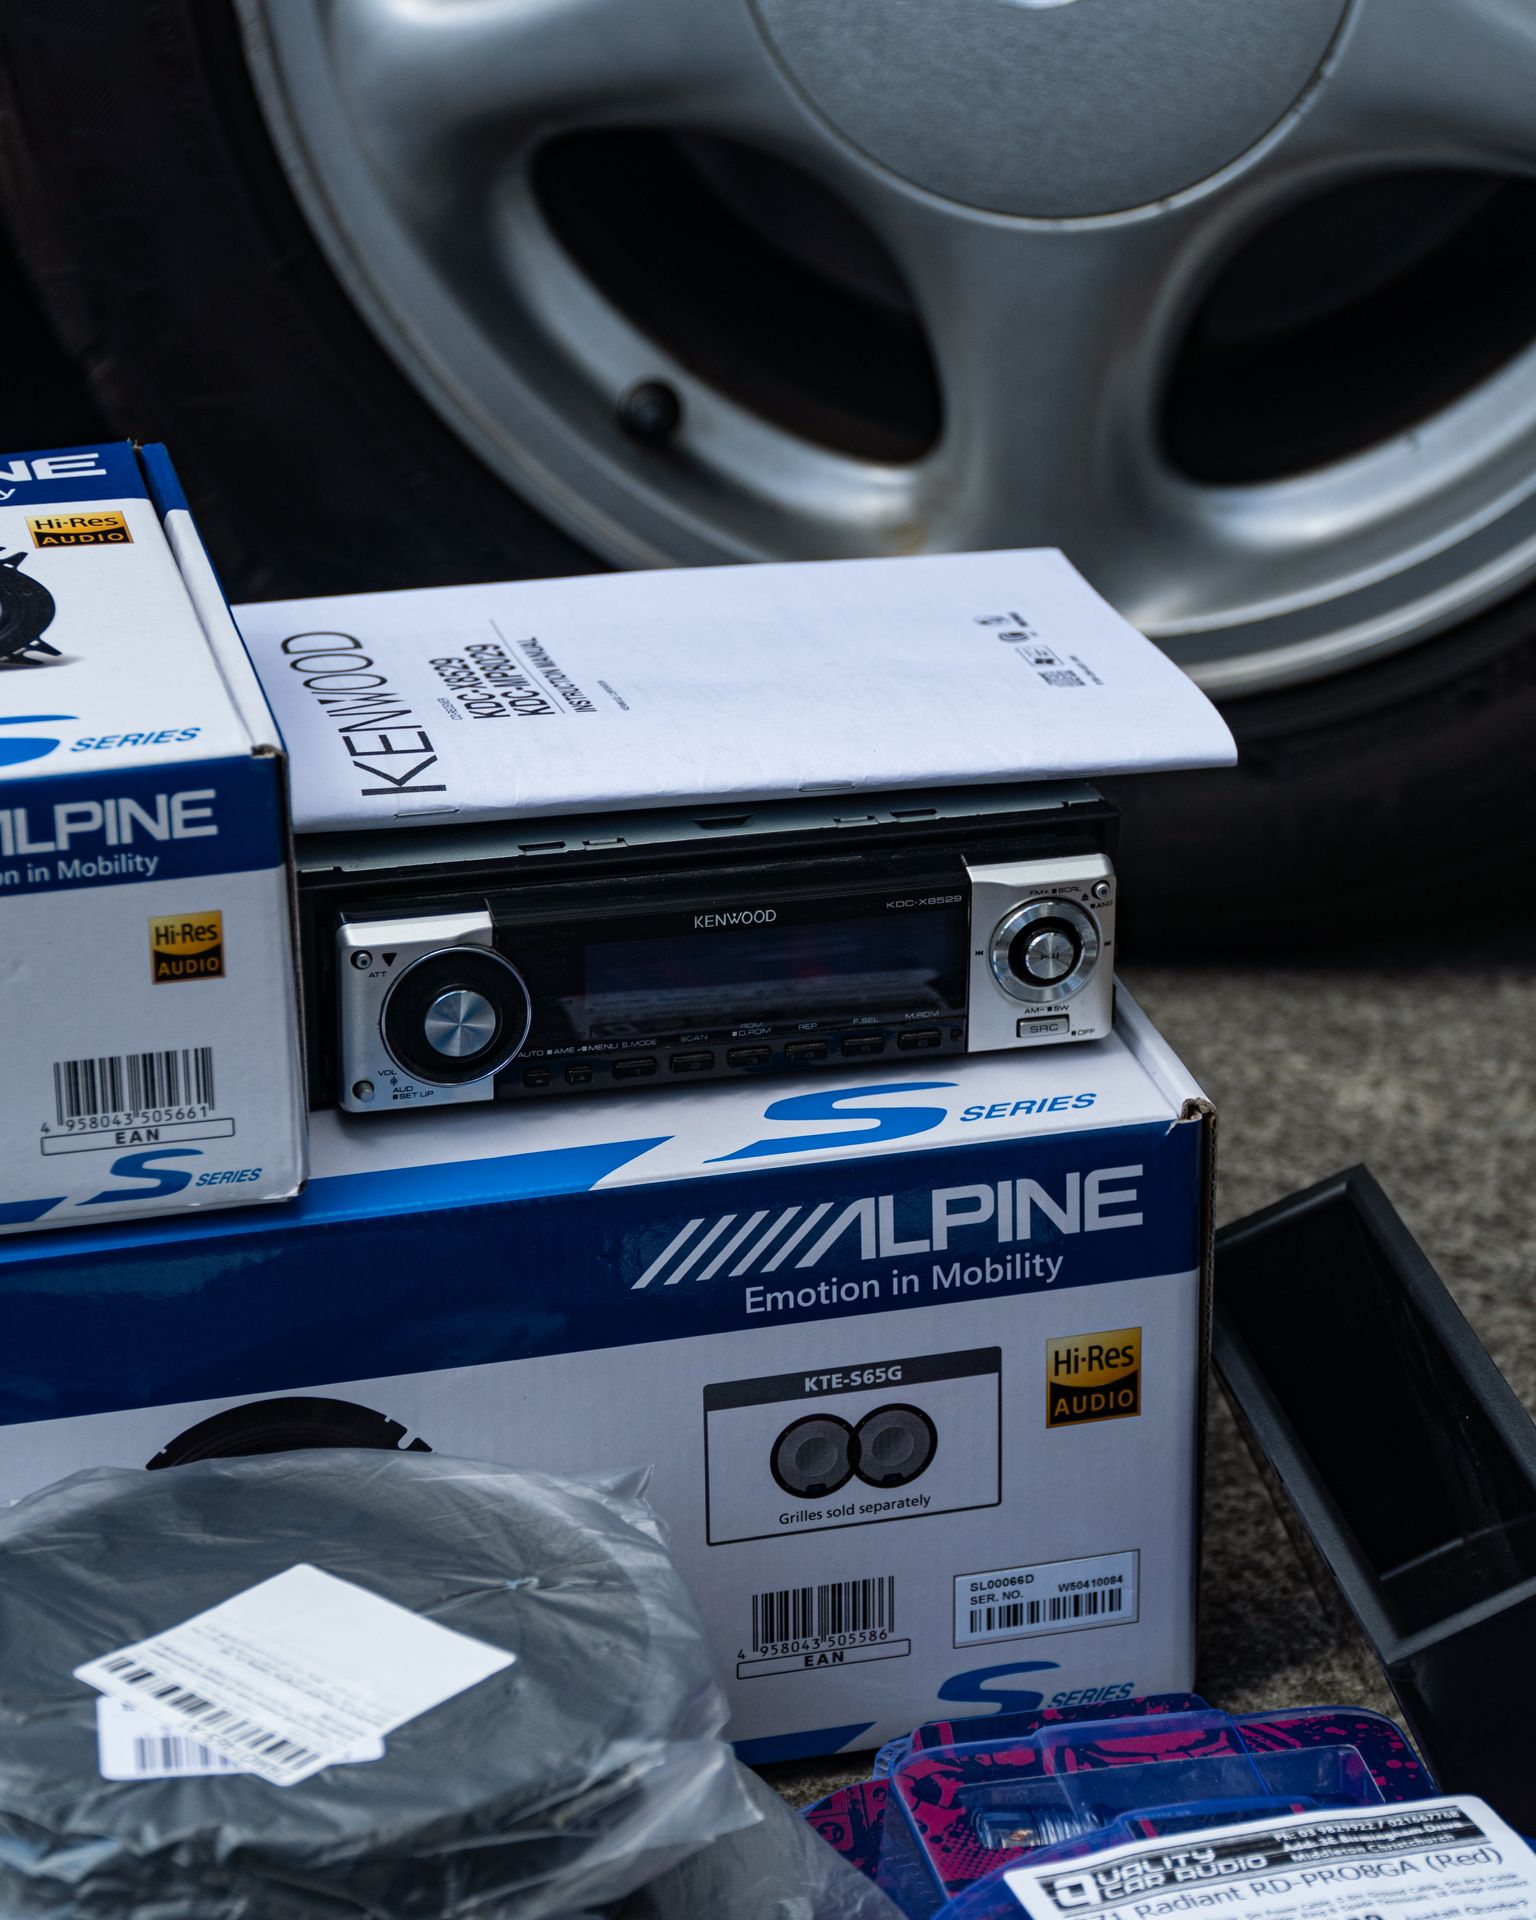
As I may want to return to the factory head unit and CD player in the future, I didn't want to cut any wires. Therefore, to wire the head unit in, I ordered a Kenwood 16-pin to ISO harness, and an ISO to 87+ Toyota radio harness. With these two harnesses, it means no soldering, no cutting wires, just pure plug-and-play simplicity.
Or so I thought... turns out my Kenwood 16-pin to ISO harness didn't have an amp turn-on wire. Luckily it was as simple as depinning the old one and putting it in the new connector.
As for being able to play my own music through this old unit, I ordered a 2x RCA to 3.5mm jack adaptor, as well as a 3.5mm jack to USB-C adaptor as my phone is too new for even a headphone jack apparently.
Furthermore, while a subwoofer is currently out of the budget, I knew that it was next on my to-do list. Therefore, I thought I'd do the wiring for it while the dash panels were off, so purchased a Radiant RD-PRO 8-gauge 1500w subwoofer wiring kit as well.
I also got a Toyota-specific 1-din pocket to cleanly fill the gap in.
Now, the speakers. I initially wasn't looking for anything too fancy. Walking into the shop with a $200 budget for four speakers, I was too easily convinced by the sales mans words, and came out with a set of Alpine's valued over $400.

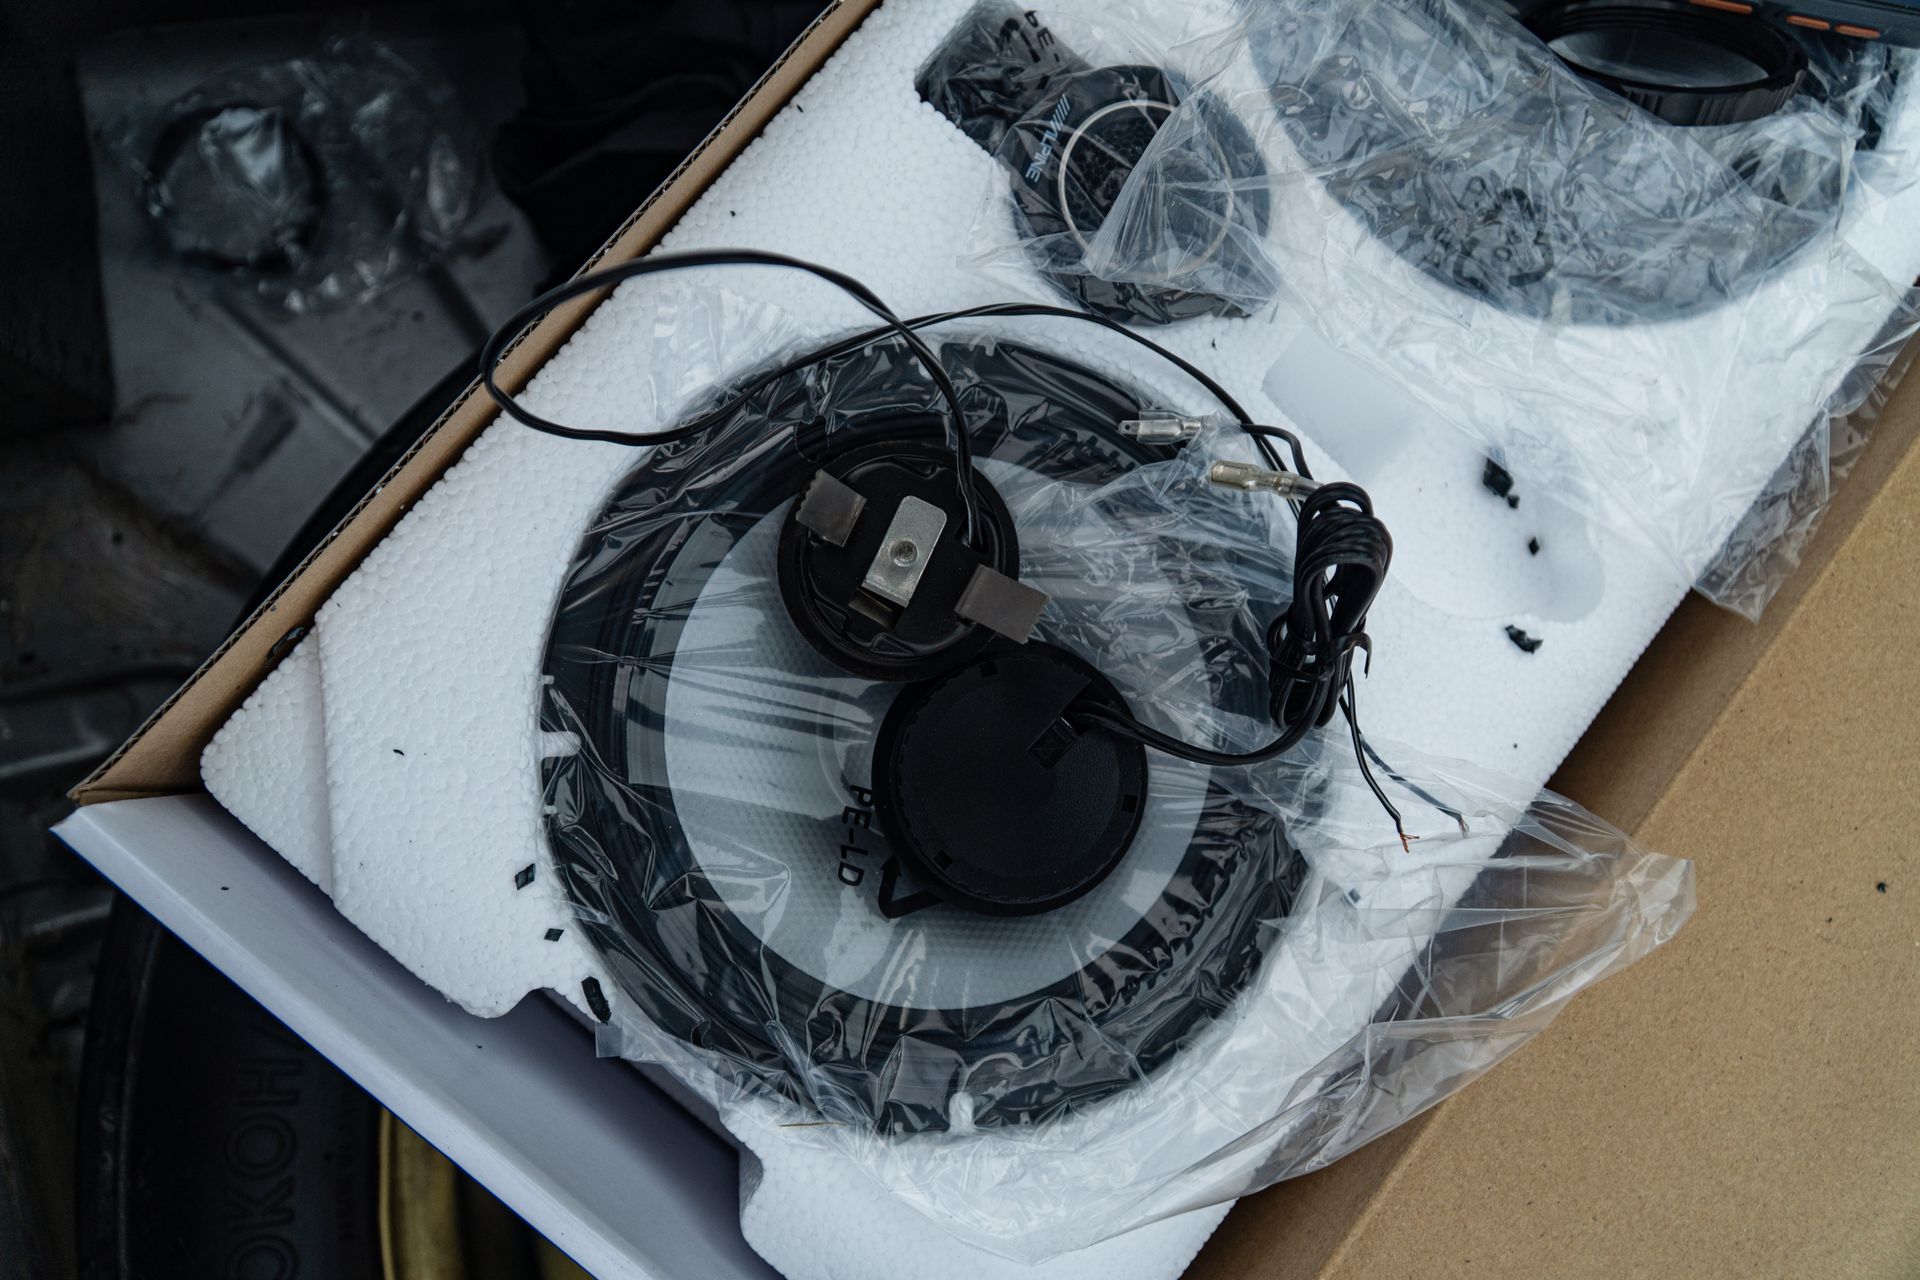
For the front's, I have a pair of Alpine S2-S40 4-inch coaxial speakers. While tiny, I wanted to maintain the stock air-boxes for the speakers, so these were the best options for that.
For the rear's, while I'm sure a set of coaxial speakers would have been perfectly fine, the fact that holes were already cut for some tweeters on the rear panels, I decided to go for a set of components once again. Alpine S2-S65C 6.5-inch component speakers will sit in the rear panels.
To make the most of this set-up, a set of foam bass rings were ordered for the front and rears.
First up, installing the head unit. Popping off all of the dash panels was terrifying as I didn't want to crack any brittle clips.
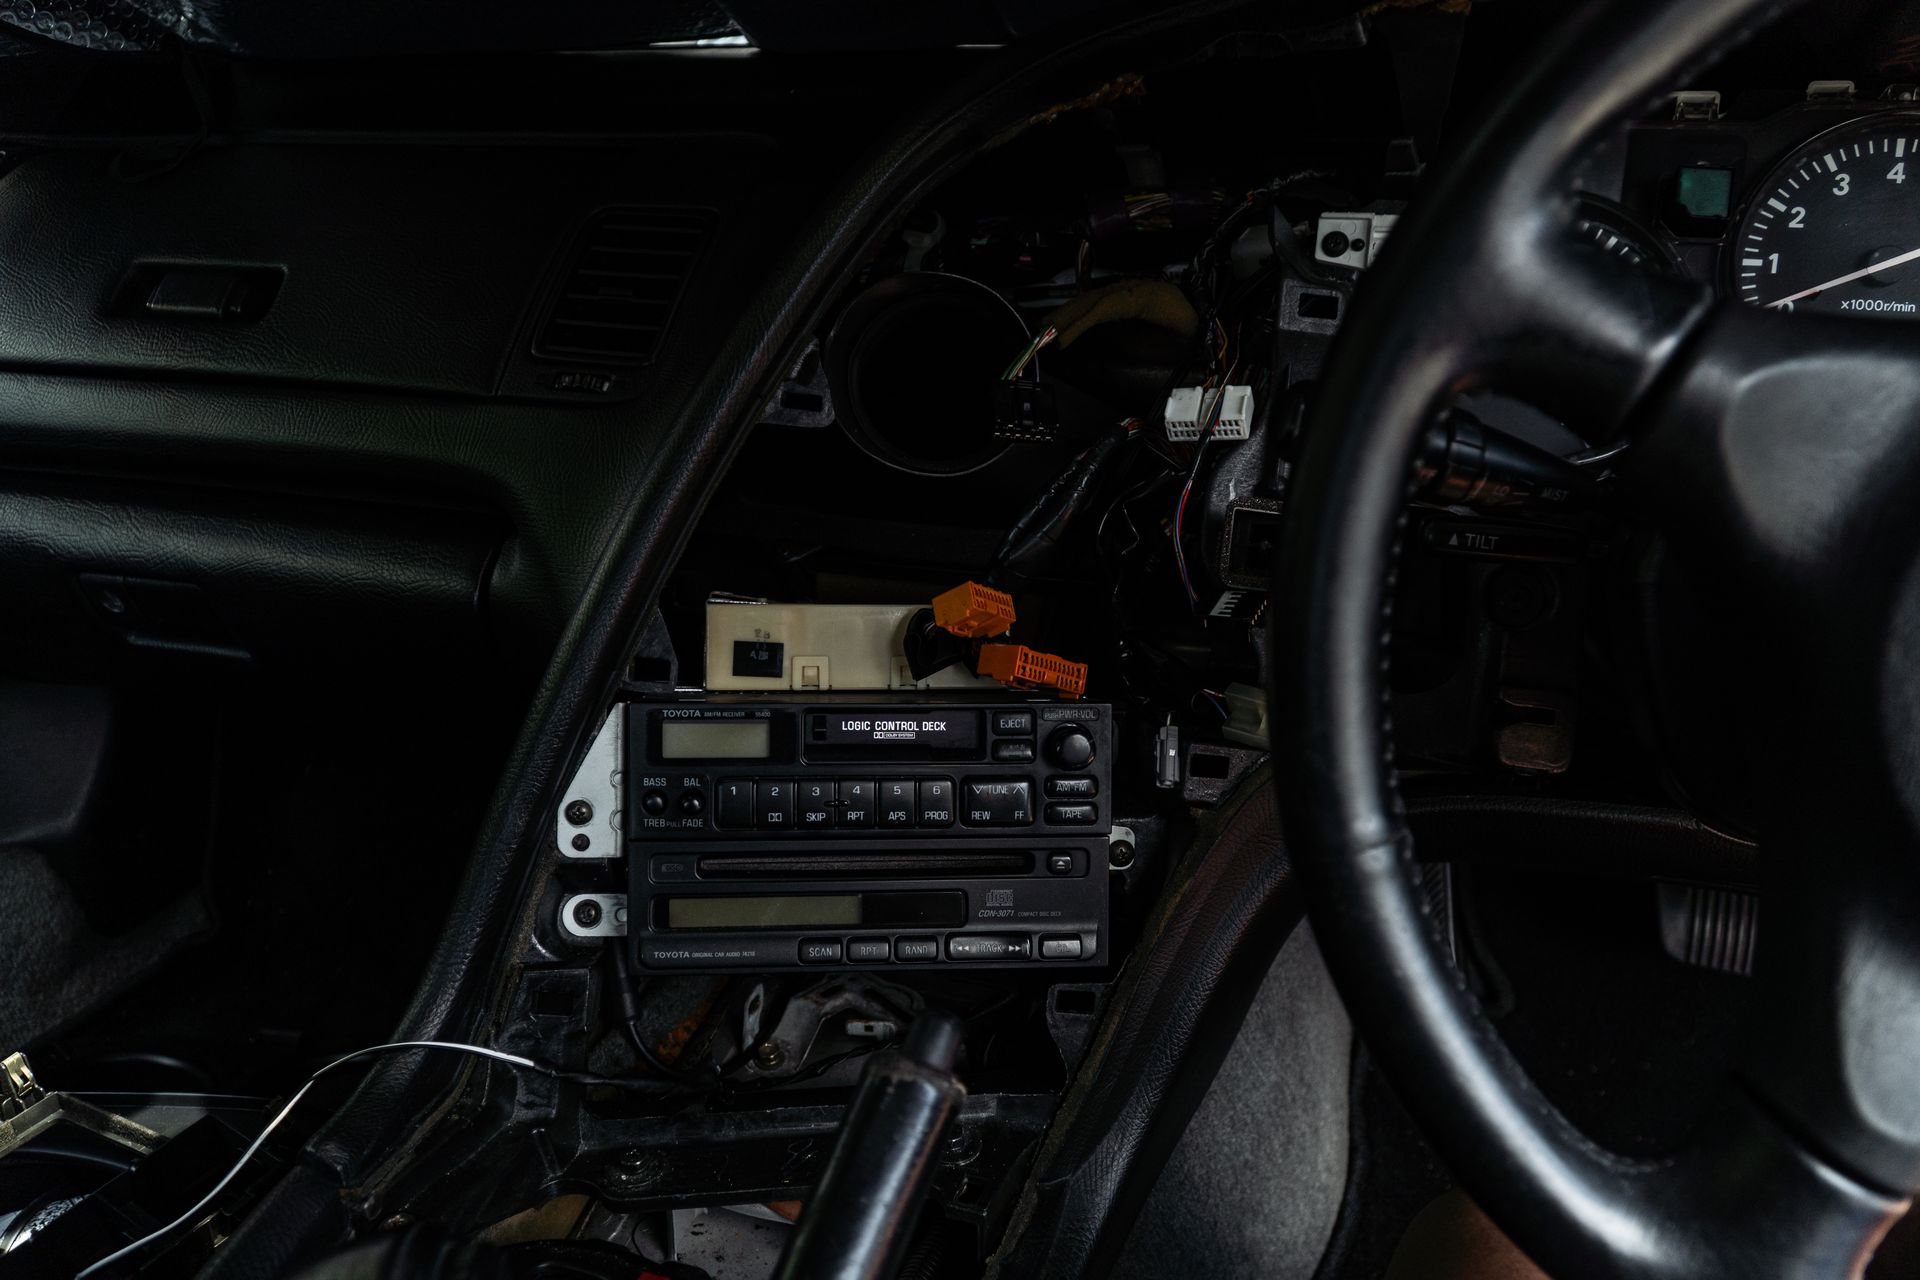
Once off however, it was as simple as unbolting the old head unit and unplugging it. Then I got my 87+ Toyota to ISO harness, and plugged it in to the existing head unit connectors, then connecting the Kenwood harness to the ISO harness. Once this was done, I connected the RCA connectors for not only the aux, but also the subwoofer. The aux cable, subwoofer RCA's, and amplifier turn-on were all then carefully routed out through the glovebox.

After messing with the display settings a bit, I finally settled on a look I was happy with. Although the jet ski display is unbelievably cool, the simple equalizer visualizer display was just too clean looking not to use!

All that was left now was to see if the rear passenger speaker worked, and luckily, it indeed did work. Now the dash panels could go back on, and we could progress to the door speakers.
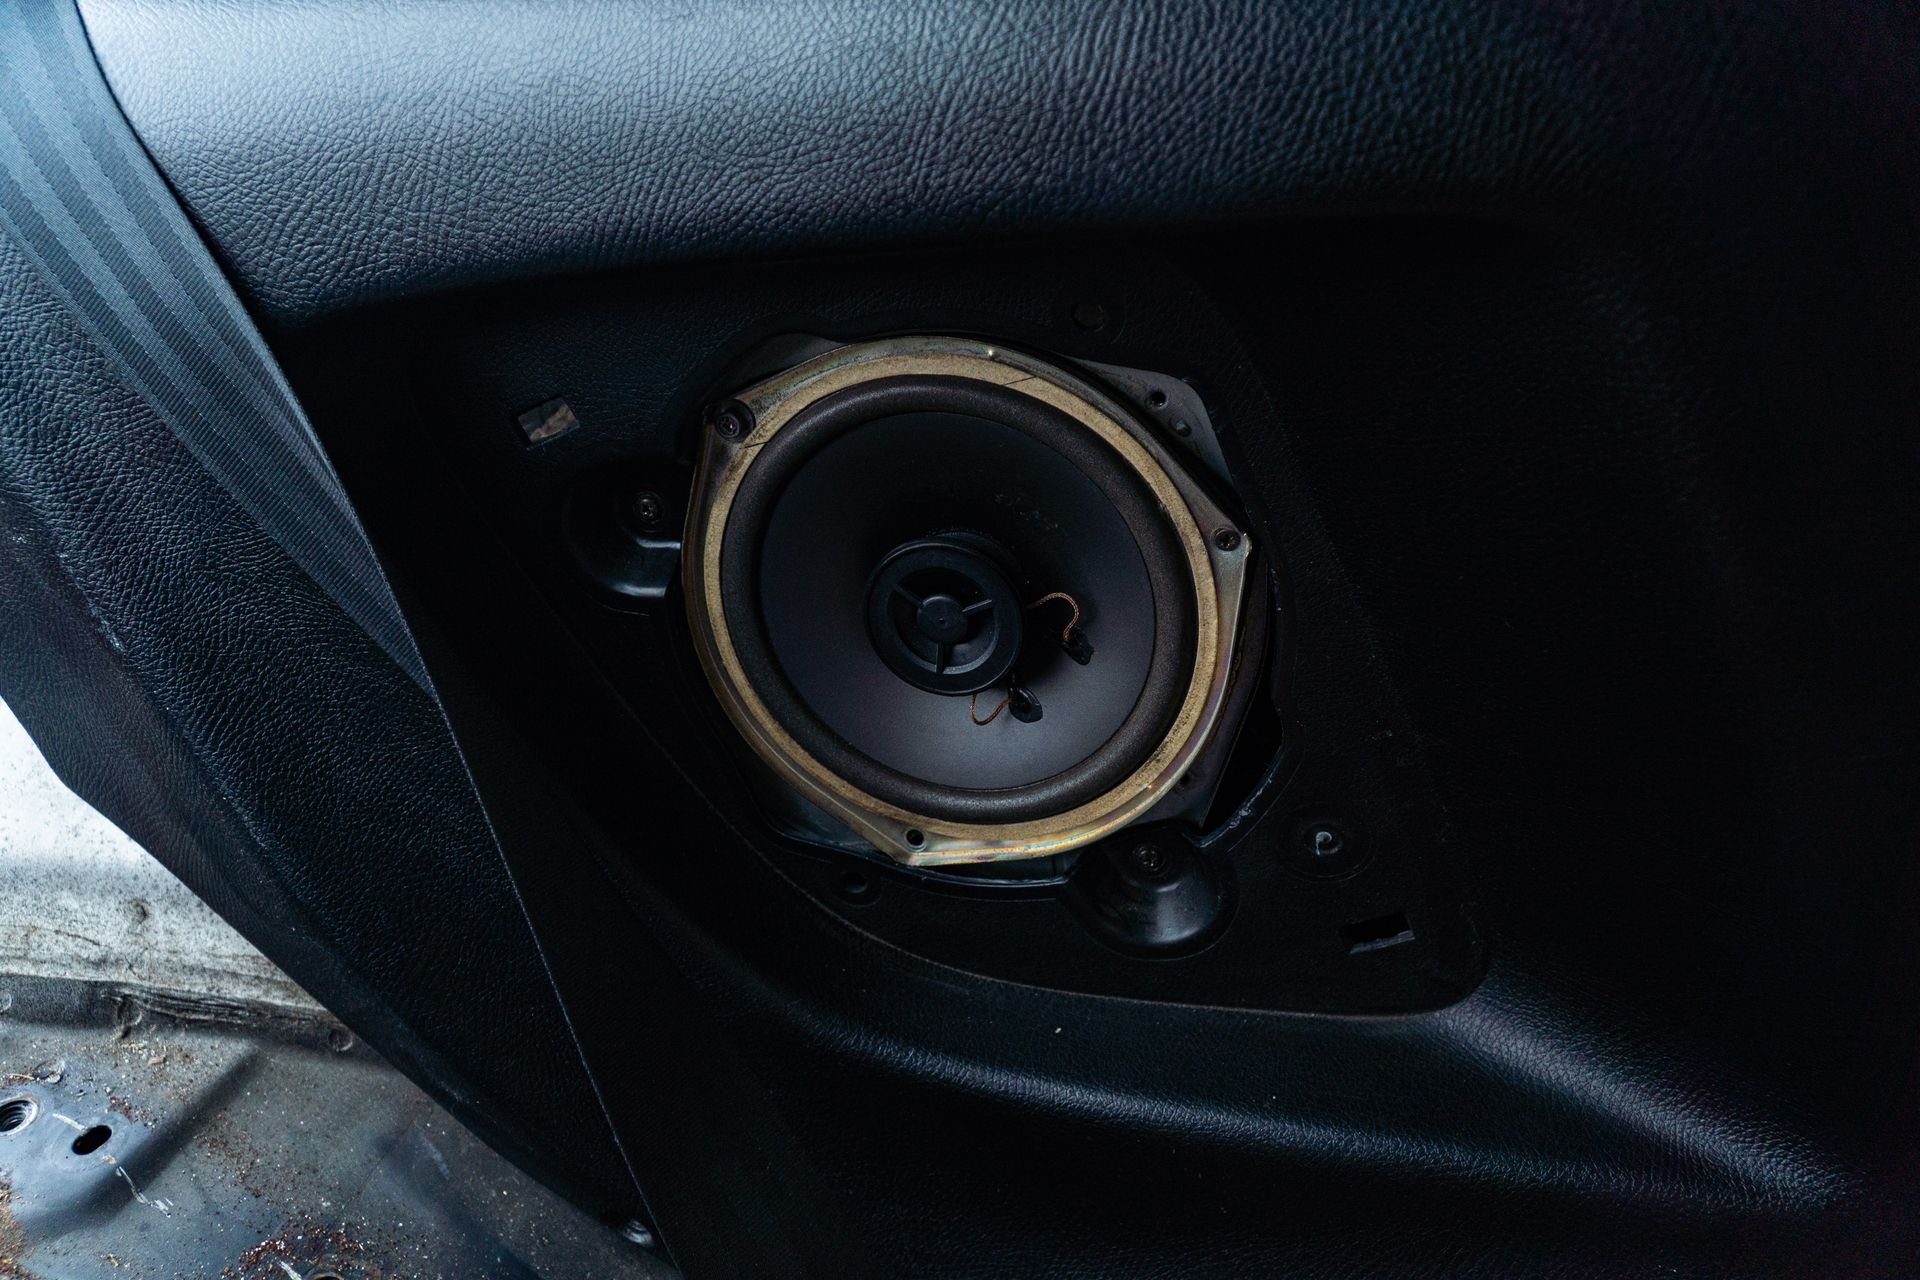
Removing the door cards was as simple as a few bolts and a few clips. It turns out the blown fronts were a pair of Kicker KS400's.

After disposing of them, the new speaker was screwed in using some questionable methods, but hey, if it works, it works. The gap between the air box and the speaker, as well as the air box port were filled in with the supplied foam tape.

Once mounted, I then stuck on the bass rings, and chucked the door cards back on.

Next up, the rears. This was going to be the biggest part of the job as the rear interior would need to come out for the new tweeters to be mocked and mounted. This is because to get the inside of the rear speaker panels, all of the trunk panels and rear seats had to be removed.

Once everything was out, and the old tweeters were pulled out, I went to fit the new tweeters to the pre-existing holes. However, I found out that the new tweeters were a good bit bigger than the old Pioneer's, despite both being marketed at 1-inch tweeters, and so didn't fit.
After a bit of cutting with a heated utility knife, I got the tweeters fitting nice and clean.


The new Alpine's run inline cross-overs, so the bulky external Pioneer one's could be removed.
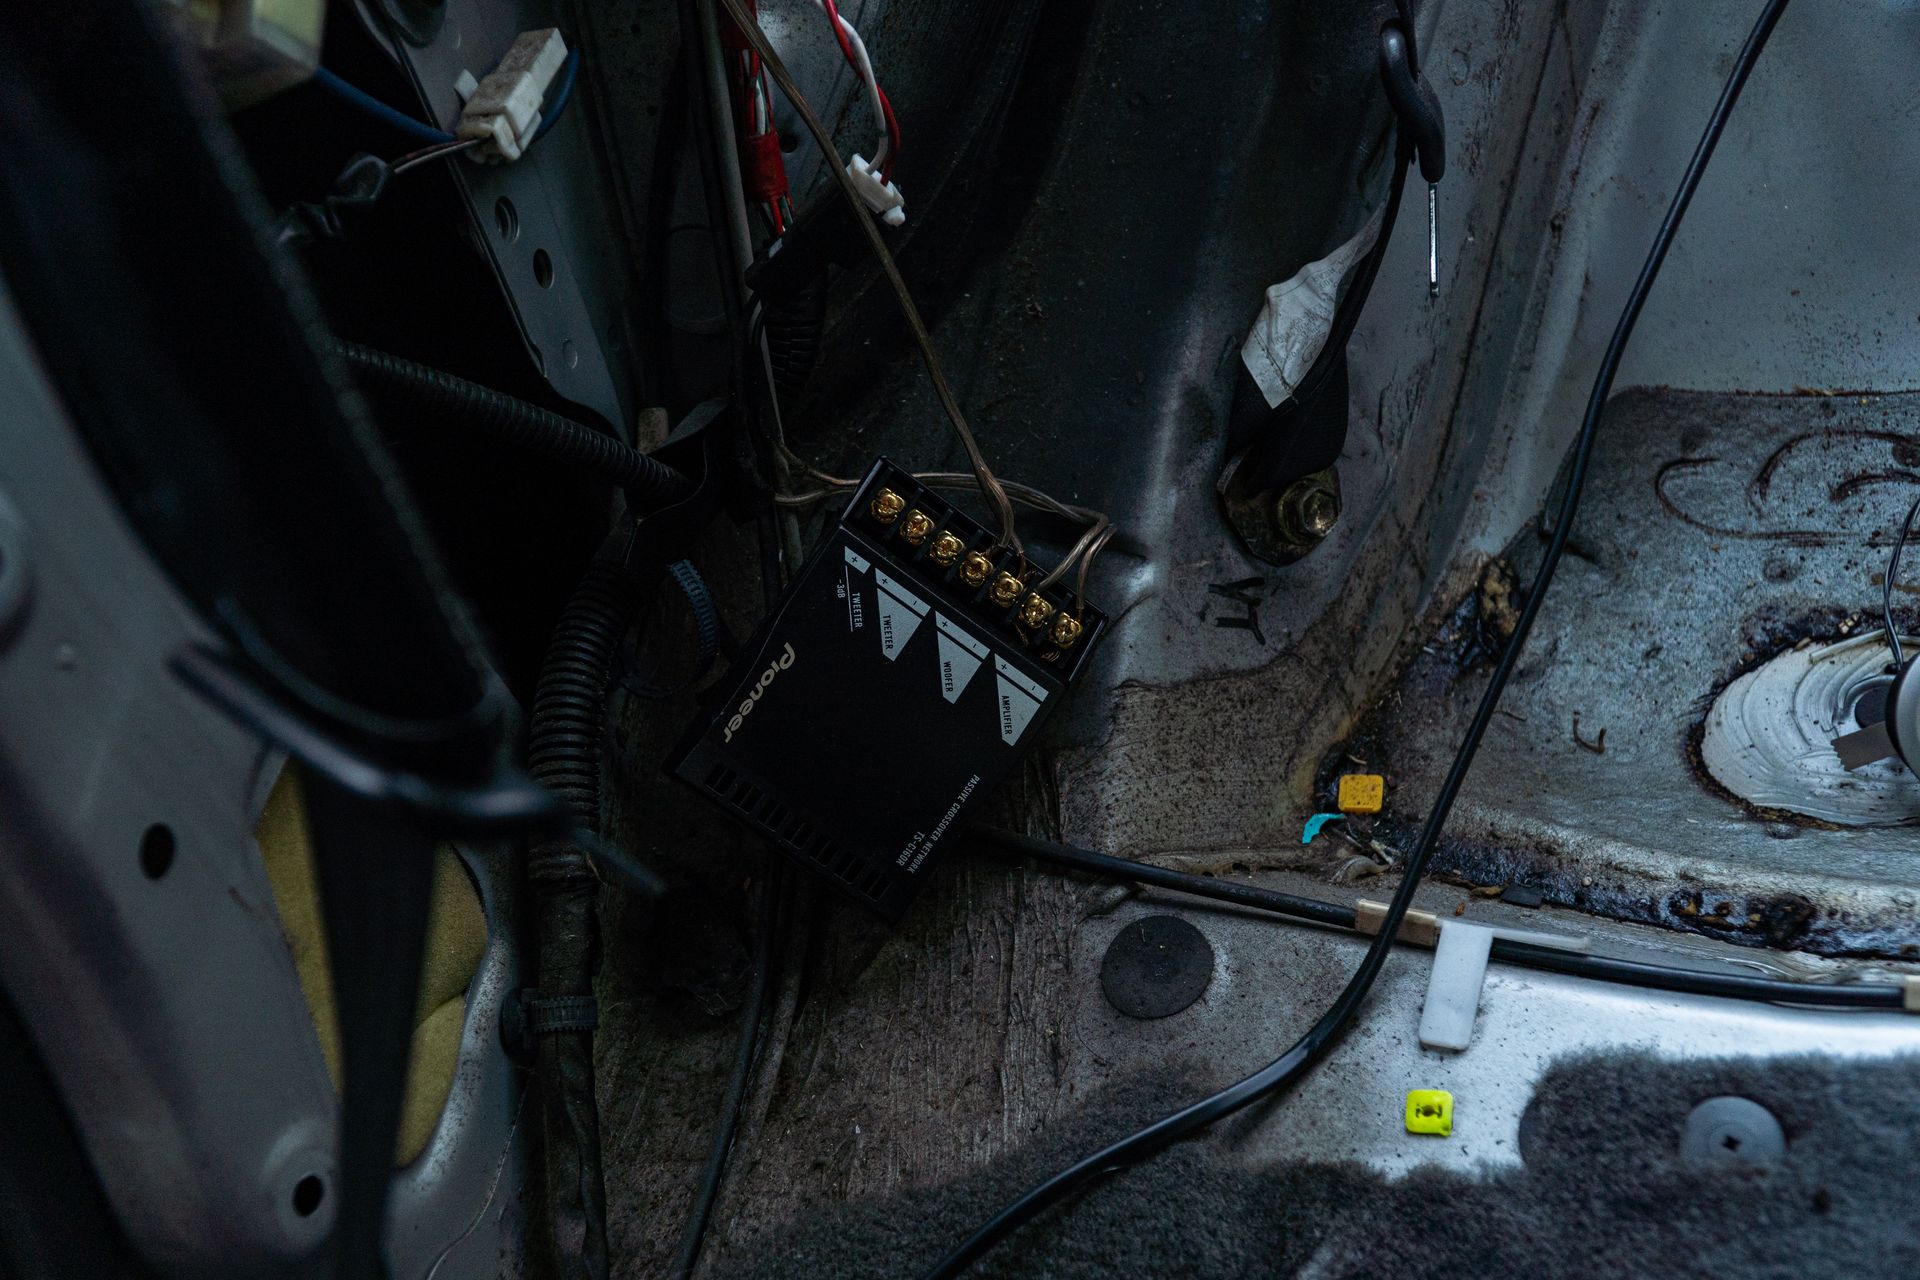

The next ordeal was to solder in new spade connectors for the wiring to connect to the rear speakers, as the previous Pioneer's didn't run this style connector.

Once the rear speakers were mounted, the rear bass rings too could be pressed on, and then the interior reassembled. On a side note, for anyone else doing their speakers in a Supra, don't bother with rear bass rings, as the speaker is already essentially against the speaker grille.

While everything was out, I decided to route my subwoofer wiring to the trunk. The RCA cables and the amp turn-on from the heat unit were routed under the glovebox, through the side scuff panels, and out the back through the passenger side.
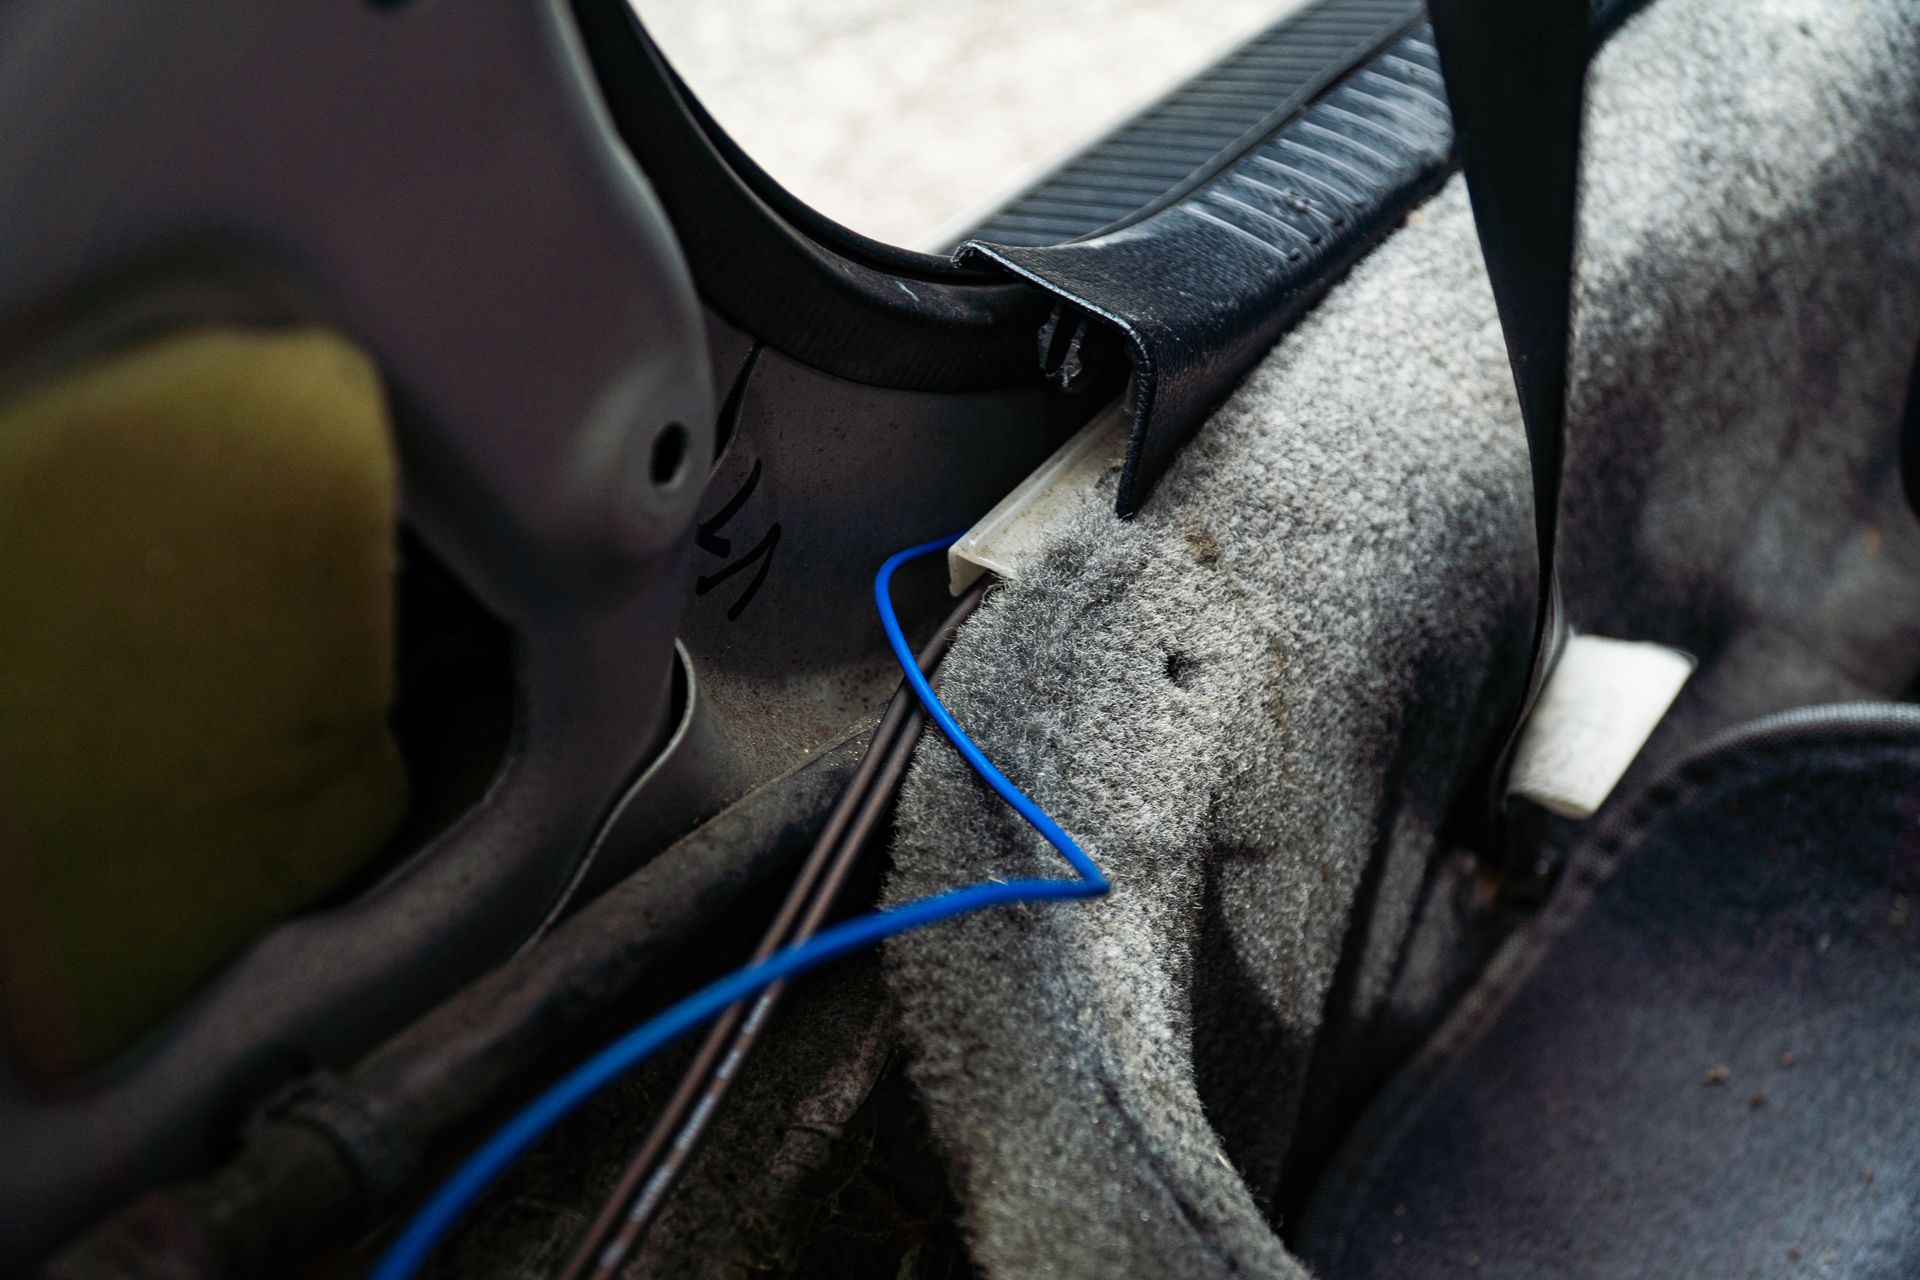
For the power wire, the easiest grommet to feed the wire through was on the drivers side, so it was routed down the same path through the drivers side.


The fuse was installed by the battery, and wire looming installed for a clean, OEM look.


After a few weeks of running no subwoofer, I found an amazing deal on Marketplace, and couldn't say no! A Rockford Fosgate 401S 400-watt RMS amp, that also came with a Fusion Encounter EN-SW102 10-inch subwoofer. While the subwoofer is by far from the best brand, the amp is an absolute gem!

I really only bought the duo for the amplifier, with plans to swap out to a matching Alpine S2-series subwoofer in the future!
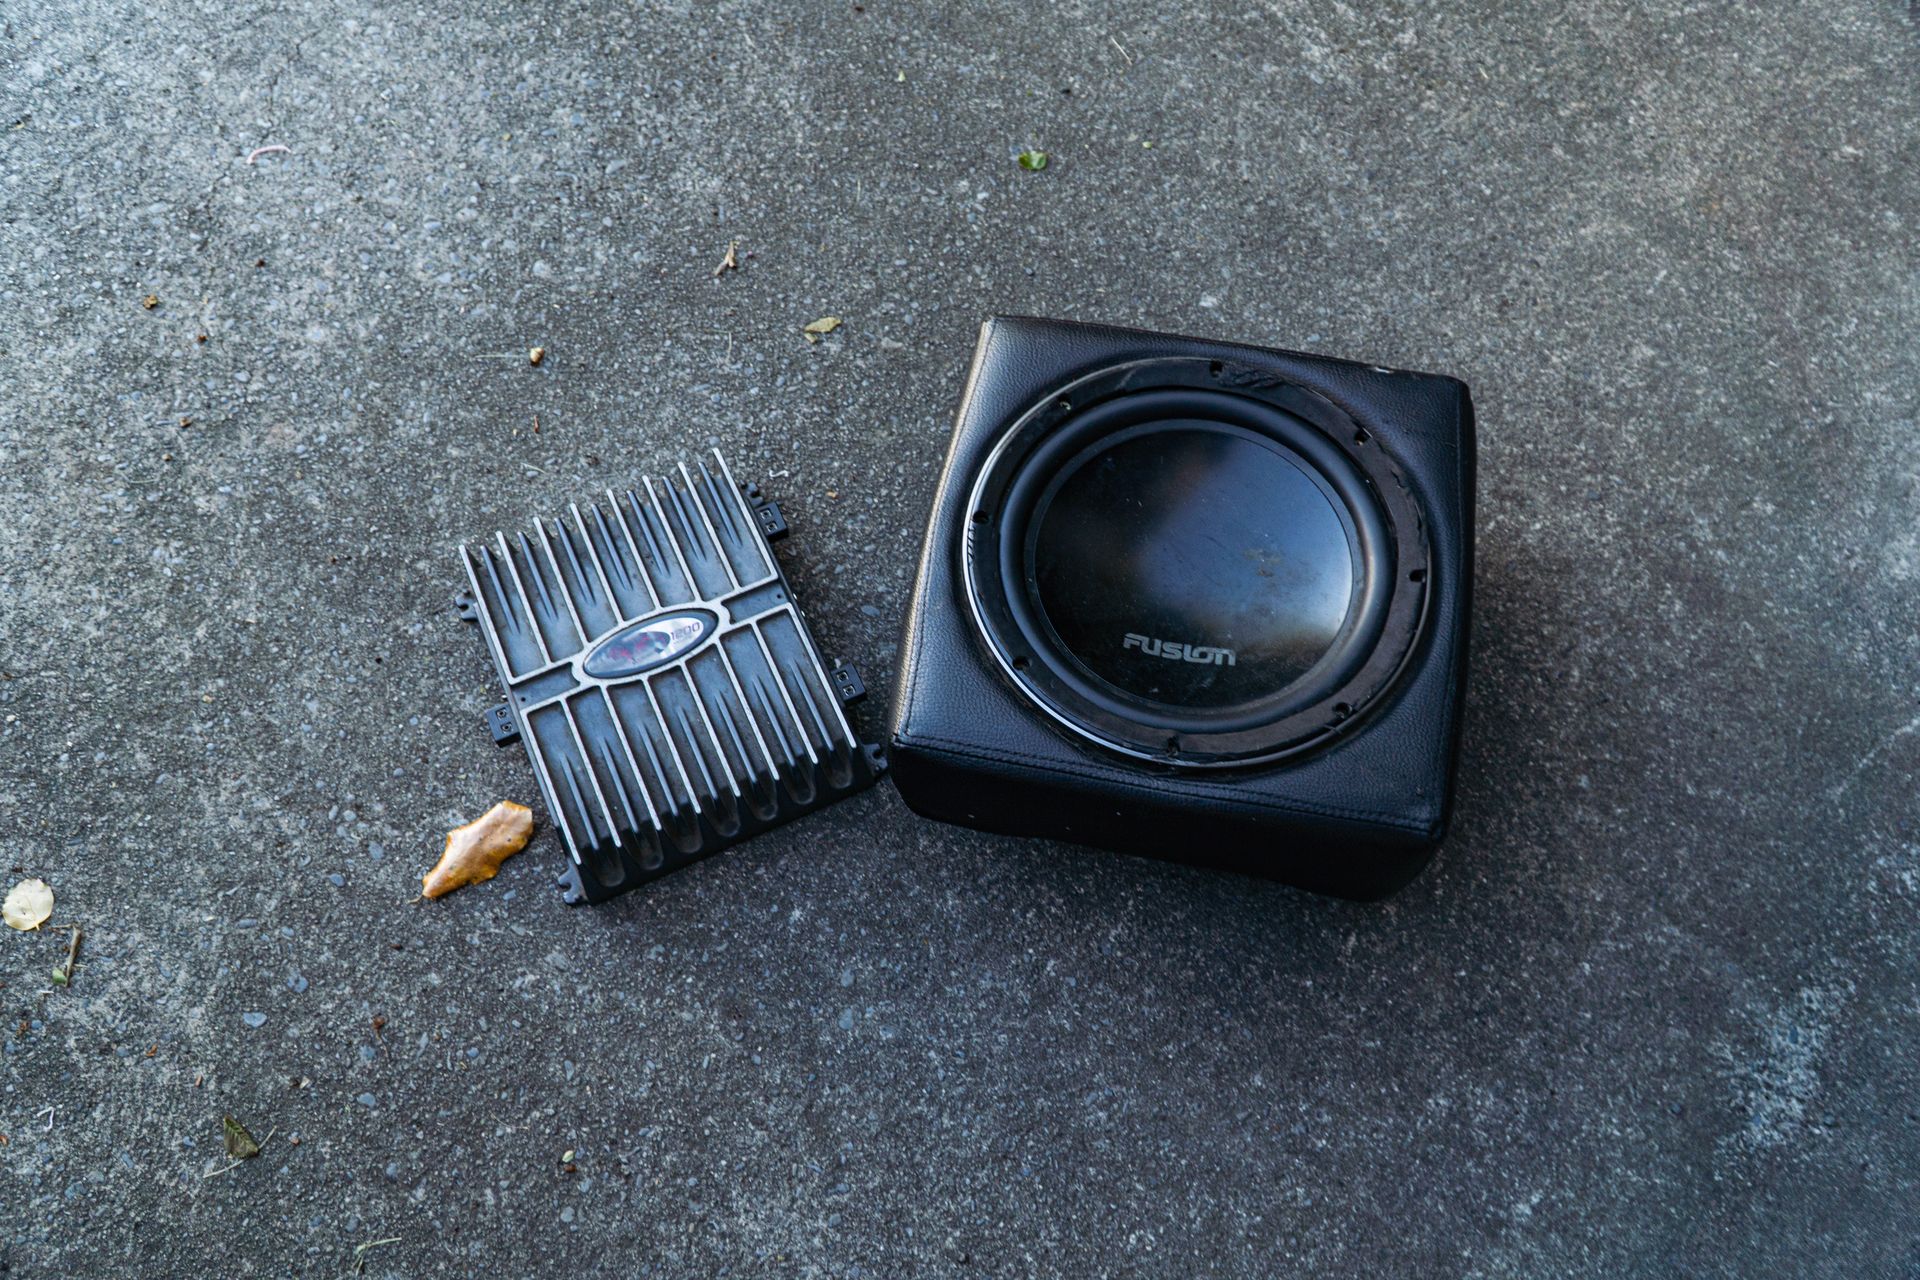
The subwoofer also came with a half-complete enclosure. The top and sides were padded, and had stitched black leather, presenting nicely. The underside of the enclosure however had been asymmetrically cut off.

The first step to installing the subwoofer was to make sure the enclosure was completed and sealed. To do this, I got some MDF, a banana socket speaker box terminals, some 12-gauge speaker wire, some wood screws, and some Sikaflex 123 sealant.
Using a jigsaw, I cut up pieces of MDF to suit. Then I trimmed up the existing enclosure, mounted the MDF pieces all down with the screws, mounted the terminal, and smothered all of the joints. It looked a bit rough around the edges, but can't be seen since the questionable looking side is at the bottom.

A quick lick of black paint, and a bit of Velcro strip over the Sikaflex got it looking a bit nicer.


Further, the angled piece on the side fits perfectly against the rear strut top hump.

After mounting it with some Velcro tape onto the carpet, I connected up the speaker wires from the subwoofer to the amplifier, and then connected up the RCA's, power cable, ground, and amp turn-on, and the install was done.

A quick clean got everything looking spic-and-span.


It bumps way harder than I could have imagined for such a small enclosure, absolutely transforming the sound system!
2. The Small Details
As the saying goes, the small details are what truly make the biggest difference. Firstly, the Supra was treated to a few trinkets that came off of the Crown.
Under the bonnet a Blitz Racing 1.3-bar radiator cap and a Project Mu reservoir sock.

And in the cabin, a cigarette lighter kill switch cap and an Oscar Distributors 300mm blue-tint convex rearview mirror.


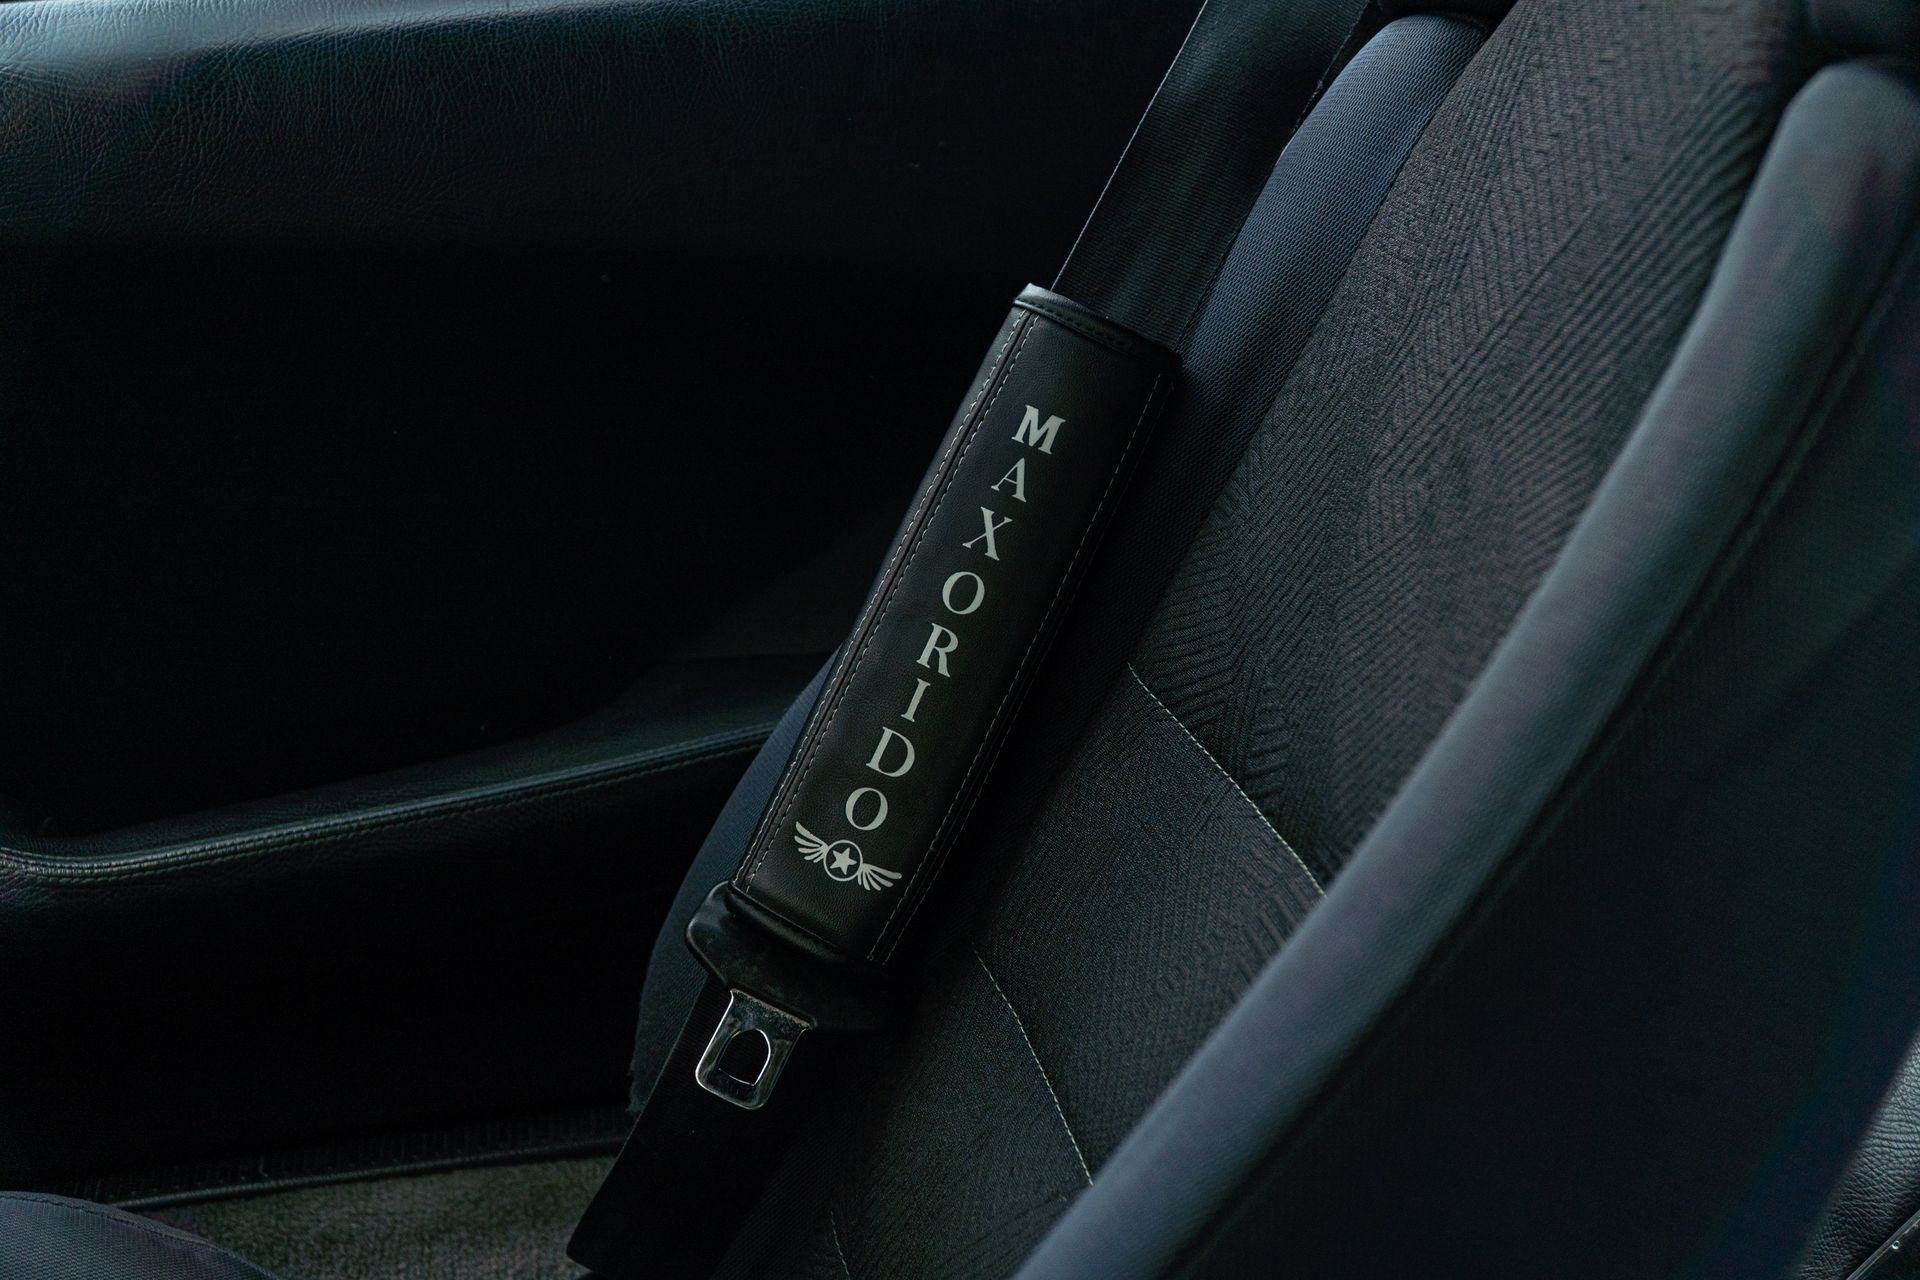
And of course, the Orido leather seat belt pads
Furthermore, seeing the hideous K&N pod filter, but not having a stock air-box to chuck in, I did the next best thing and installed an HKS mushroom filter.

The pod filter measures in at 100mm, and it and the 76-to-100mm cast-aluminum elbow both came out of a 2JZ-GTE Supra. The filter is the pre-update 1990's design, with the old-style screw head, and no ugly red stripe on the base.
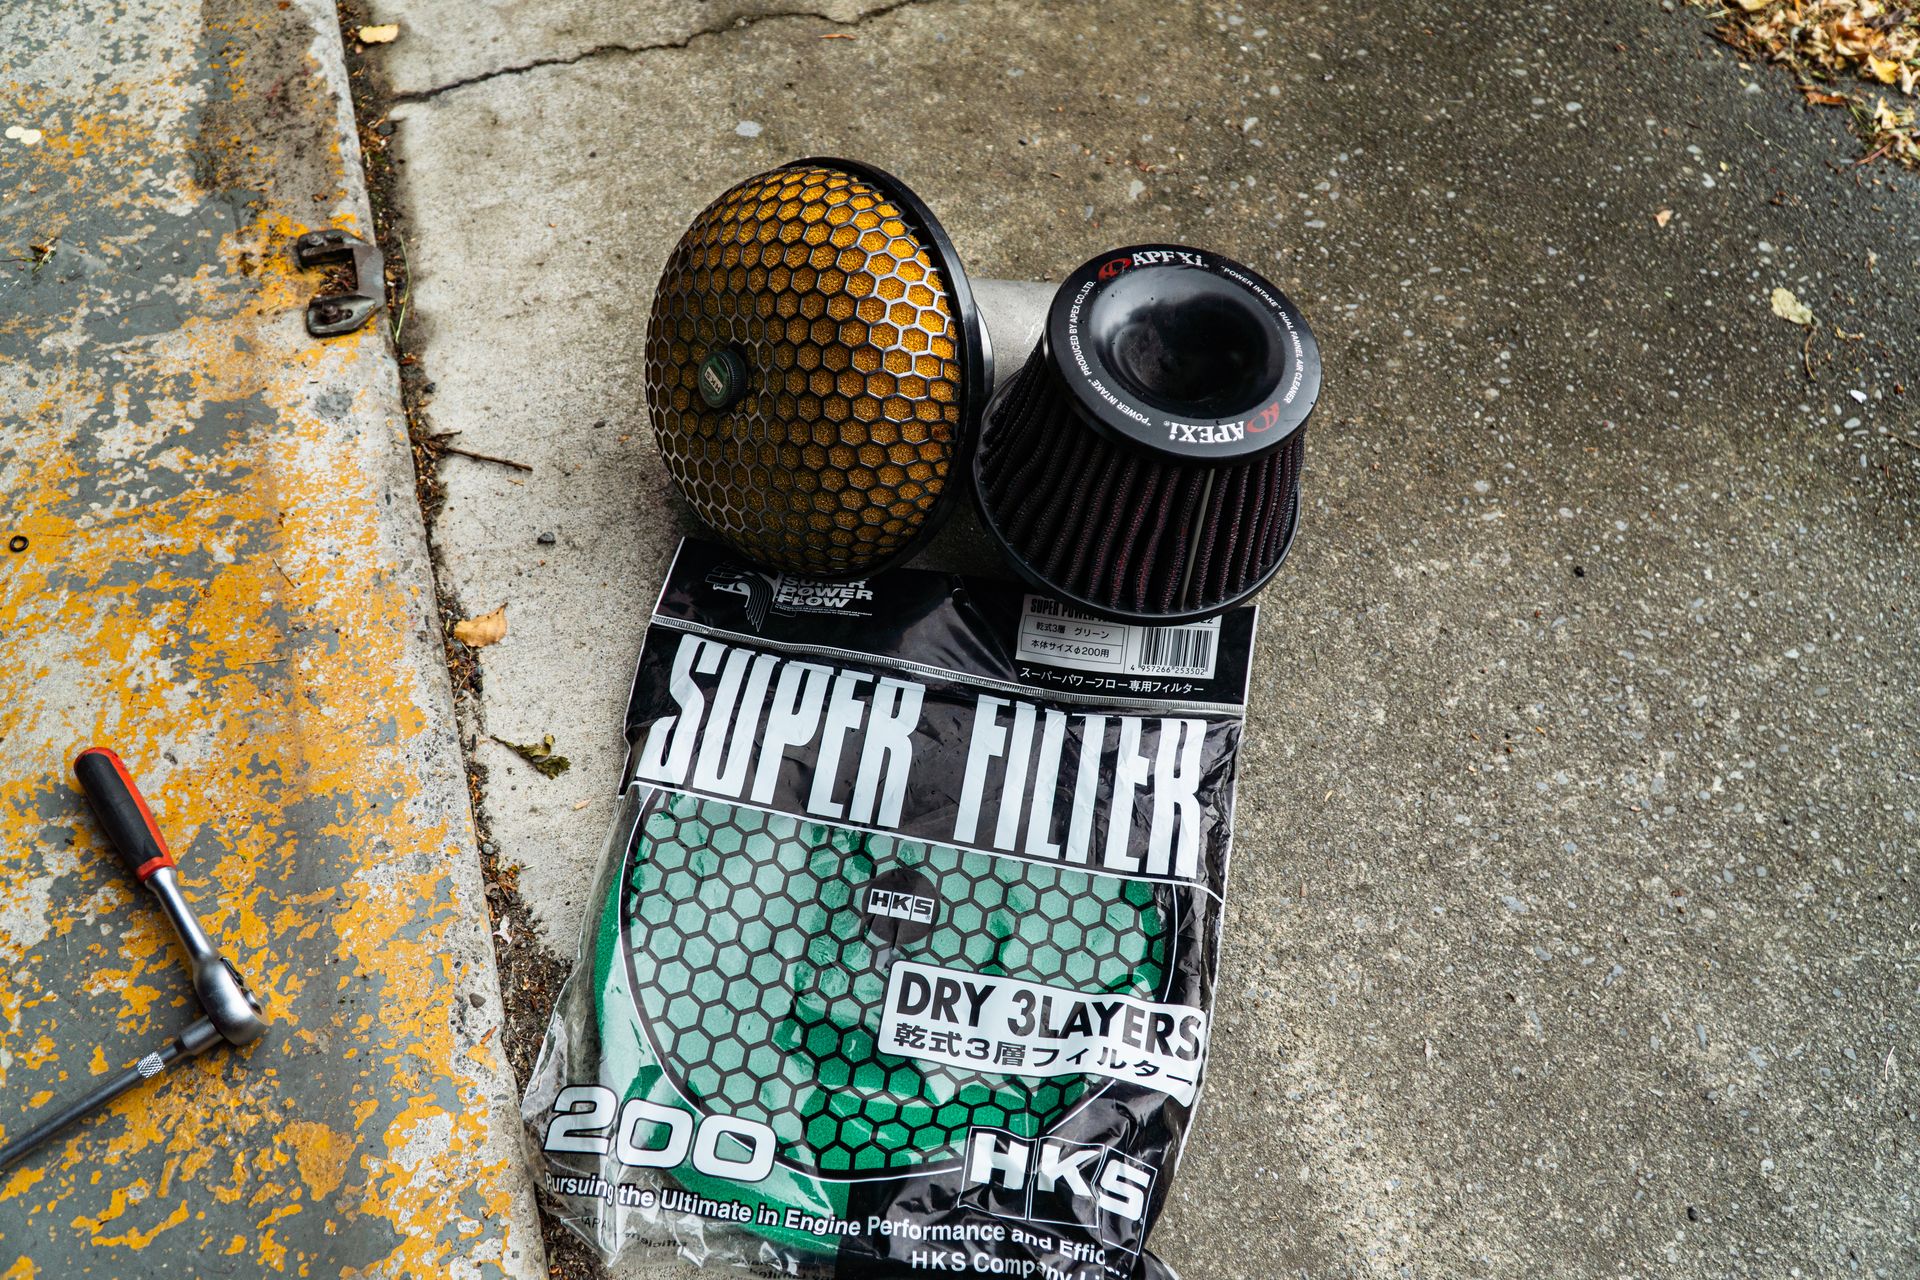
The filter had however deteriorated, so I pulled a brand new filter element I had ordered from HKS a couple years ago out of my stash.

Now the Supra is rocking an extra period-correct Japanese part! The HKS filter definitely sounds the part too!

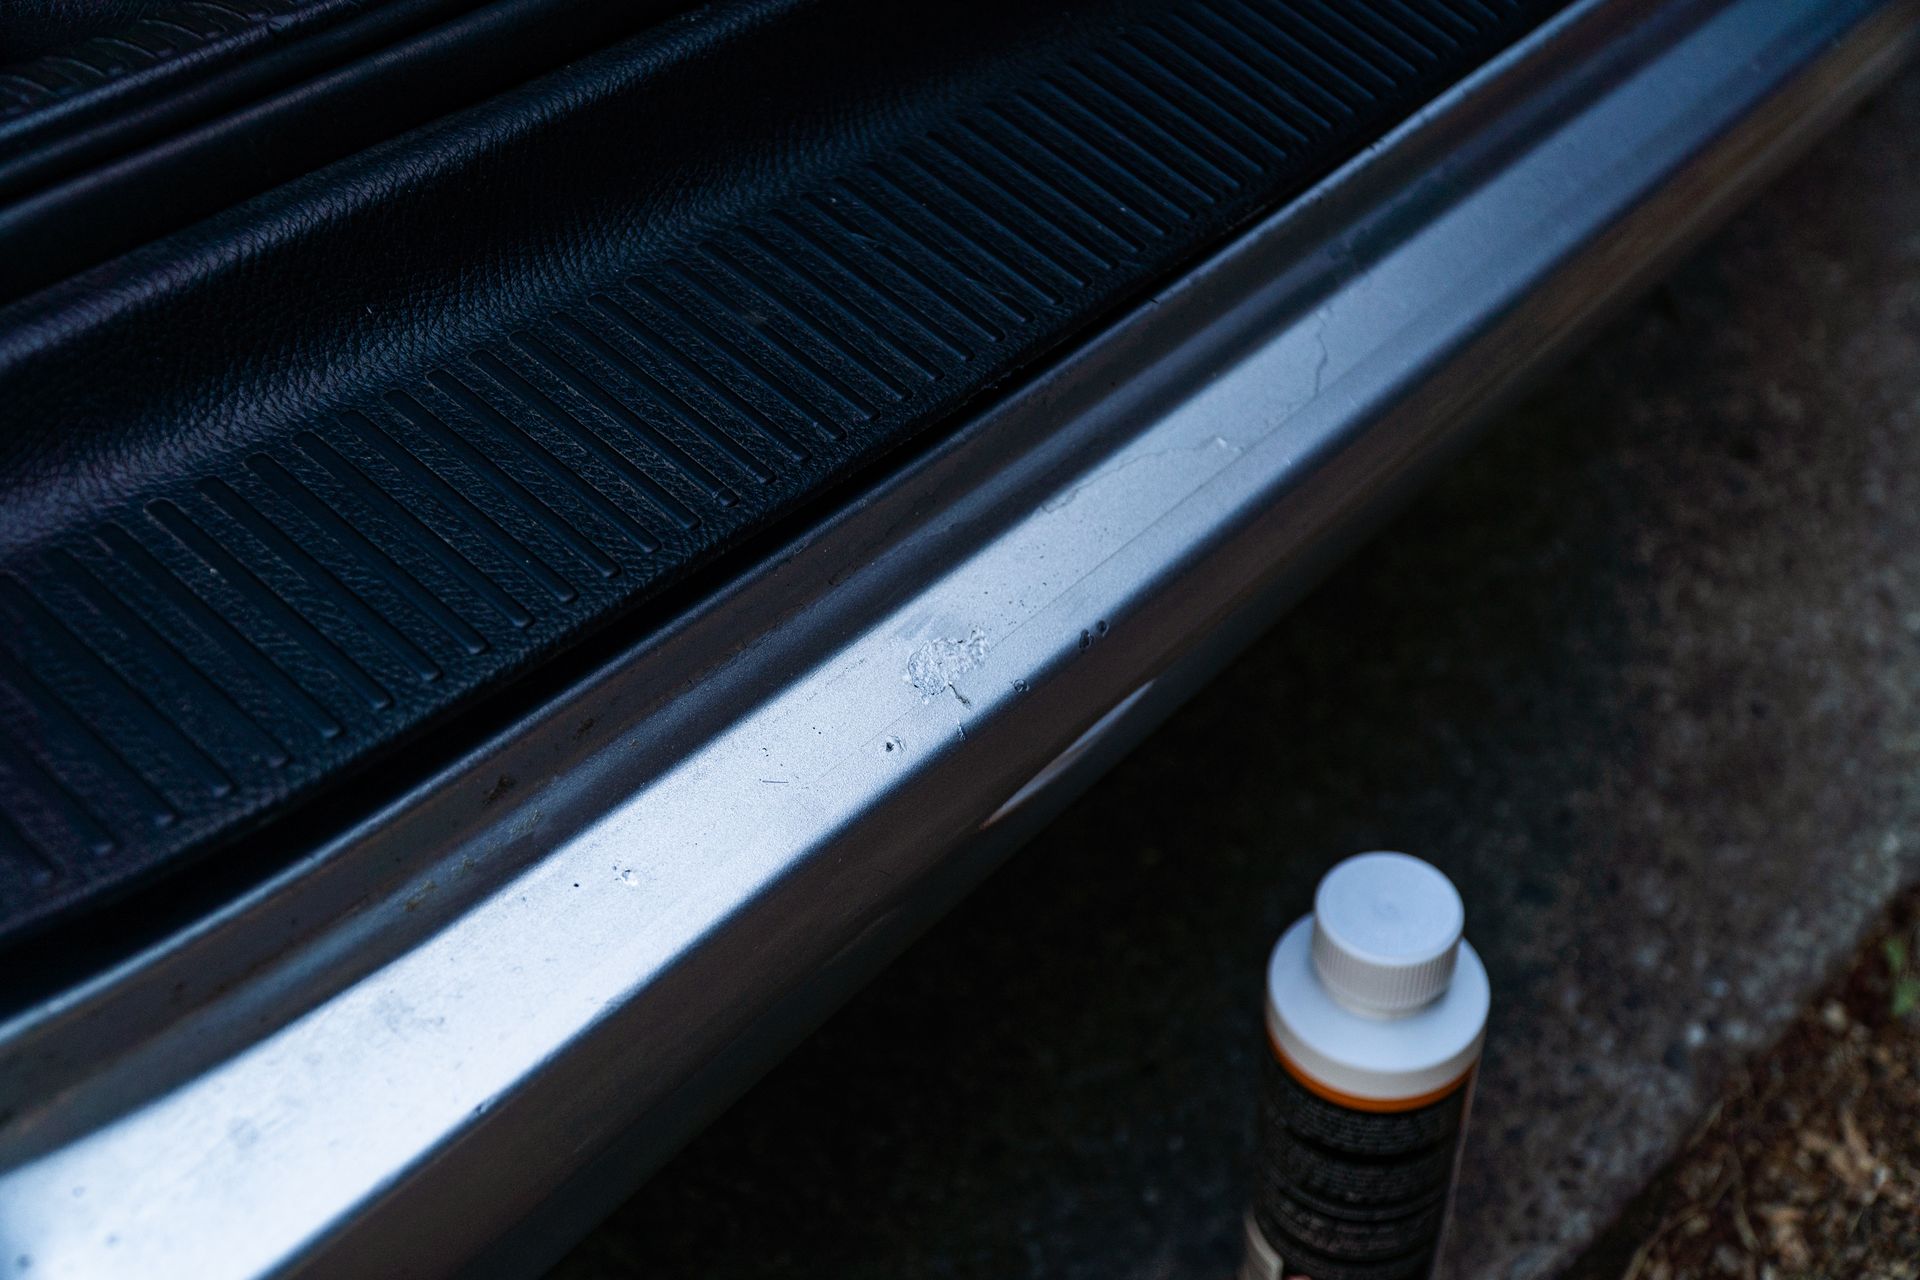
As for the exterior. Firstly, I went around the paint, and touched up any small rusty stone chips and paint chips with a drop of rust convertor, and then a silver paint pen. Cleaned up a few imperfections very nicely.

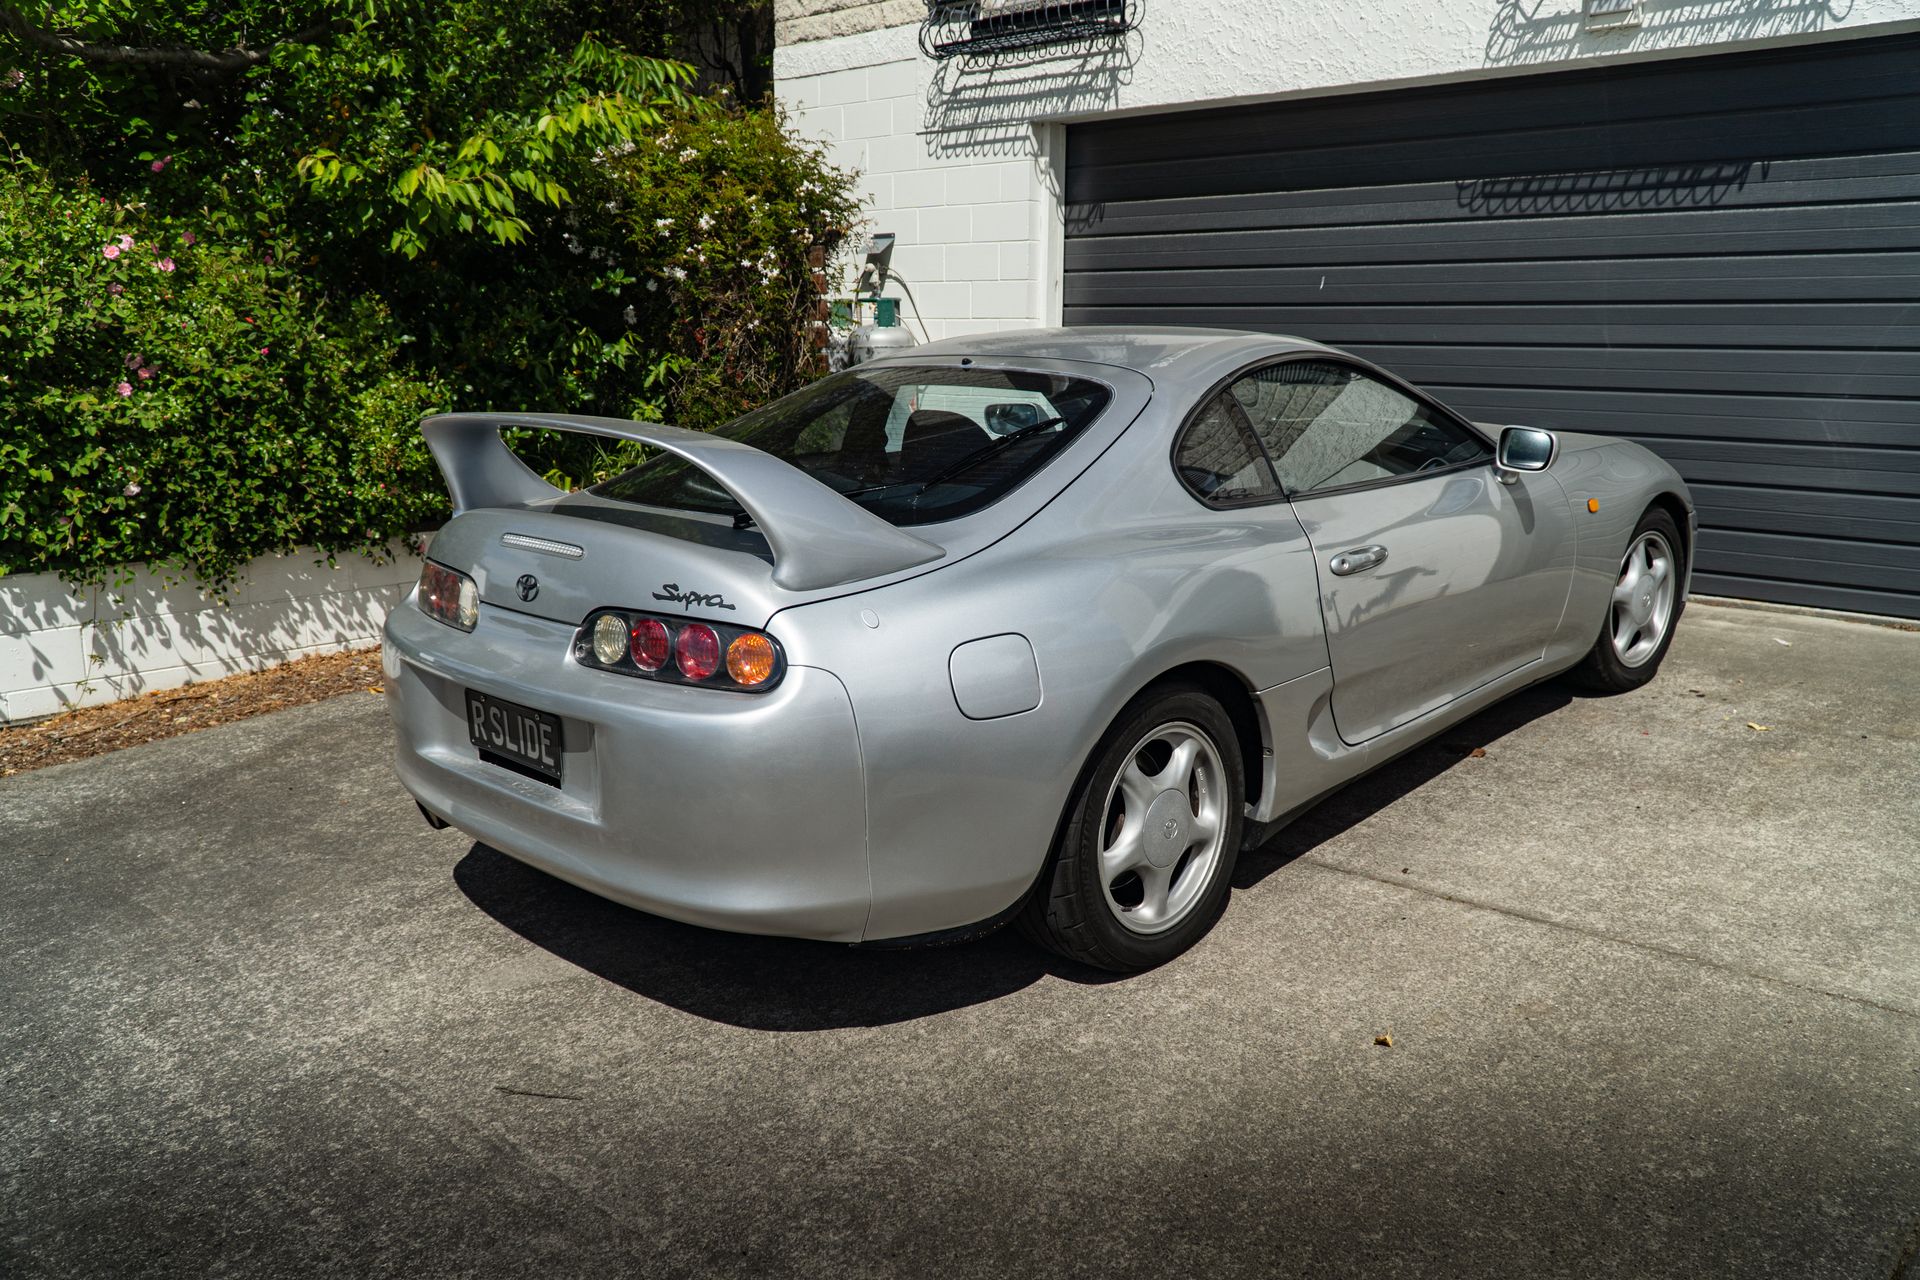
I also decided to chuck on the black and silver 'R SLIDE' personalised plates that I kept from the Crown.
I noticed the front license plate holder was missing, so purchased a spare off of my dad along with an OEM load cover.

Turns out the factory license plate bracket holes had been bogged over, so I had to line the bracket up and drill new holes.


And then, possibly the biggest, but cheapest change the Supra has seen... repainting the centre caps.
The faded grey factory wheel centre caps were something that bugged me every time I looked at the car. After a week or so, I had had enough.

Using some leftover paint from a mates project, I quickly cleaned the caps with alcohol, and chucked on a few coats of silver.
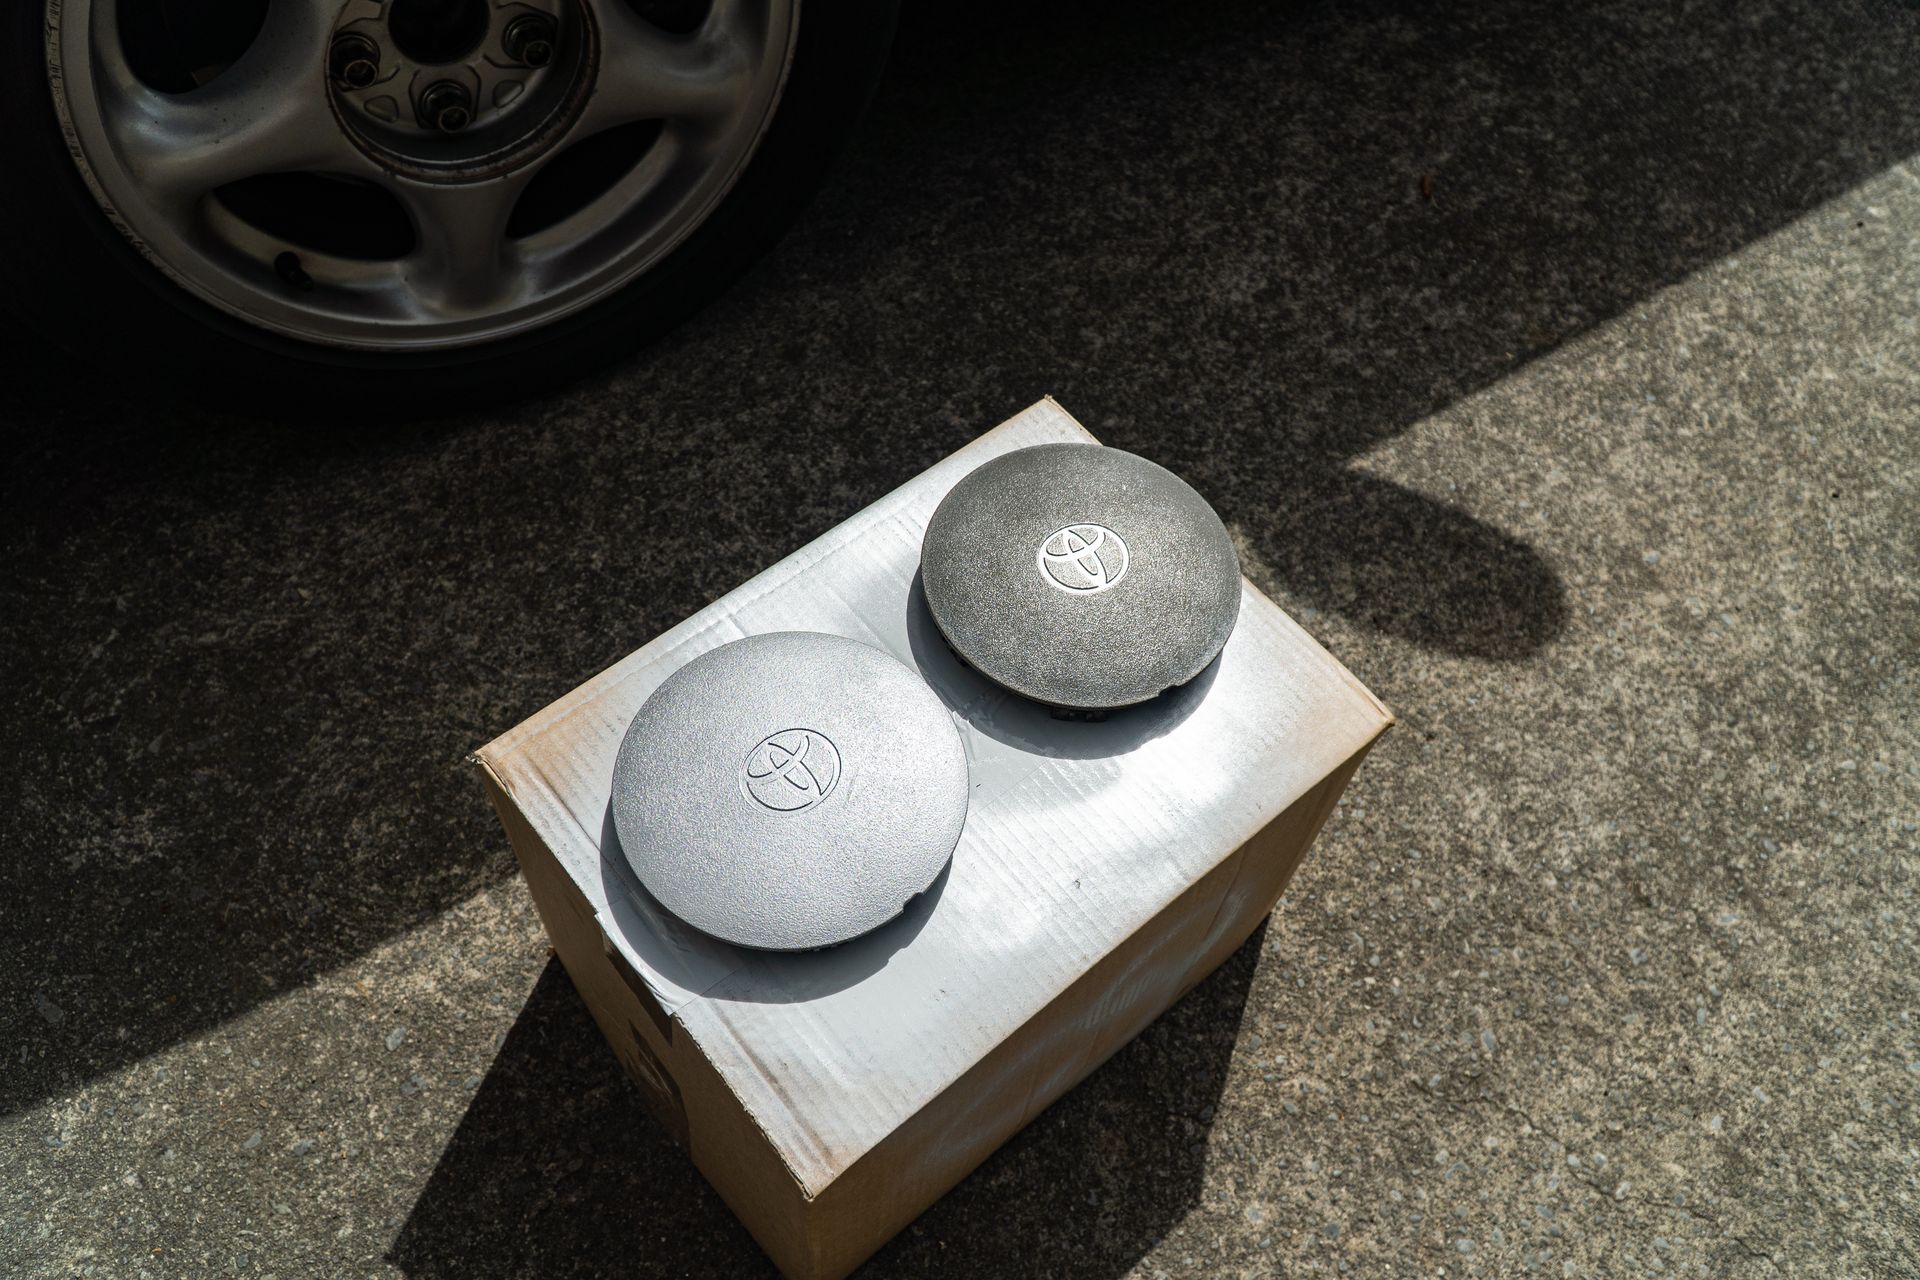
The end result, the car looks much better, and much cleaner. It is crazy how such a small piece can make such a small difference.

Here's a quick before and after.

The question is whether I keep these stockies, or go for some baller Japanese wheels. While some chromies would be awesome, there is no denying that the stock 5-spokes hold a lot of character, and it would be a waste not to use the near-new RE003's on them!
For now though, my small budget is dictating that the stock wheels stay. Although... some spacers all around might be a worthy addition.
3. An Unreliable Toyota
Okay, so the chapter title is a bit unfair. I have encountered one reliability issue with the Supra so far. The rear drivers indicator started blinking extremely dimly, to the point where it wasn't visible. After buying new bulbs, an inspection of the wiring harness showed a loose ground wire.

After soldering it direct to the bulb socket, the indicator now works flawlessly.

Otherwise, the first 2000km on the Supra has been completely issue free, and over the next few weeks, it will once again embark on a 4-day road trip through the Otago region.
Although, I'll save that trip for the next post.